
Now that you understand the Google Tag Manager interface, let’s implement Google Analytics pageview tracking, the out of the box tracking code of Google Analytics that allows you to get basic Google Analytics reports.
Login to Google Tag Manager account and open the container you want to work on. This will bring you to Default Workspace. In this interface, click on “Add a new tag” link.
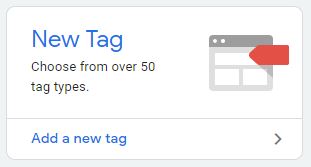
Figure: Add a new tag.
This will take you to the interface where you will add your tags.
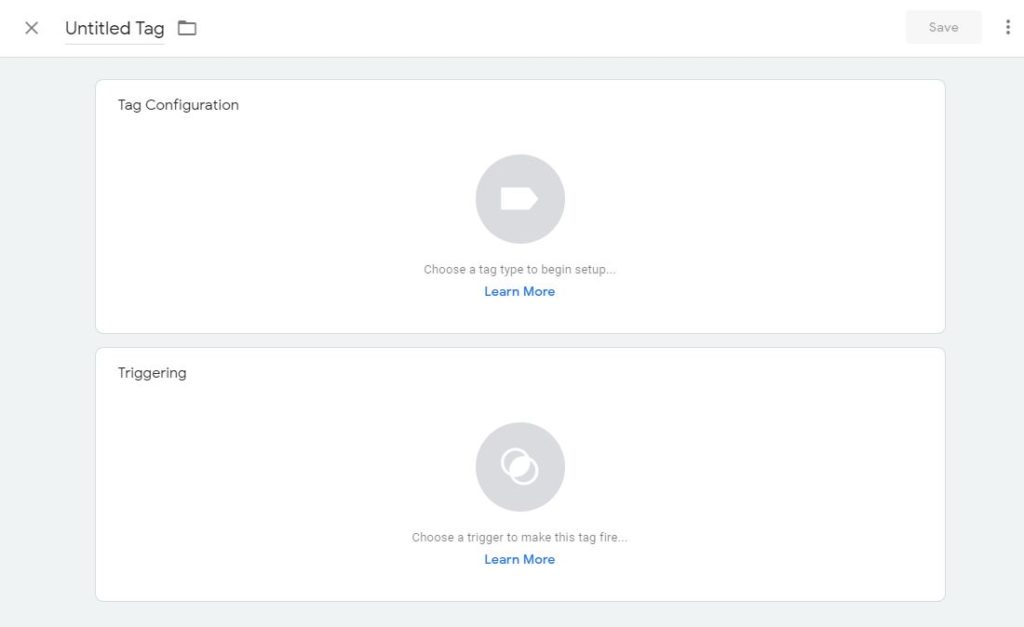
Figure: New tag interface
Here you have 4 settings that you can provide to configure a tag.
- Tag Name – a descriptive name for the tag that you are configuring.
- Folder – This is where you can store the tag. This value is required but will help you to organize your tags.
- Tag – Configure the tag to pass appropriate values.
- Trigger – the rule that determines when to fire the tag
In this scenario, I am setting the following values
Tag Name: Google Analytics Tag
Folder: GA Tag
Click on the folder Icon next to the tag name and that will give you an option to either put the tag in an existing folder or create a new folder. When you create a new folder then your tag will be automatically added to that folder.
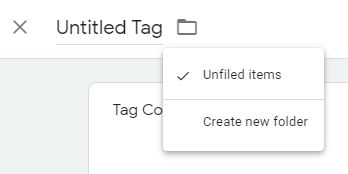
Figure: Select or create a folder
Now that you have given a name and stored the tag in a folder, it is time to configure that tag.
In order to configure that tag, hover over “Tag Configuration” section. When you hover over it, you will see that the section gets highlighted and a pencil icon shows up.
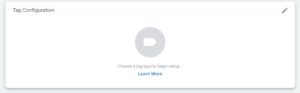
Figure: Tag Configuration
Click in the middle of the tag or on the pencil icon to open a screen where you pick the tag that you want to configure.
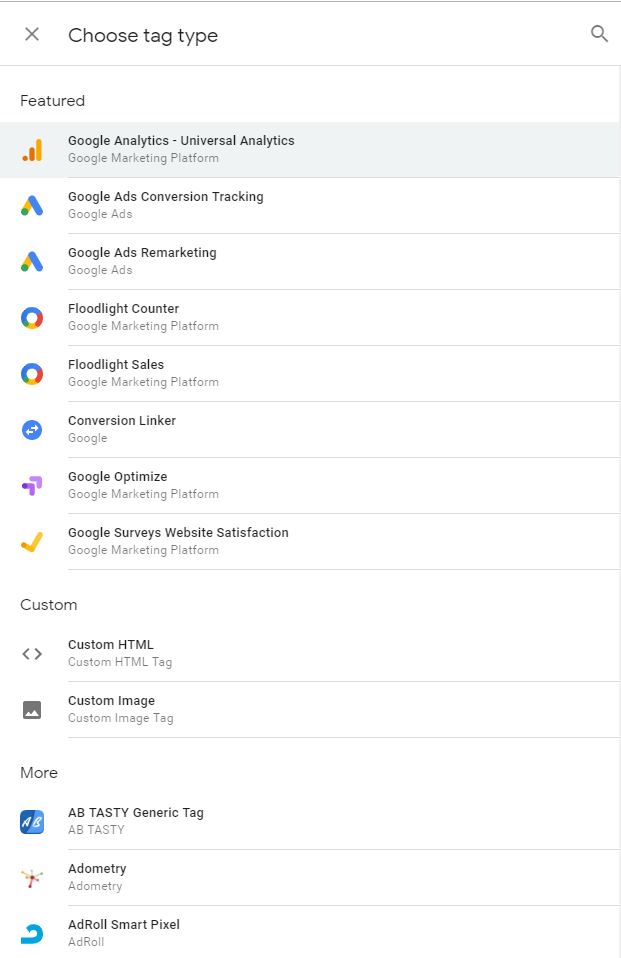
Figure: List of Tag Types in Google Tag Manager
Google Tag Manager has easy integration with several commonly used tags. What you see in the figure above is only a partial list of tags. We are going to use Google Analytics – Universal Analytics tag. Click on it and now you can see that Google Analytics Tag is ready to be configured.
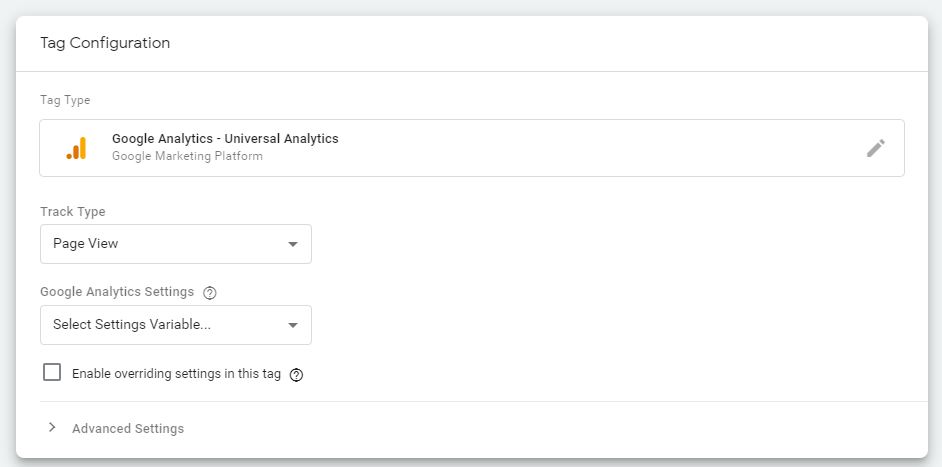
Figure: Google Analytics Tag
There are few other options you must select before the tag can be finalized. The other options that you need to set depend on the type of tag. In case of Google Analytics, first thing we must pick the “Track Type”, this tells Google Analytics, which type of data to send.
Clicking on the Track Type field will give you a drop down with all the available options. We will cover them as needed in other chapters. For now, we just want to track basic stats so leave it at Page View.
Note: If you are not familiar with Google Analytics then I suggest becoming familiar with Google Analytics as most of the examples are going to be using Google Analytics.
The next option is to select your Google Analytics tracking ID. This is the property id that you want to send the tracking data to.
If you are using a new Google Tag Manager setup then you will need to setup a variable that will hold this value. Once you set the variable, you can use it for any future configuration. Click on the field and select “New variable..”. This will open a screen where you can set this variable.
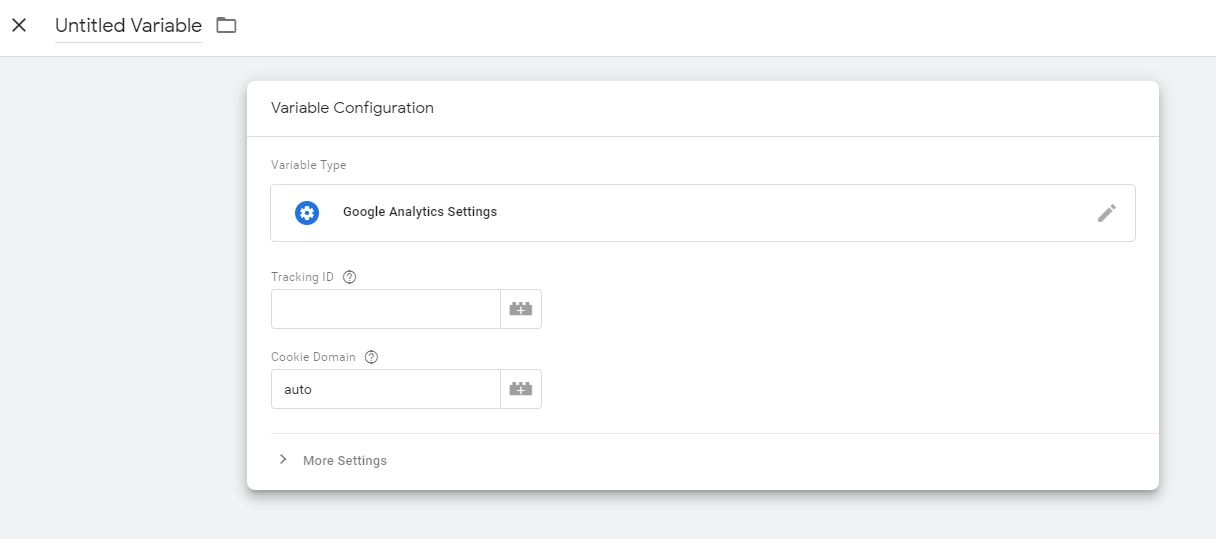
Figure: Google Analytics variable setup
Give your variable a name and assign it to a folder if you would like. Next, you need the Tracking ID from your Google Analytics account.
In order to get this id, go to the Admin section of Google Analytics and click on Tracking Info --> Tracking Code, in the Property section.
![]()
Figure: Tracking Info --> Tracking Code
![]()
Figure: Google Analytics Tracking ID
This is the screen where you will get the tracking ID.
Copy this tracking ID and then add it to Tracking ID field the tag configuration.
Finally, select the cookie domain. You will generally leave it at Auto. Since we are only doing basic Google Analytics implementation at this point leave it as “auto”.
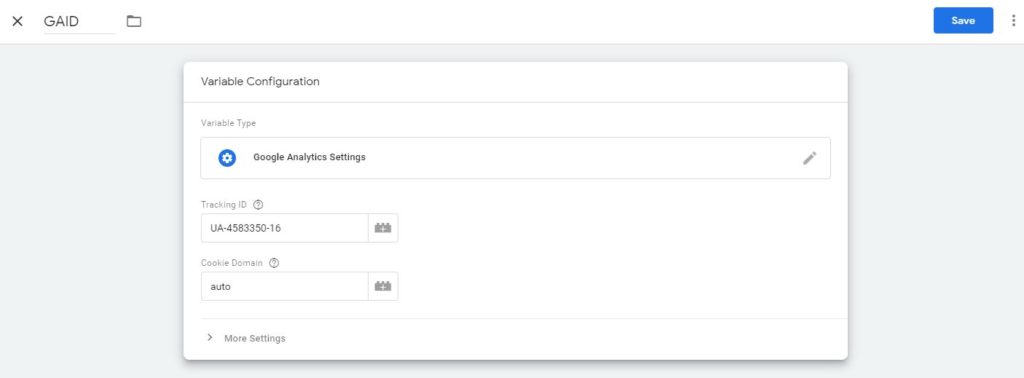
Figure: GA Variable Configuration
We are not going to set anything under “More settings” at this point. Those are advanced configuration settings so leave them as it and click on the “Save” button.
Now the variable is configured and is ready to be used.
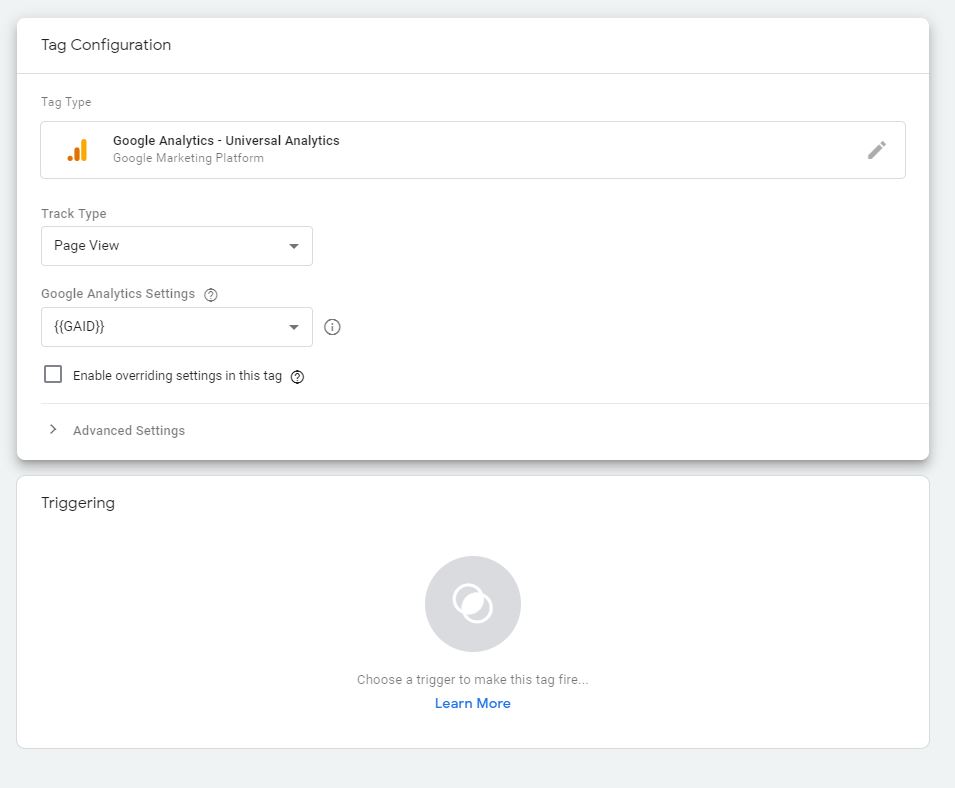
Figure: Google Analytics Pageview Tag Configuration.
Now you have set the values required for the Google Analytics page view tag. At this point you have an option to either add a trigger or save the tag and add a trigger later. Trigger is what will determine when this tag is fired.
To configure the trigger, go to area marked as “Triggering” and click in the middle (or the pencil icon that appears when you hover over the “Triggering area). This will open a screen where you can pick any pre-configured triggers or create a new one.
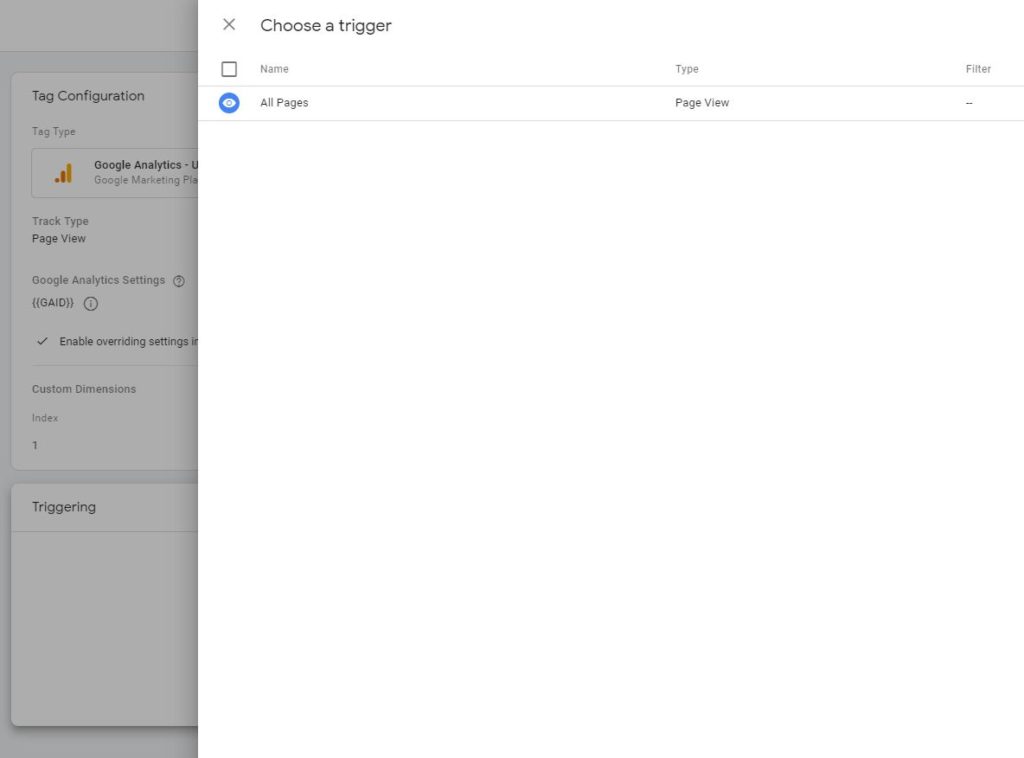
Figure: Select a trigger.
The only trigger that’s available by default is “All Pages”, by selecting this trigger you are setting up to fire the specified tag (GA Pageview in this case) to be fired on all the pageviews. That’s exactly you want, you want to track every single page view, so select this trigger.
Now click save and your tag and trigger are ready. At this time your tag is still not published to your live site. You will have to take few more steps before that tag is live.
Before you publish the tag to the live site, you can use the preview option of Google Tag Manager to see how the tag will work.
We will look at the preview option in the next chapter.
Previous Chapter: Google Tag Manager Workspace Overview – Free Tutorial
Enroll in our Google Tag Manages courses
- Google Tag Manager (GTM) Online Training Course - From Zero to Hero
- Google Tag Manager Advanced Applications
Want to Learn Web & Digital Analytics? Enroll in a Web & Digital Analytics Course
Related Services