
When the users are done adding products to their shopping cart, they will usually start the checkout process. The checkout process can contain multiple steps. Once we track all the checkout process steps, we can visualize it using the funnel exploration in GA4. This article will help set up the first checkout process step. To track the first step of the checkout process, we have to use an event called "begin_checkout." Begin checkout event can take up to four parameters - like other eCommerce events.
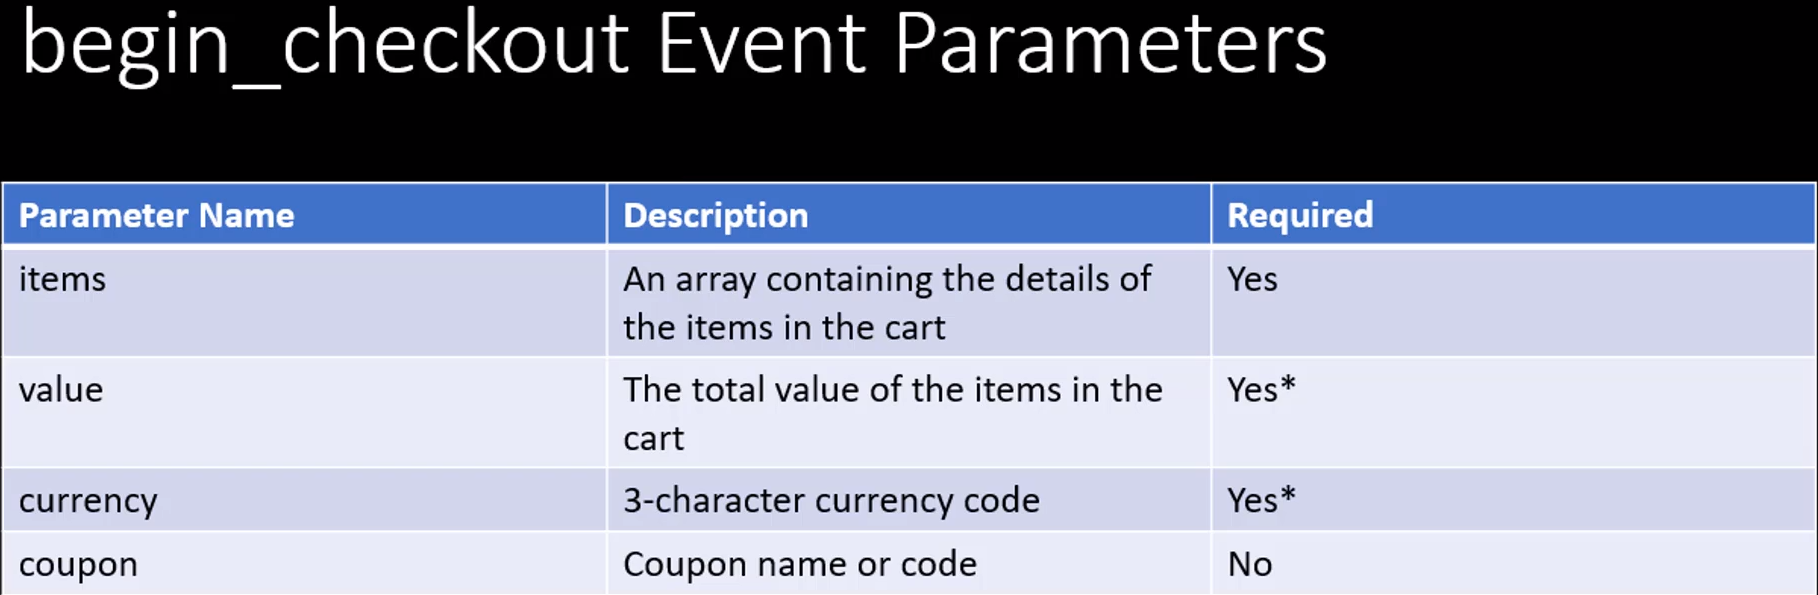
Begin_checkout event also only requires item parameters. Value and currency are optional, but providing these two parameters will provide more meaningful reporting. Begin_checkout also can take a fourth parameter called the coupon. This is an optional parameter. If a customer uses a coupon while shopping in the store, then we can use this field to track the name or the code of that coupon. Below is a gtag code to implement the event directly to the web pages.
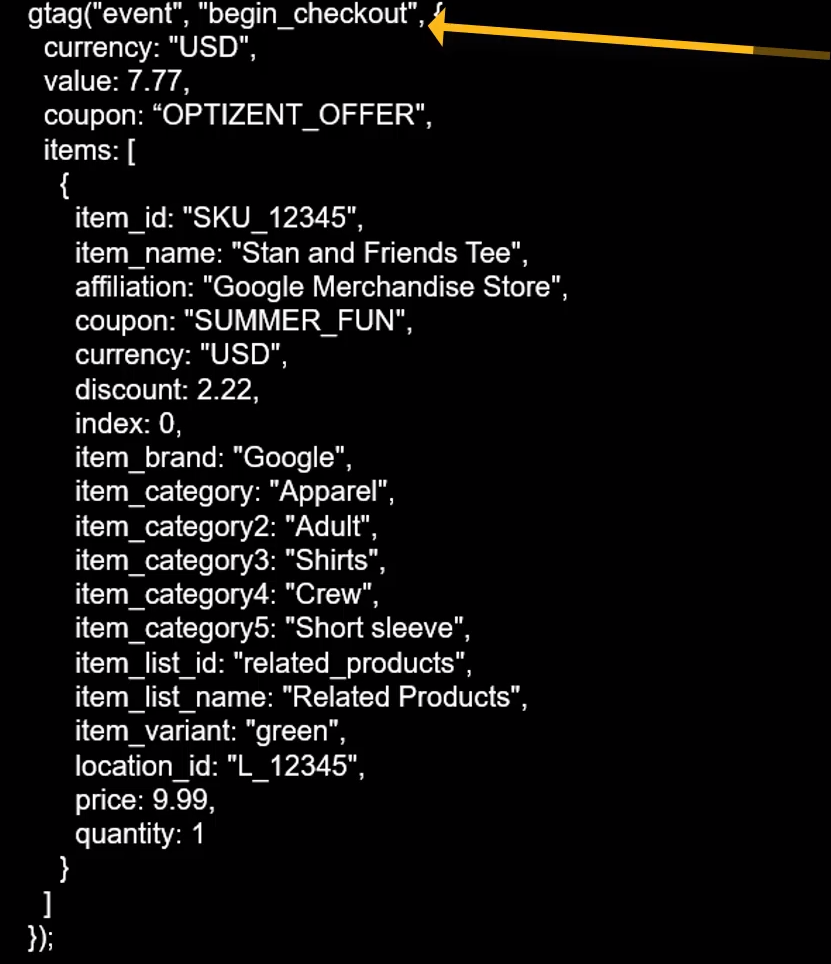
The code has the event name, begin_checkout, followed by all the parameters, currency, value, coupon, and the items array. Now go to Google Tag Manager, and put the site in the preview mode to see the data layer and the custom event name. After seeing that, we will create the required tag and the trigger.
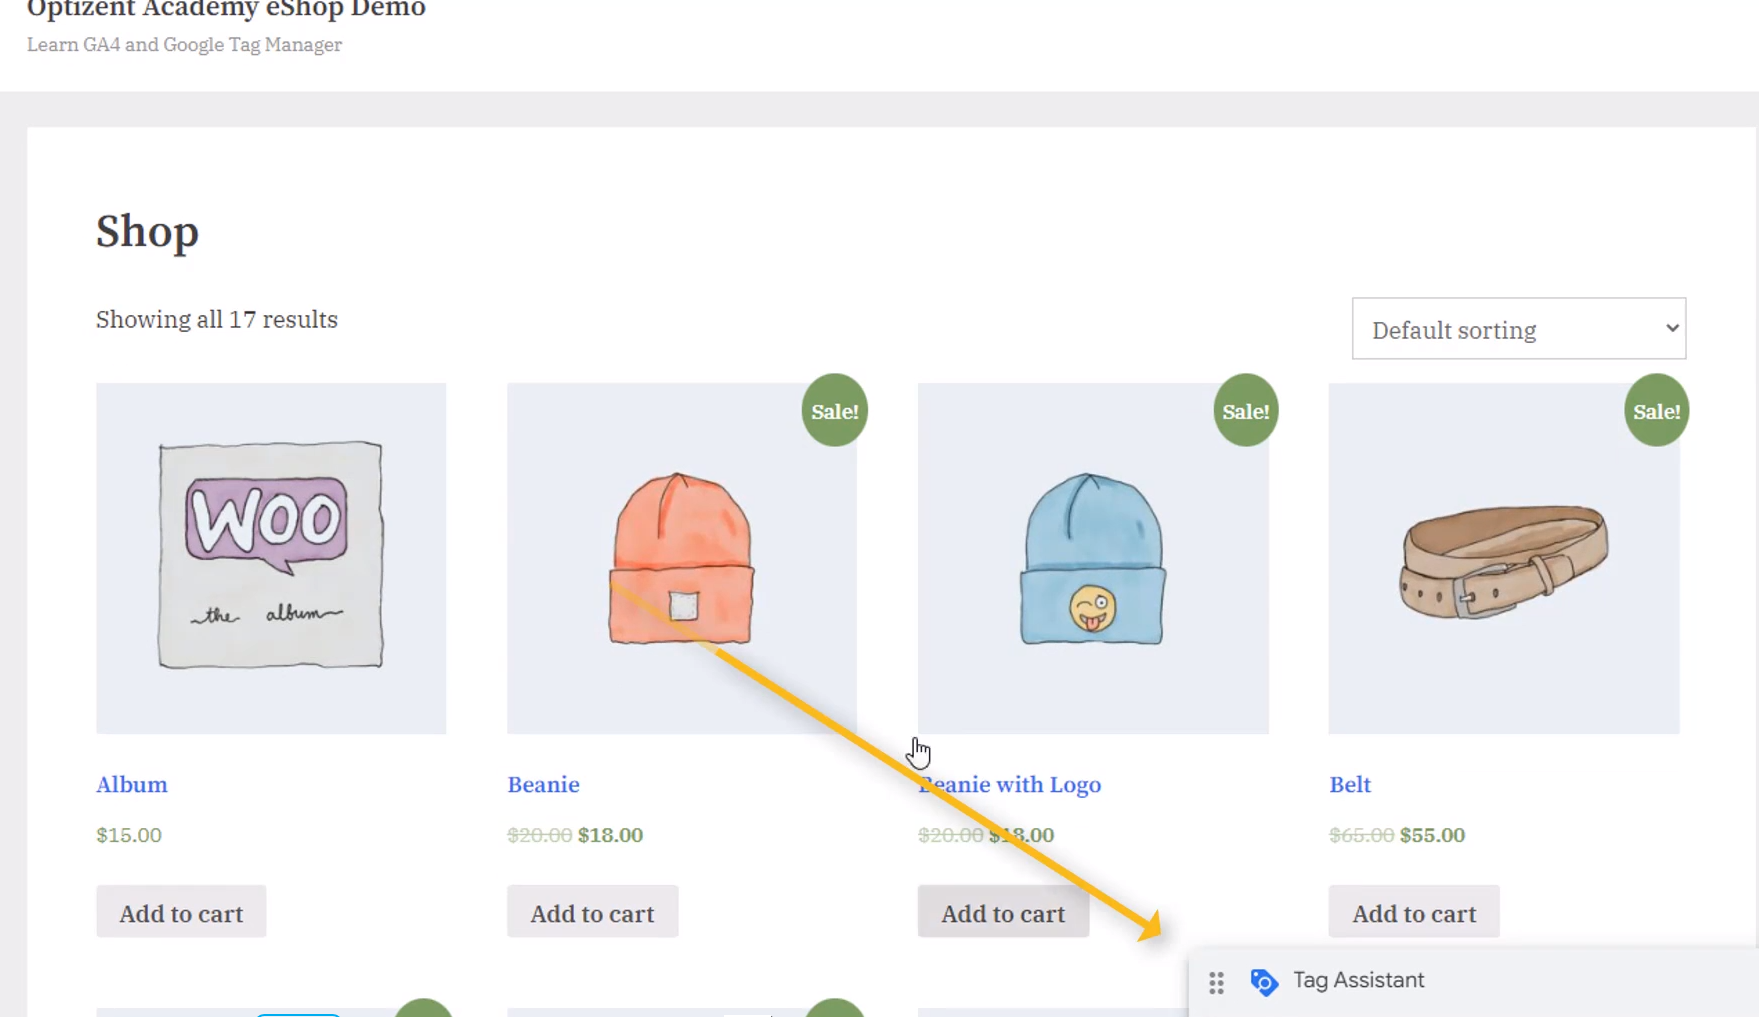
In the Google Tag Manager account of the Ecommerce demo shop. Go to the preview mode. Click on connect. The demo shop is loaded. Tag Assistant is connected, and then click on Continue. Now go back and add two items to the cart. Click on view cart. At this point, click on "proceed to checkout." This click's action will be tracked as the begin_checkout event.
So after clicking this button go back to Tag Assistant and see the data layer and custom event that gets generated. This should have created a data layer and a custom event. Check the Tag Assistant and see what custom event was created and is begin_checkout. Clicking on that will show the data layer that got created.
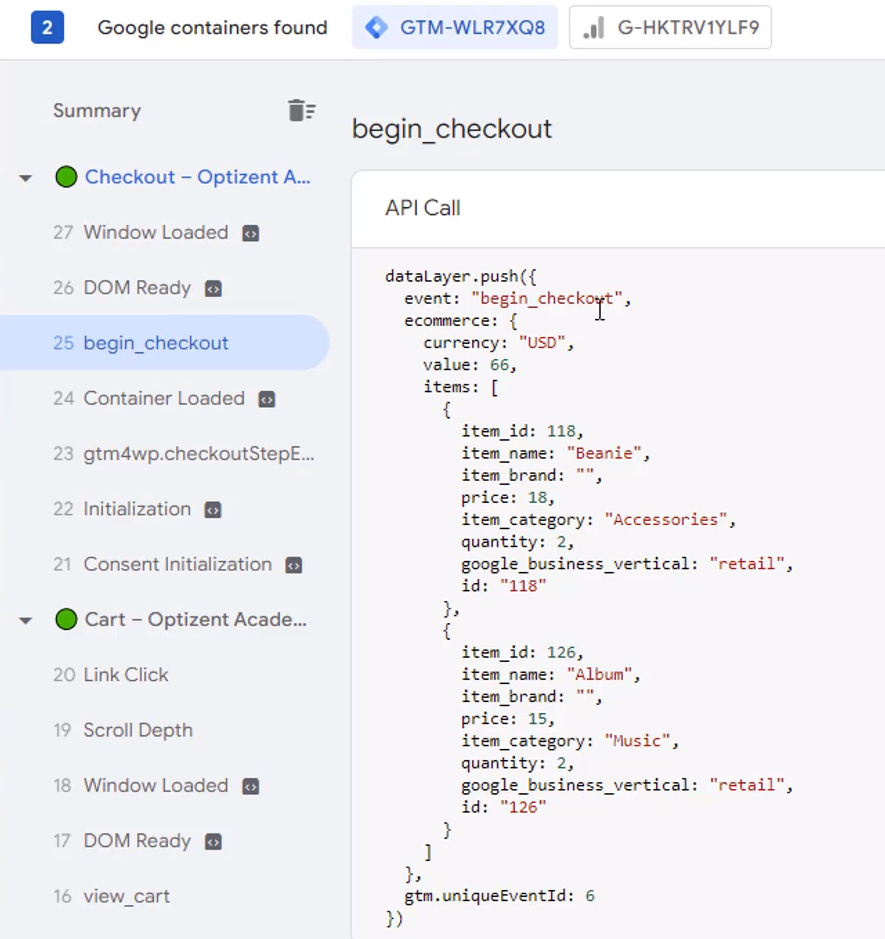
It's exactly like what we have used in the past. It has the custom event name begin_checkout, eCommerce object with currency, value, and items. We will use the custom event name to trigger the GA4 event tracking. Go back to Tag Manager and set this up. Click on Tags, click on new. The process is the same in all the eCommerce events. Then click Google Analytics 4 event, pick your base configuration tag and enter the name of the event that you want to track, and it's "begin_checkout" this is the name that GA4 expects.
Click on event parameters and add three rows. Currency value and items. The values will be pulled from those variables that we have already created. Let's call the tag name as "eCommerce Begin Checkout," and save it. To add a trigger - click on the plus to add a new trigger. Let's call it "CE Begin Checkout." Click in the middle, and let's pick a custom event from the list.
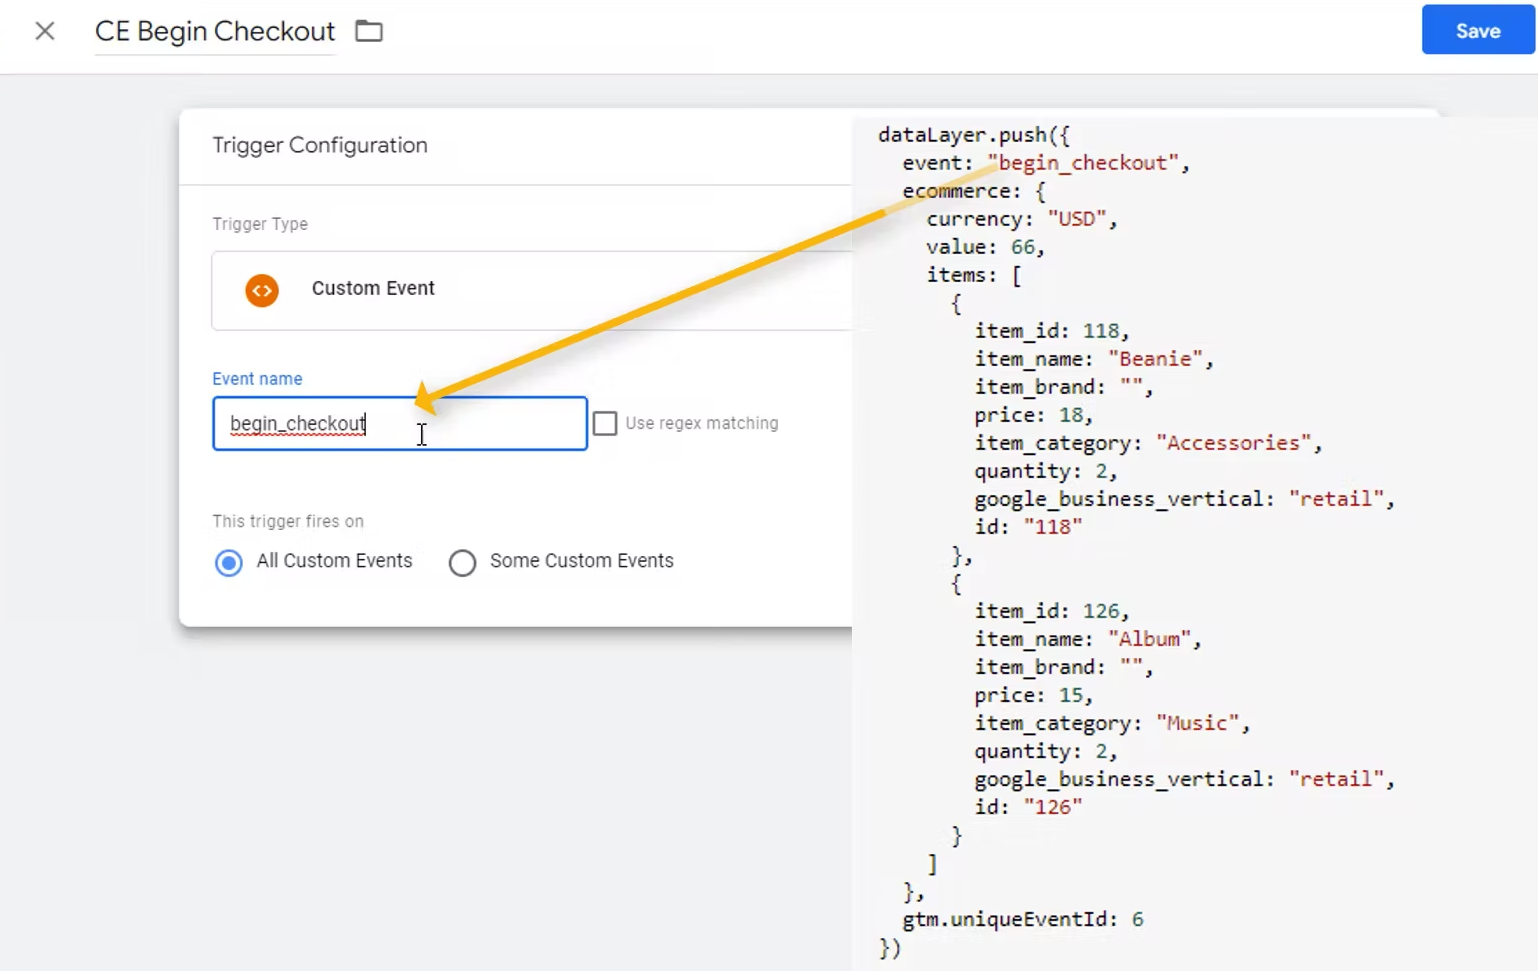
The name of the custom event is "begin_checkout." This is the name of the custom event in the data layer. Save it. Our tag is now ready. Submit and publish it. Once this tag starts to collect the data, we will be able to see it in GA4.
Google Analytics 4 help and support
We are here to help you with all your Google Analytics needs. Our team can get you up and running in no time and also train you and your team to save you a lot of time so that you can focus on driving the business outcomes rather than configuring Google Analytics 4.
Online Course - If you want to learn on your own then check out Google Analytics 4 Masterclass
Workshop - We conduct the onsite customized workshop. Reach out to us for more details.
Consulting - Reach out to us for more details.