
Google Ads Conversion Tracking measures user actions after ad interactions—such as purchases, sign‑ups, or leads—and is critical for campaign optimization and ROI measurement.
Traditional client‑side tracking is increasingly impacted by browser privacy features, ad blockers, and cookie restrictions, which can reduce attribution accuracy. Server‑side conversion tracking using Google Tag Manager (GTM) Server Container moves data processing to a secure, first‑party environment, improving reliability, privacy compliance, and resilience.
This guide walks you through setting up the Conversion Linker and Google Ads conversion tags server‑side.
Configure Conversion Actions in Google Ads
- In your Google Ads account, go to:
Tools & Settings → Measurement → Conversions - Click New conversion action.
- Select the conversion type (e.g., Purchase, Lead, Sign‑up).
- Name your conversion action, choose a category, and configure:
- Conversion value
- Count method
- Attribution and other settings
- Click Save.
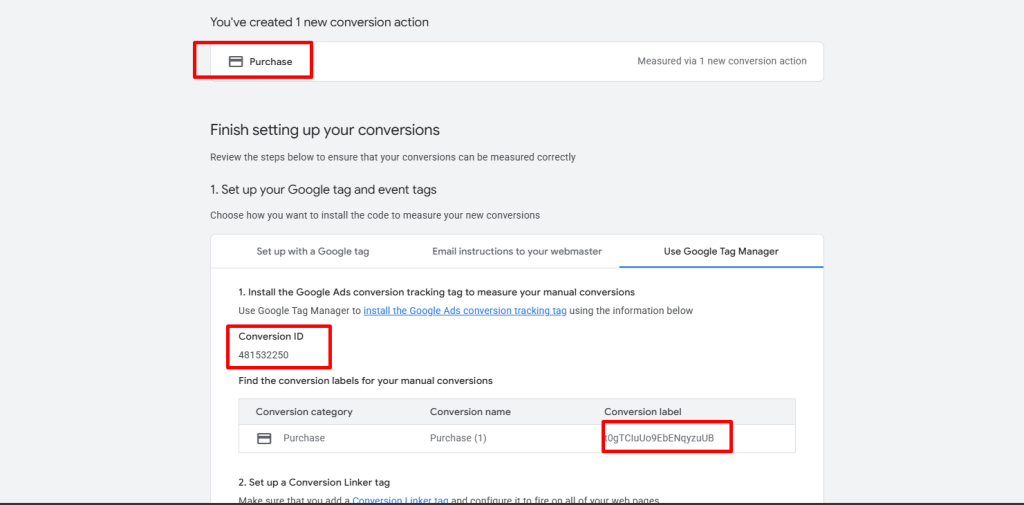
Retrieve Your Conversion ID and Label
- After creating the conversion action, click Set up the tag.
- Choose Use Google Tag Manager.
- Copy the Conversion ID and Conversion Label.
- You’ll use these values when configuring tags in GTM.
Set Up the Conversion Linker (Server‑Side)
- Open your GTM Server Container.
- Go to Tags → New.
- Under Tag Configuration, select Conversion Linker.
- Set the trigger to All Pages.
- Save and Publish the tag.
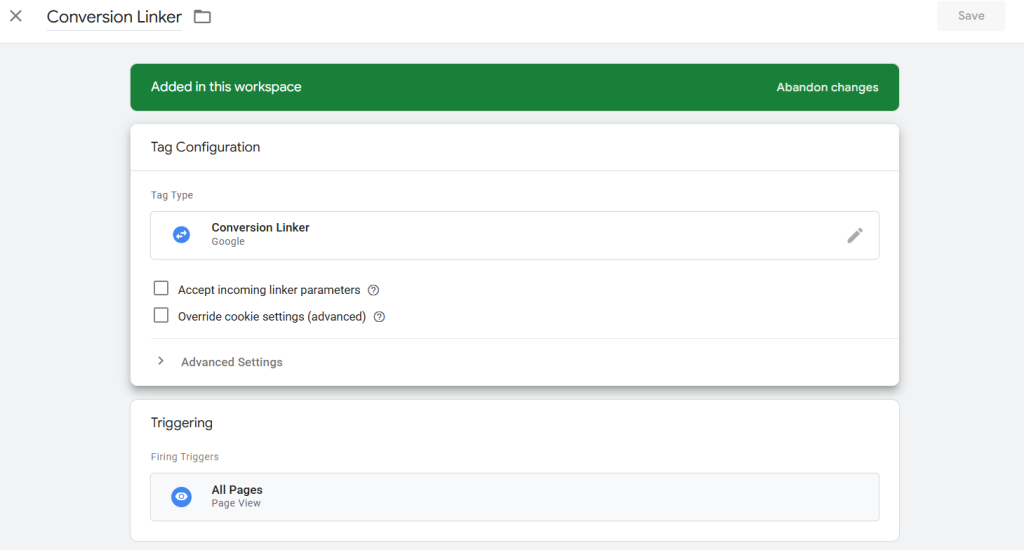
The Conversion Linker stores the Google Click ID (GCLID) in a first‑party cookie, enabling accurate attribution even as third‑party cookies are restricted.
Create the Google Ads Conversion Tracking Tag
- In your GTM Server Container, go to Tags → New.
- Select Tag Configuration → Google Ads → Track Conversions.
- Enter your Conversion ID and Conversion Label.
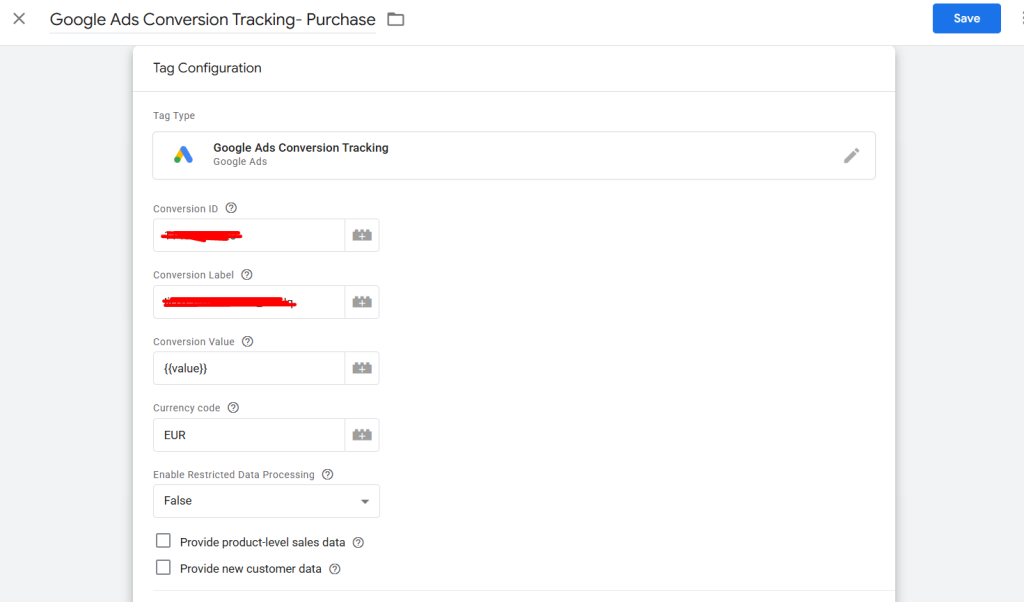
Configure Conversion Value and Currency
- Use a dynamic variable (from your data layer) for transaction‑level values, or
- Set a static value if the conversion has a fixed worth
- If a value is set, Currency Code is required
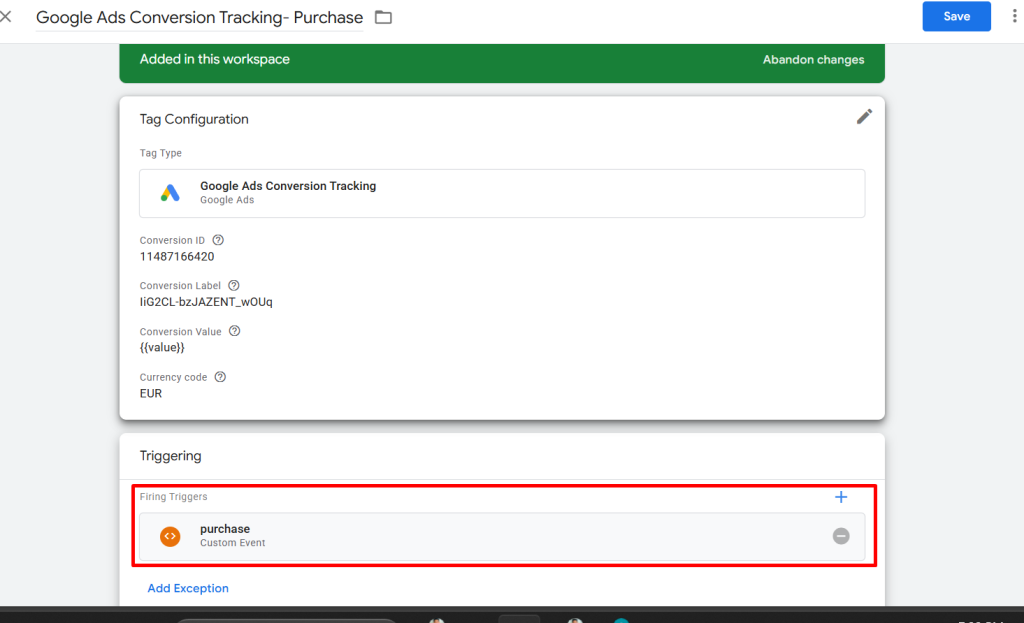
Set Up the Trigger for Your Conversion Tag
- Click Triggering → + to create a new trigger.
- Choose Custom Event.
- Enter the event name (e.g., purchase, signup, or your custom event).
- Configure the trigger to fire on the appropriate event from your data layer or event stream.
- Save the trigger and assign it to your conversion tag.
Test and Publish
- Use GTM Preview mode and a test environment to trigger conversions.
- Verify that requests are sent correctly from the server container.
- In Google Ads, monitor the conversion action status.
- Status may show No recent conversions or Active within 24–48 hours.
- Once validated, Publish your GTM server container.
Best Practices
- Run client‑side and server‑side conversion tags in parallel during initial rollout
- Google Ads automatically deduplicates conversions, preventing double‑counting
- Once server‑side tracking is validated, set it as primary and remove or demote client‑side tags
Summary
Server‑side Google Ads conversion tracking improves attribution accuracy, strengthens privacy compliance, and ensures more reliable performance measurement in a cookieless, privacy‑first web.