
For product teams who manage their tracking via Google Tag Manager (GTM), the process of setting the Amplitude User ID is a matter of sequencing three key components: a Variable, a dedicated Tag, and a precise Trigger.
Here is a step-by-step guide on how to configure GTM to pass the correct User ID to Amplitude.
Prerequisite: Installing the Amplitude Browser SDK
Before you start, ensure the Amplitude SDK is integrated into your GTM container:
- Open your GTM container (assuming your GTM code is already connected to your site).
- Navigate to the Template Gallery and search for the Amplitude Browser SDK or the relevant Amplitude tag template.
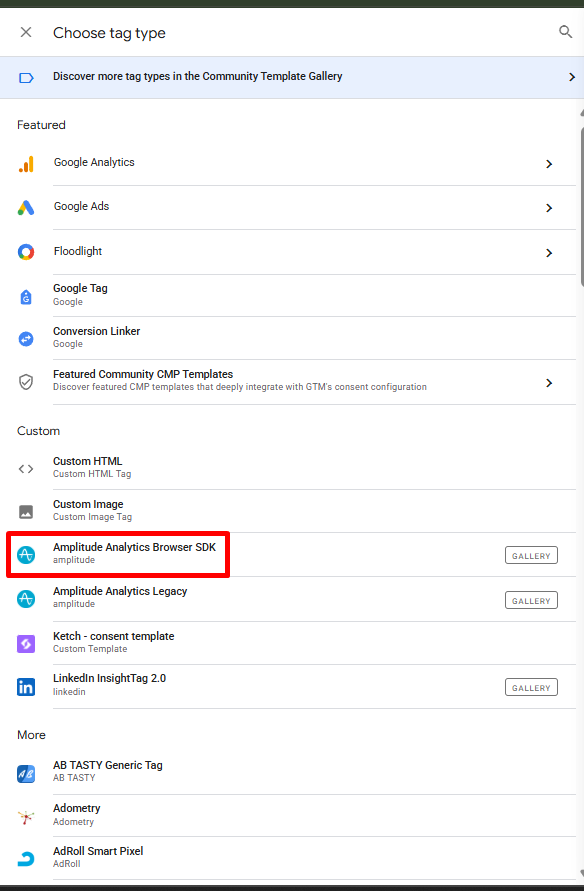
- Add the template to your workspace
Step-by-Step GTM Configuration
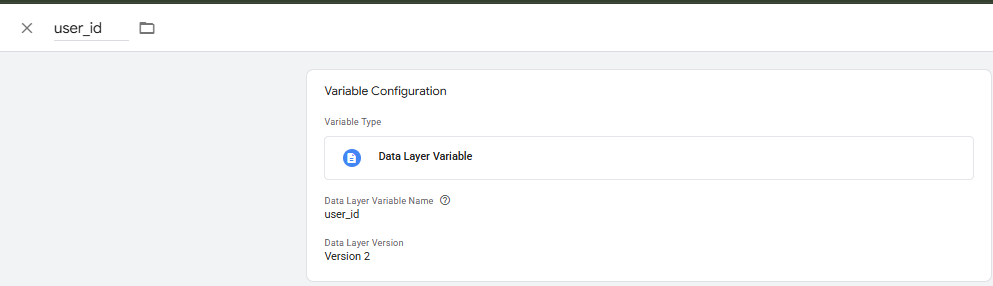
Step 1: Create the User ID Variable
The User ID needs to be pushed from your product’s backend to the browser’s Data Layer upon a login or account creation event.(Mainly when its available). GTM then needs a variable to access this value.
- In GTM, go to Variables and create a New >User-Defined Variable.
- Select the Data Layer Variable type.
- Enter the name of the Data Layer key that contains the User ID (e.g., user_id). This variable will dynamically return the user’s unique ID when it’s available.
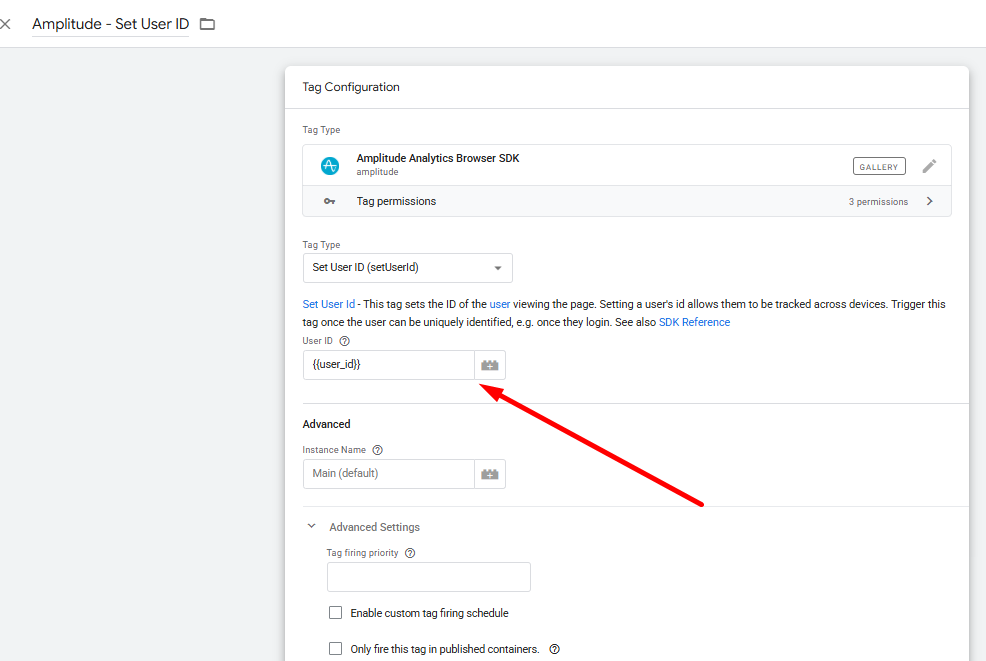
Step 2: Create the “Set User ID” Tag
You need a specific tag dedicated to telling Amplitude who the user is, separate from any event tracking tags.
- Go to Tags and create a New Tag.
- Select the Amplitude tag template you installed.
- Select the Tag Type as Set User ID.
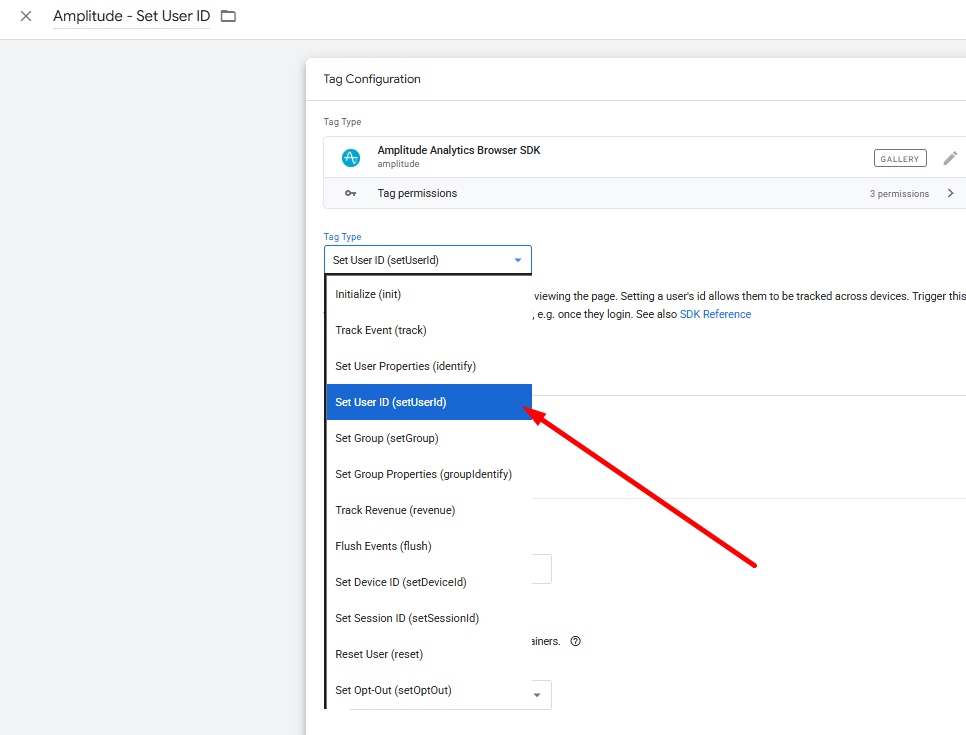
- In the User ID field, put the user id variable that we created earlier.
Step 3: Define the Trigger
The trigger controls when the tag fires. It’s important that this tag only fires when a valid, non-null User ID is available.
- Go to Triggers and create a New Trigger.
- The best practice is to use a Custom Event that is pushed to the Data Layer precisely when the user has logged in or created an account (e.g., when the event account_created or user_logged_in is pushed).

- Assign this trigger to the Set User ID tag created in Step 2.

Now save the tag and publish!
Need help with Ampltitude? Email us at support@optizent.com or fill out the contact us form.