
This guide explains how to implement AdRoll conversion tracking through a server-side Google Tag Manager (sGTM) container. Using a server-based setup allows you to send events directly from your server environment to AdRoll, improving data reliability and giving you greater control over how tracking data is handled.
What the Server-Side AdRoll Tag Does
The AdRoll server-side tag enables direct integration between Google Tag Manager and AdRoll’s event ingestion endpoint. It allows you to send both standard and custom events from your server container, along with server-level, device, and custom parameters.
This approach reduces dependency on browser execution and provides a more controlled data pipeline compared to purely client-side tracking.
Why Use AdRoll with Server-Side GTM
Running AdRoll tracking through a server GTM container provides several advantages:
- More consistent and accurate conversion data
- Reduced exposure to ad blockers and browser restrictions
- Greater control over data governance and privacy compliance
Step-by-Step: Setting Up AdRoll via Server GTM
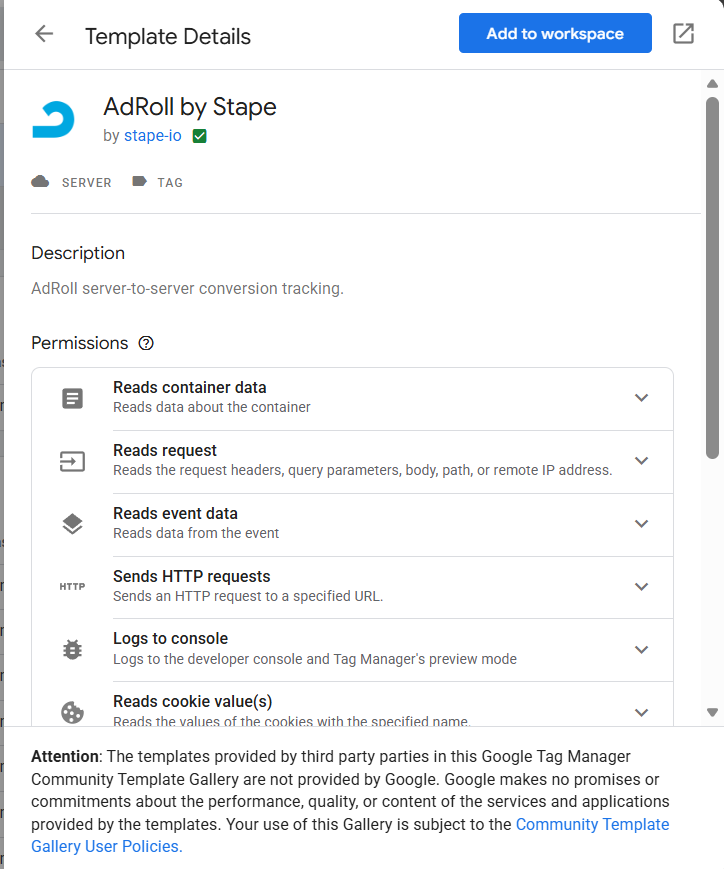
Step 1: Add the AdRoll Tag Template
Open your server-side GTM container and navigate to Templates. Under the Tag Templates section, search the Template Gallery for AdRoll by Stape and add it to your workspace.
Step 2: Create a New AdRoll Tag
In the Tags section of your server container, create a new tag and select AdRoll as the tag configuration.
Step 3: Define the Event Naming Method
Choose how event names should be assigned:
- Standard events – select from predefined AdRoll events such as page view, add to cart, or purchase
- Inherited events – automatically map incoming server GTM event names to AdRoll’s standard events
- Custom events – manually define a custom event name
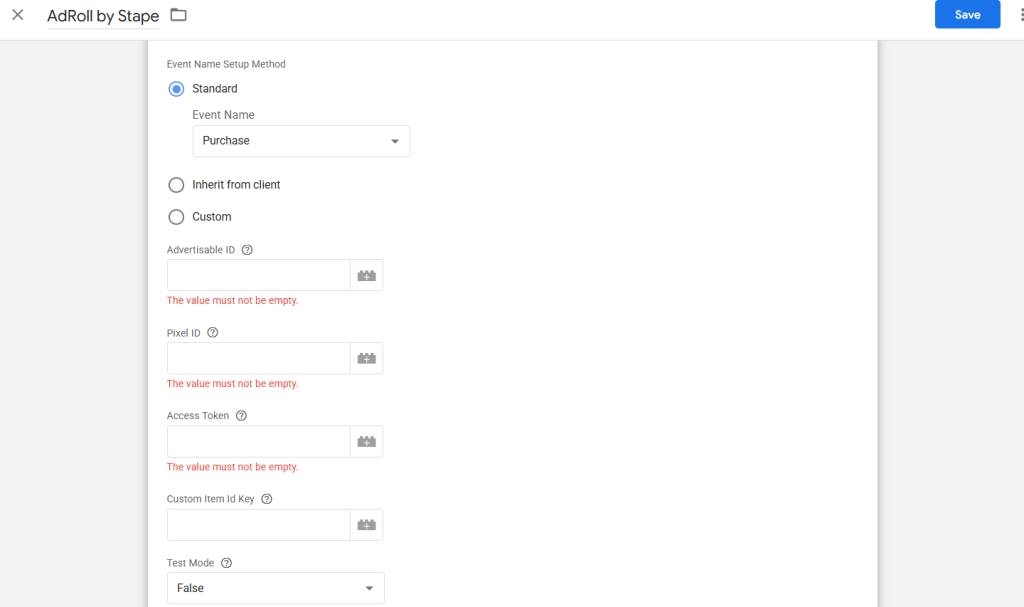
Step 4: Configure Required Credentials
Regardless of the event naming method, the following values must be provided:
- Advertisable ID – available in your AdRoll account under website pixel settings
- Pixel ID – also found in the AdRoll pixel configuration
- Access Token – generated in your AdRoll account’s personal access token section
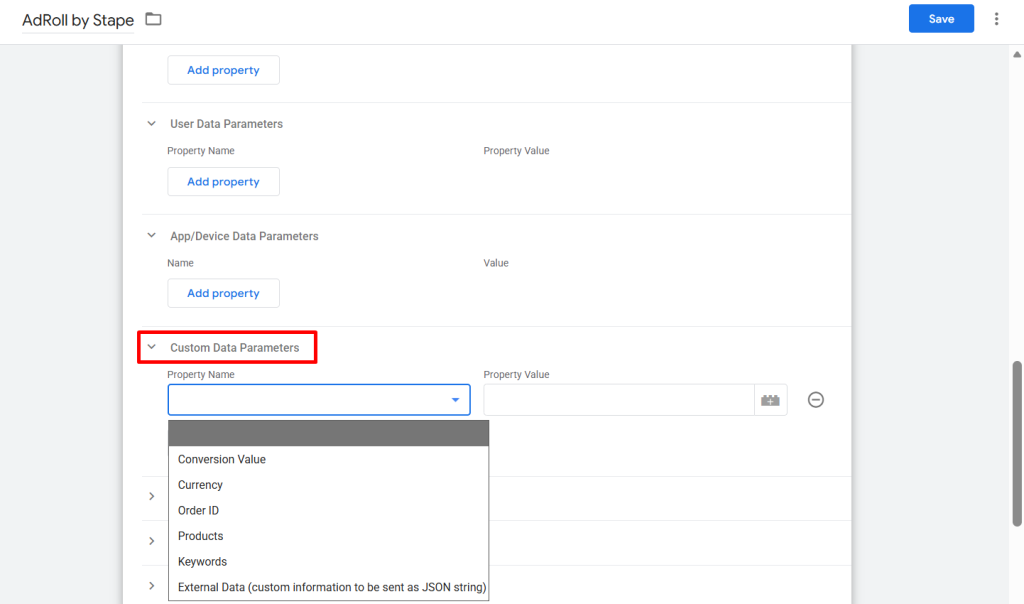
Step 5: Add Optional Parameters
You can enhance your event payload by adding additional parameters, including:
- Server-side attributes
- App or device-related data
- Custom event parameters specific to your business logic
These fields allow for more detailed reporting and audience segmentation.
Step 6: Add Triggers
Assign appropriate triggers so the AdRoll tag fires only when the relevant server-side events are received.
Step 7: Test and Validate
Use GTM Preview and Debug mode for both web and server containers to confirm:
- Events are reaching the server container
- The AdRoll tag is firing as expected
- Required parameters are being passed correctly
Final Thoughts
Implementing AdRoll through server-side GTM gives you a more resilient and privacy-conscious tracking setup. You can track standard eCommerce actions such as page views, cart interactions, and purchases, as well as define custom events tailored to your business needs.
As AdRoll continues to expand its server-side capabilities, this setup positions you well for future improvements while already delivering the core benefits of server-side tracking today.