
Master Amplitude Analytics on your WordPress site with our step-by-step guide. We’ll show you how to unlock powerful user insights by using a plugin, Google Tag Manager, or adding the code directly.
Choose the method that works best for you:
- Using a Plugin: The easiest and fastest way.
- Using Google Tag Manager: The most flexible and powerful method for managing all your scripts.
- Manual Code: For advanced users who are comfortable editing theme files.
Before You Start: Get Your API Key
No matter which method you choose, you’ll need your Amplitude API Key first.
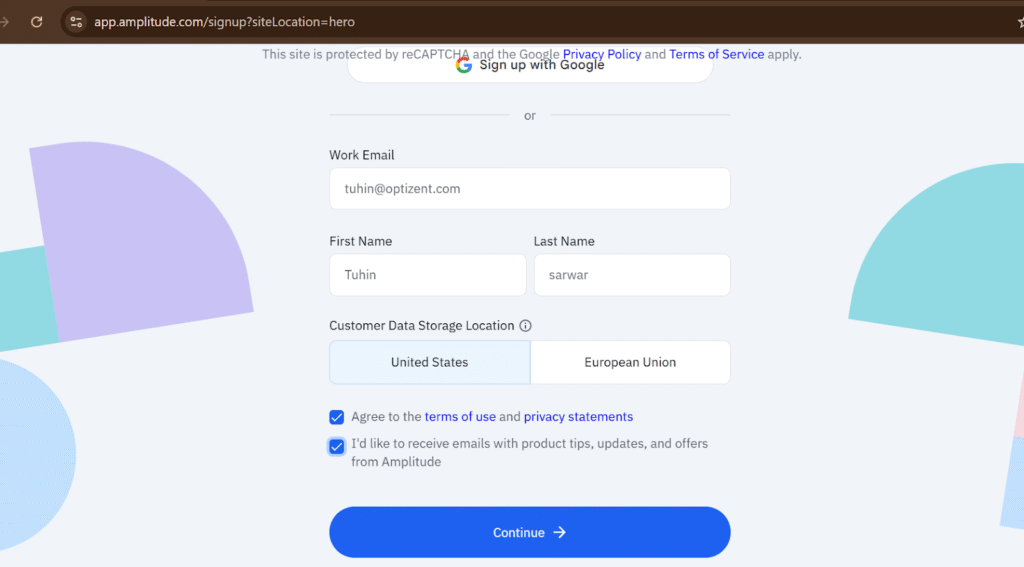
- Create an Amplitude Account: If you don’t have one, sign up on the Amplitude website.
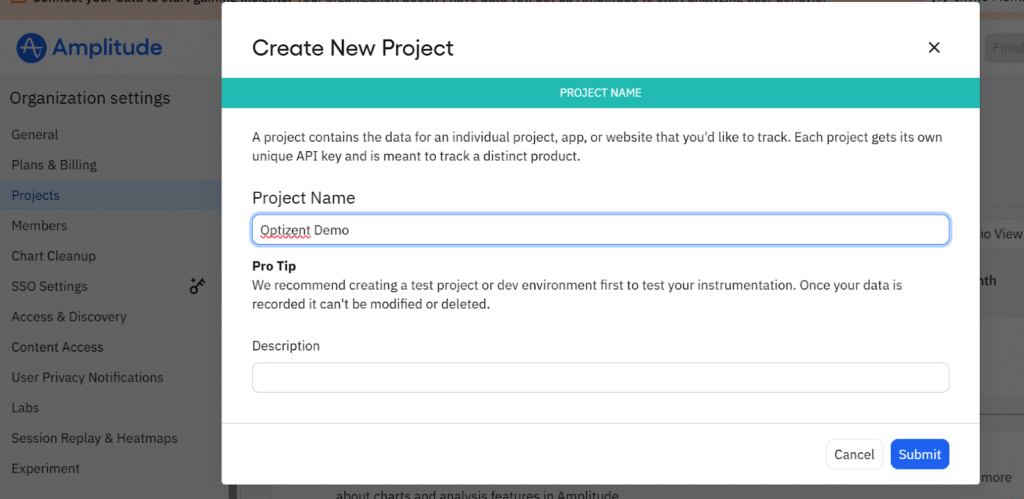
- Create a Project: Inside your Amplitude account, set up a new project for your website.
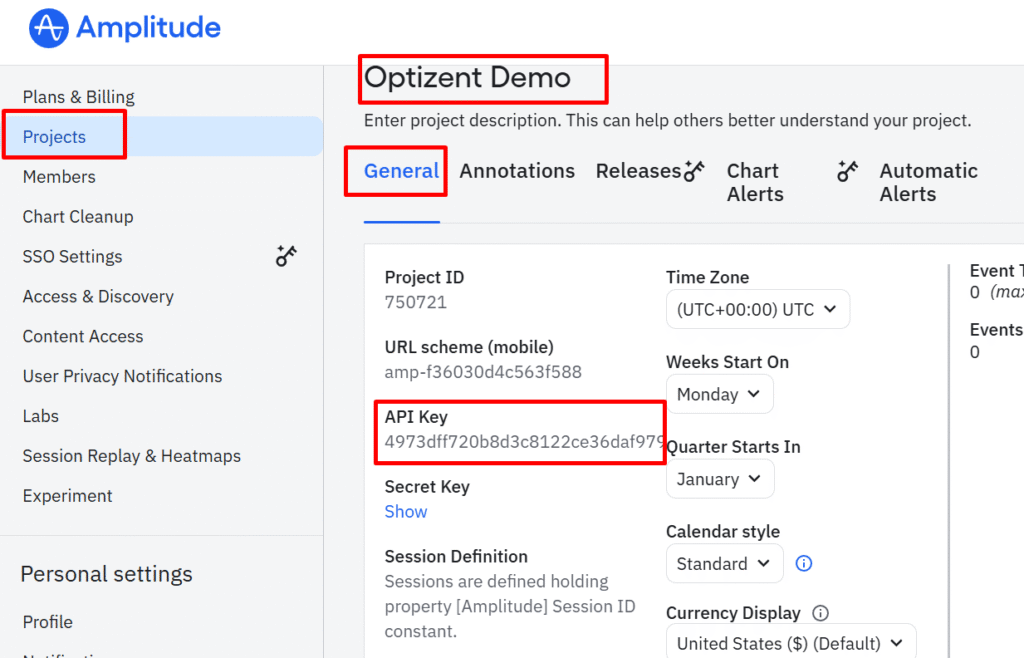
- Find Your API Key: Under Project general settings you can find the API key.
- API Key (a long string of letters and numbers). Copy this key, as you will need it below.
Method 1: Use the Official WordPress Plugin (The Easy Way)
This is the recommended method for most users. It’s fast, safe, and requires no code.
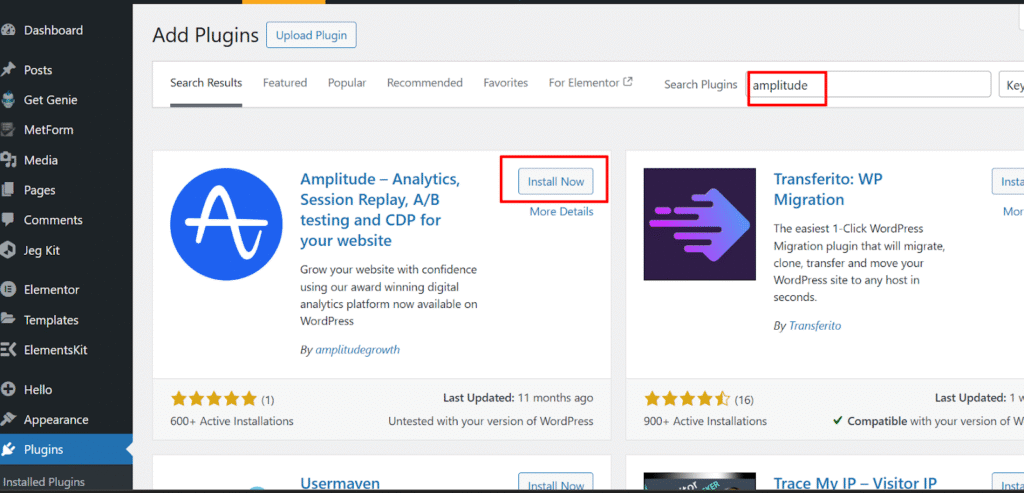
- Install the Plugin: In your WordPress dashboard, go to Plugins > Add New. Search for “Amplitude Analytics“. Install and activate the official plugin by Amplitude.
- Add Your API Key: Navigate to the plugin’s settings (Settings > Amplitude). Paste your API Key into the required field.
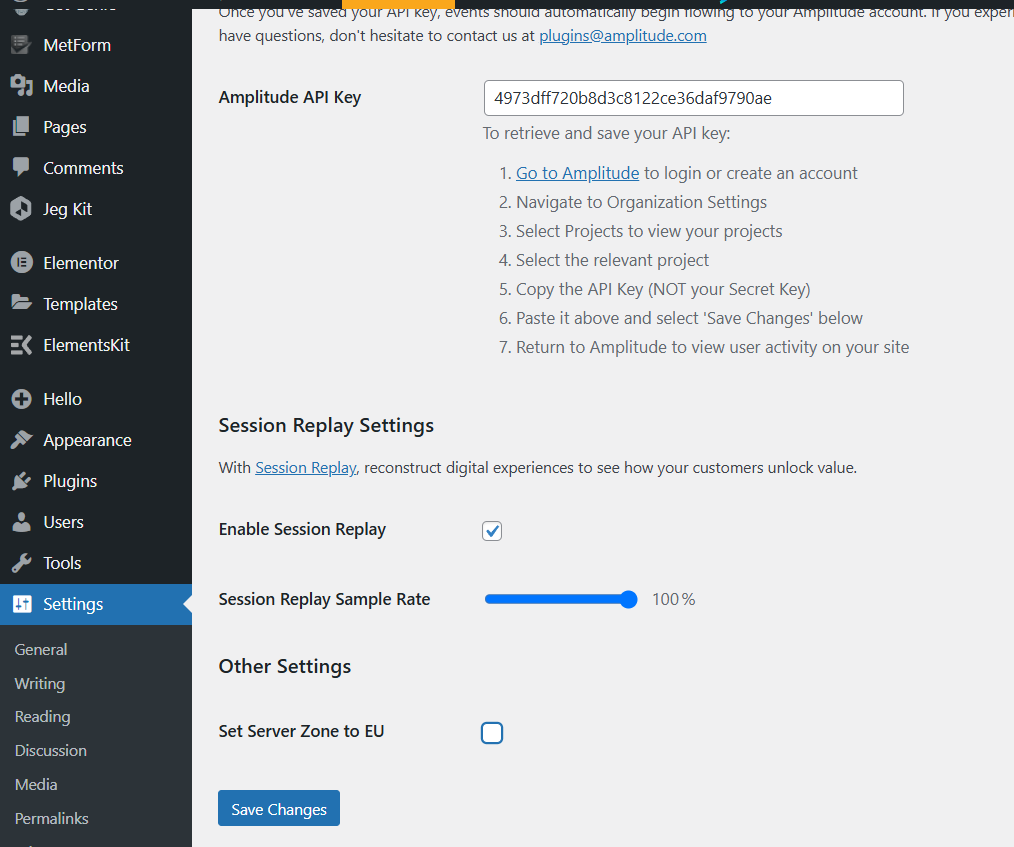
- Configure Settings: On the same page, you can enable features like Session Replay. If your business is in the EU, be sure to set the Server Zone to EU.
- Save Changes. That’s it! Amplitude is now active across your entire site.
Method 2: Use Google Tag Manager (The Flexible Way)
This is the best method if you already use Google Tag Manager (GTM) to manage your website’s scripts.
Step 1: Add the Amplitude Template in GTM
- In your GTM container, go to Tags > New.
- Click Tag Configuration > Discover more tag types in the Community Template Gallery.
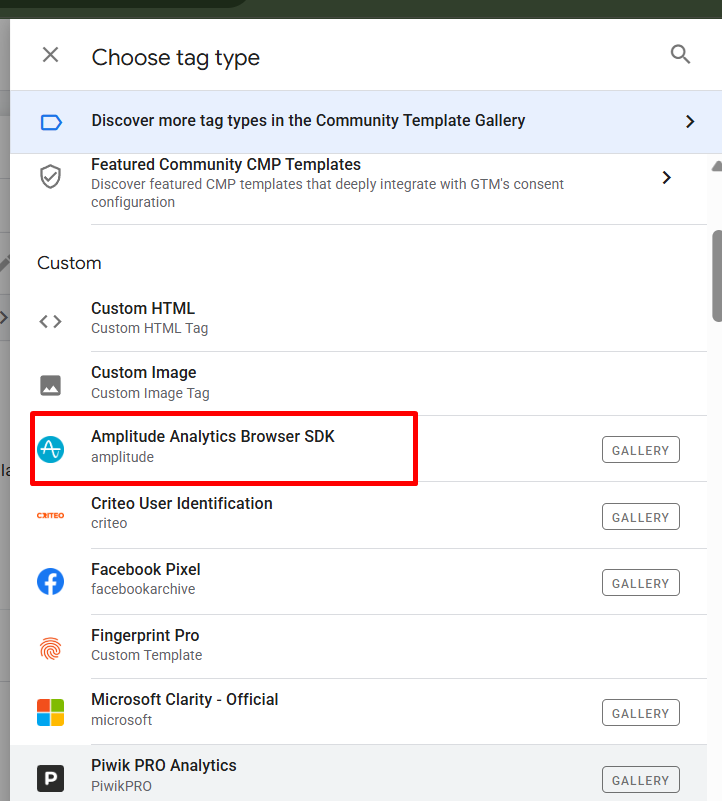
- Search for “Amplitude Analytics Browser SDK” and select the official template by Amplitude. Click Add to workspace.
Step 2: Create the Initialization Tag
- Click Tags > New again.
- For the Tag Configuration, choose the Amplitude Analytics Browser SDK template you just added.
- Paste your Amplitude API Key into the API Key field.
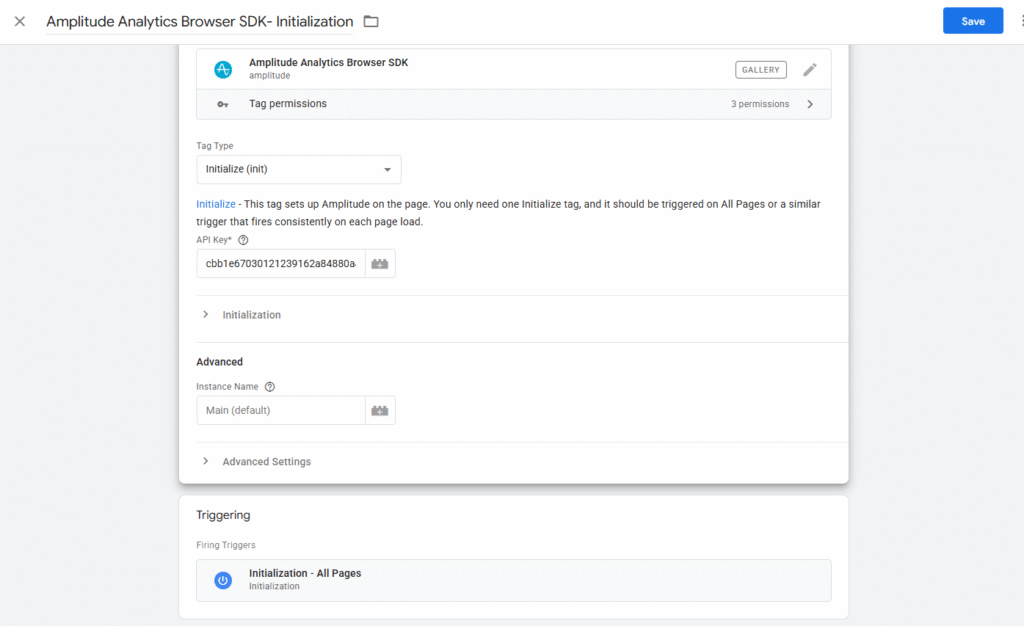
- Under Triggering, choose the Initialization – All Pages trigger. This ensures Amplitude loads on every page.
- Name the tag something clear, like “Amplitude – Initialization,” and save it.
Step 3: Publish Your GTM Container
Click the Submit button in GTM to make your changes live.
Method 3: Add Code Manually (Advanced Users)
Only use this method if you are comfortable editing your theme’s code. Warning: Always use a child theme to prevent your changes from being erased during theme updates.
Of course. Here is a more detailed, step-by-step breakdown of the manual implementation method, written to be as clear as possible for an advanced user.
Step 1: Getting the Code Snippet from Amplitude
- Log in to your Amplitude Account.
- Navigate to your project or organization where you want to send data.
- Find the data sources section. You may see a notification prompting you to “Start sending data” or an option to “Add Data Source.” Click on it.

- From the list of available sources, select Browser SDK. Amplitude uses this for all website-based tracking.
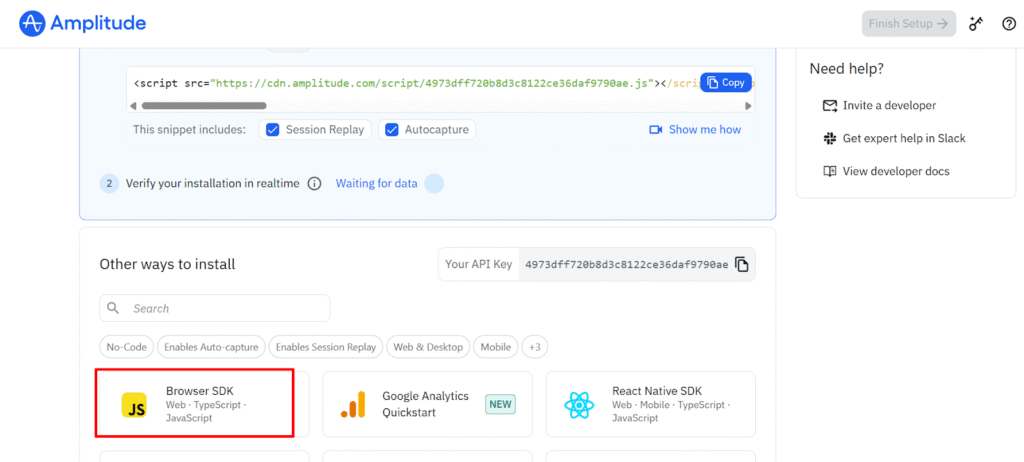
- Amplitude will now generate and display a JavaScript code snippet. This block of code is unique to your project and already includes your specific API Key.
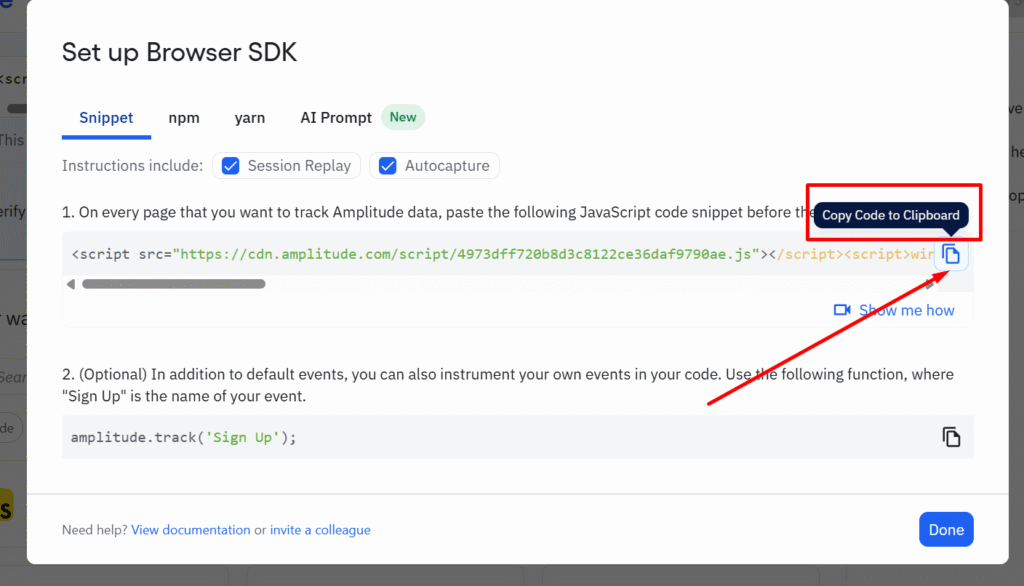
- Click the “Copy” button to copy the entire snippet to your clipboard.
Step 2: Adding the Code to Your WordPress Theme
- Log in to your WordPress Dashboard.
- From the left-hand menu, navigate to Appearance > Theme File Editor.
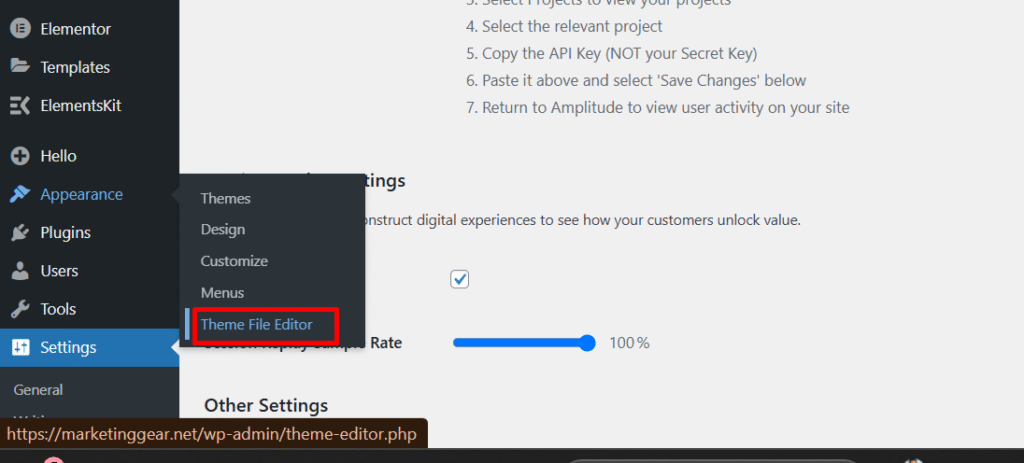
- Edit the Header File: Find and open the Theme Header (header.php) file from the list on the right.
- Paste the Code: Paste the full Amplitude code snippet just before the closing </head> tag.
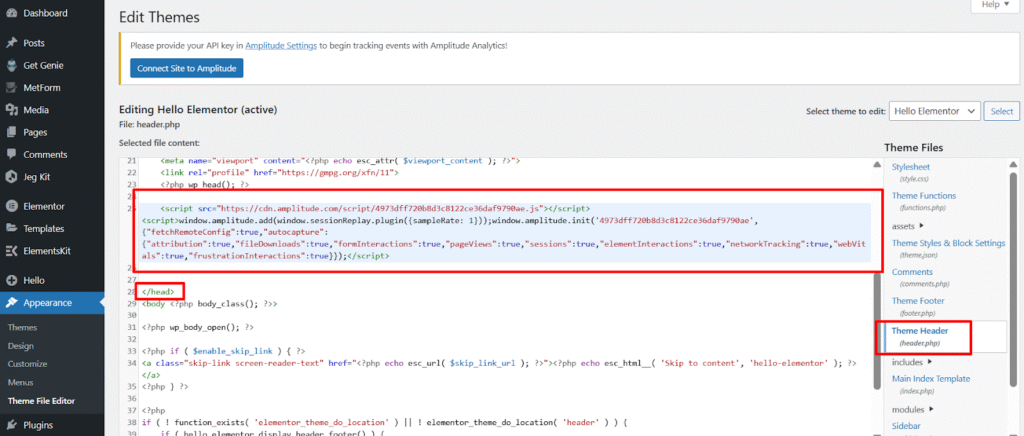
- Once the code is in place, click the “Update File” button below the editor to save your changes.
FAQs
Q: Which method is best?
A: For most users, the Plugin is the simplest and safest choice. For those managing multiple marketing and analytics tools, Google Tag Manager is the most powerful and organized solution.
Q: How do I make sure my data is accurate?
A: After setting up, open your website and click around. In your Amplitude project, look at the real-time event stream to confirm that your activity is being recorded.
Q: What else can I track?
A: You can track almost any user interaction: form submissions, video plays, page scrolls, and button clicks etc. Each action is tracked as a event that you define.