
Server-side tracking is now essential for maintaining accurate Meta (Facebook and Instagram) conversion data in an increasingly privacy-focused ecosystem. By implementing the Meta Pixel via Google Tag Manager (GTM) server-side and sending events through the Meta Conversions API (CAPI), you can reliably capture critical user actions such as purchases, leads, and page views—while improving data quality, attribution, and campaign performance.
This guide provides a clear, step-by-step approach to implementing Meta Pixel server-side tracking using GTM alone.
Why Use Server-Side Meta Pixel Tracking?
Browser-based pixels are increasingly limited by:
- Ad blockers and browser tracking prevention
- Cookie restrictions and shortened lifespans
- Incomplete user data for matching
Server-side tracking mitigates these issues by sending events directly from your server to Meta, resulting in:
- More reliable event collection
- Higher event match quality score
- Improved campaign optimization and attribution
Meta Standard Events You Can Track
Meta provides a predefined set of standard events optimized for reporting and ad delivery. Using these events is strongly recommended.
Common standard events include:
- ViewContent – Viewing a product or key page
- AddToCart – Adding an item to a cart
- InitiateCheckout – Starting checkout
- AddPaymentInfo – Adding payment details
- Purchase – Completing a transaction
- Lead – Submitting contact information
- CompleteRegistration – Registering for a service
- Search, Subscribe, Schedule, StartTrial, and others
Standard events require no additional configuration in Meta Ads Manager and are fully supported for optimization.
Event Parameters: Improving Data Accuracy
Meta allows you to enrich events with parameters that provide context and value. Supplying complete parameter data improves reporting accuracy and ad delivery.
Common eCommerce Parameters
Recommended for online stores:
- value – Total transaction or item value
- currency – ISO currency code (e.g. USD, EUR)
- content_ids – Array of product IDs
- contents – Array of product objects (ID, quantity, price)
- num_items – Total number of items
- content_type – Typically product or product_group
Purchase-Specific Parameters
Used with the Purchase event:
- order_id – Unique transaction ID
- delivery_category – Shipping method (standard, express)
- coupon – Discount code applied
Lead Generation Parameters
Commonly used for lead-focused tracking:
- value – Estimated lead value (or 0 if unknown)
- currency – ISO currency code
- lead_type – Type of lead (form_submission, demo_request)
- status – Lead qualification stage
- content_name – Name of form or offer
- content_category – Business segment
- form_id – Unique form identifier
Now Prepare Your Data Layer
A structured data layer is required for accurate tracking.
Best practices:
- Push all relevant event data (value, currency, items, transaction ID) to the data layer.
- Follow Meta’s recommended parameter naming conventions.
- Use platform-native integrations (Shopify, WooCommerce, Magento) or custom scripts.
- Validate data using GTM Tag assistant Preview mode.
Create Custom Event Triggers in GTM
- Open Google Tag Manager and navigate to Triggers.
- Create a new trigger and select Custom Event.
- Enter the event name exactly as it appears in the data layer (e.g. purchase).
- Scope the trigger as required.
- Save the trigger.
Define Data Layer Variables
Create variables to extract data from the data layer:
- Go to Variables in GTM and create a new Data Layer Variable.
- Use paths such as:
- ecommerce.value
- ecommerce.currency
- ecommerce.items
- ecommerce.transaction_id
- user_data.email
- user_data.phone
- Name variables clearly (e.g. “DLV – ecommerce.email”).
These variables will be mapped to Meta event parameters.
Send all of the required events from client side GTM to Server Side GTM.
Then Configure the Meta Conversions API Tag
- In server side GTM, go to Tags and click New.
- Choose a server-side compatible tag:
- A Meta Conversions API template (recommended), or
- A Custom HTTP Request tag
- Enter your Meta Pixel ID and Access Token from Meta Events Manager.
- Map event names and parameters using the created variables.
- Include user data fields (hashed) for advanced matching.
- Attach the appropriate custom event trigger.
Including hashed email, phone number, or a persistent external ID, city, zip, country,click id, browser id significantly improves event match rates.
Test, Debug, and Publish
Before publishing:
- Use GTM Preview mode to confirm event firing.
- Inspect server-side requests and payloads.
- Verify events appear in Meta Events Manager with correct deduplication.
- Once validated, submit and publish your GTM container.
Best Practices for Advanced Matching
User data parameters improve user identification and attribution. When available, send:
- em – Email address (hashed)
- ph – Phone number (hashed, E.164 format)
- external_id – Persistent user or CRM ID
- Additional fields such as first name,last name, country, zip, city, date of birth, location, IP address, and user agent
Example:
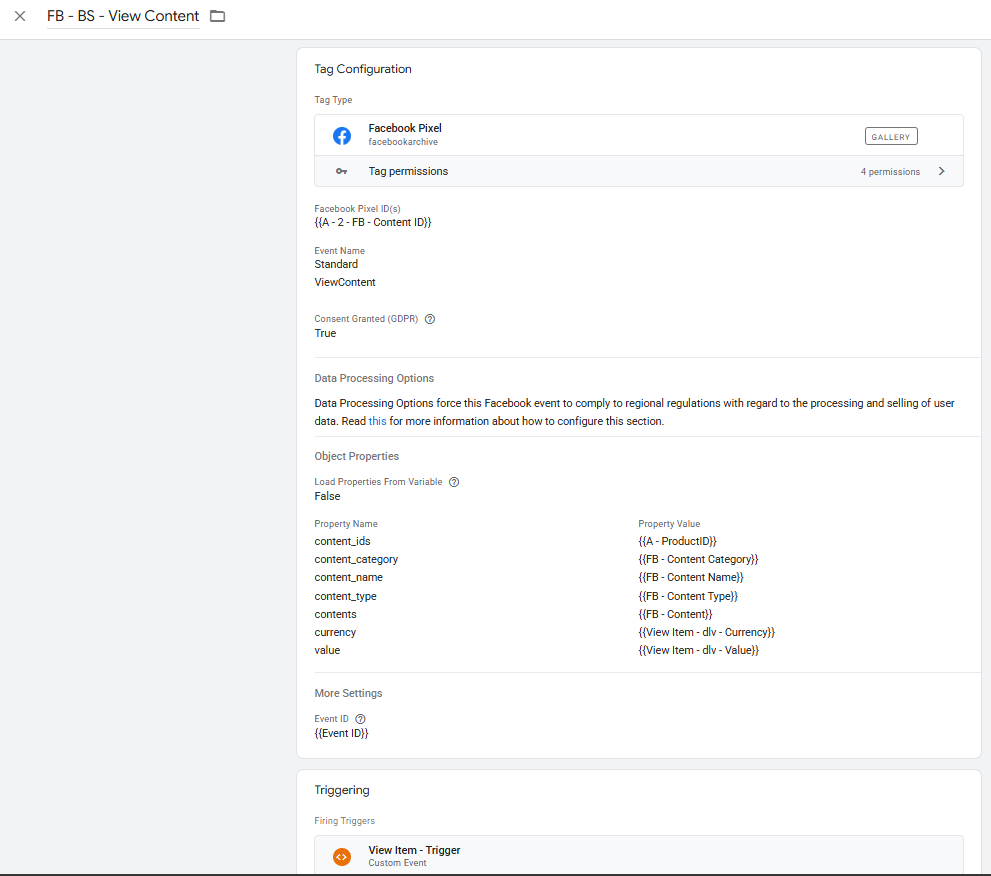
ViewContent Event
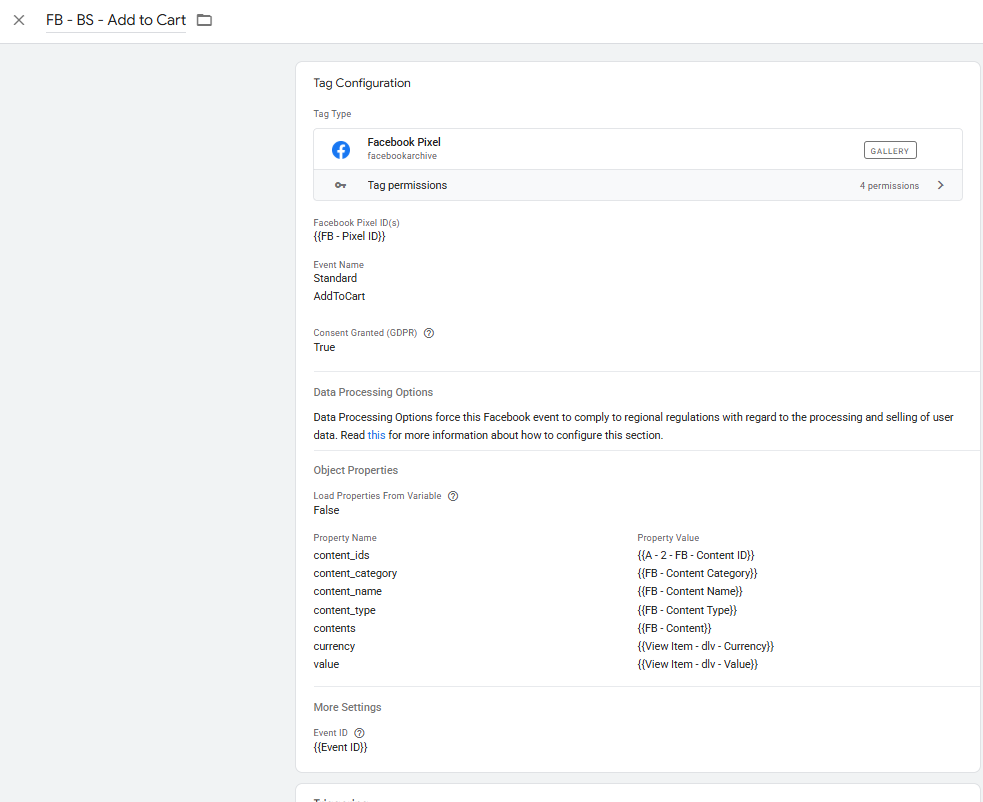
AddToCart Event
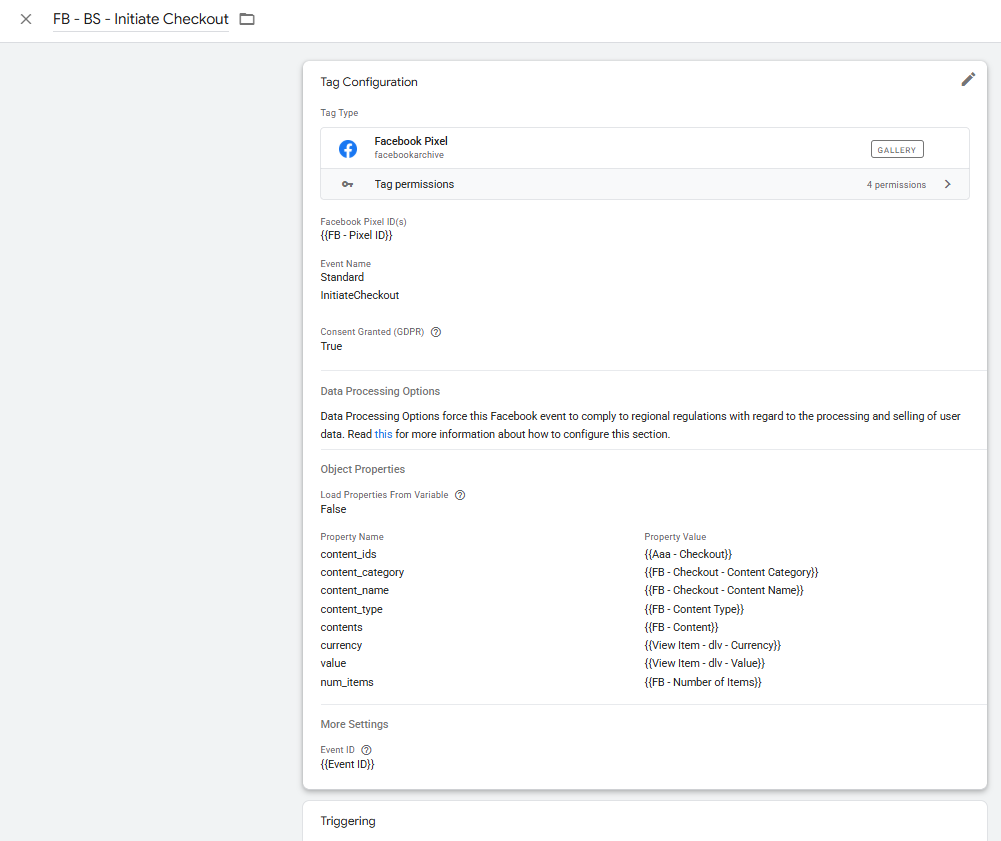
InitiateCheckout Event
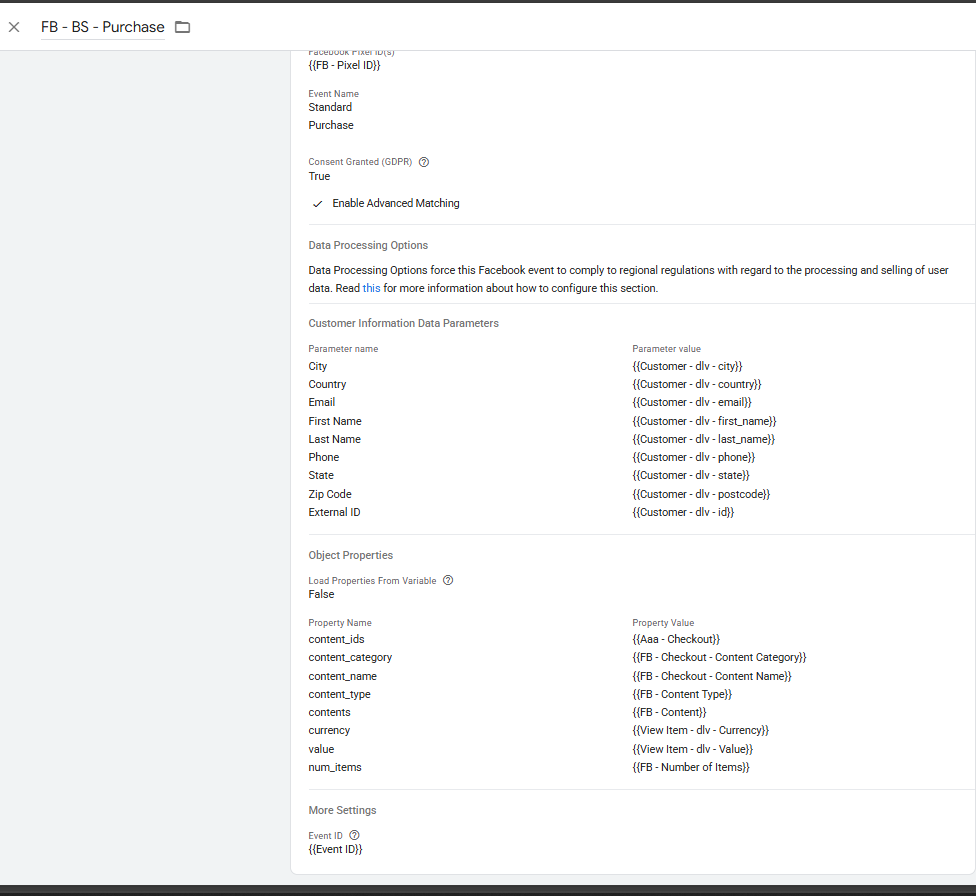
Purchase event
Final Thoughts
Implementing the Meta Pixel via GTM server-side and the Conversions API is a robust, privacy-conscious approach to modern conversion tracking. With structured data layers, standard events, and enriched user data, you can ensure reliable measurement and sustained performance across Meta advertising platforms.