
Your website might contain links sites or pages that are not part of your own website. By using the tag that we implemented earlier, it won’t capture the link clicks in your analytics because there is no page view happening on your site because of those link clicks. However, you can track those link clicks using Event tracking in Google Analytics.
In this chapter, I will show you how to capture these link clicks.
The Trigger
First, let’s create a trigger. Keep in mind that it does not matter if you create a tag first or a trigger first.
This trigger will capture link tracking, and as soon it captures the clicking of an external link, it will trigger the tag and send data to Google Analytics.
Click on Trigger link on the side and then click on “New”.
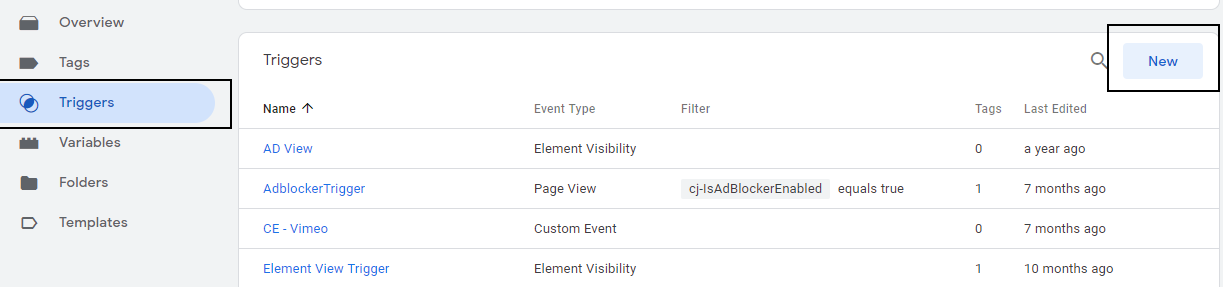
Figure: Creating a new trigger
On the next screen, click in the middle to create a new trigger (we went through this process while creating the Page View tracking in Google Analytics).
Choose trigger type: Just Links (it is under clicks)
Next, select “Some Clicks” as we are only going to track “External Clicks only.
Now, you will get some additional options to specify which links you want to track. In case of tracking all external clicks, it is relatively simple. You set up the option to exclude all the internal URLs (pages), meaning any URL that does not contain your domain.
![]()
Figure: External Link tracking trigger.
In that scenario, it is going to track all the external links on analytics. Once you're done, give it a name and save it. I am calling it “GA External Link Clicks Trigger”.
Now, the trigger is done. Next, I will show you how to create a tag that will send the data as an event to Google Analytics.
But before you can create a tag, you will need to capture some information of the link that is clicked. There are several “Built-in” variables in Google Analytics that capture information about the clicked link. However, you must enable them before you can use them in your tags or triggers.
Configuring In-Built Variables
Click on Variables in Google Tag Manager navigation.
Click on the “Configure” button in the “Built-In” variable section. Scroll down in the list till you see the “Click” section. Make sure all the variables in the “Page” and “Click” section are checked. By checking these variables, you are making them available for you to use them in any tags or trigger you create.
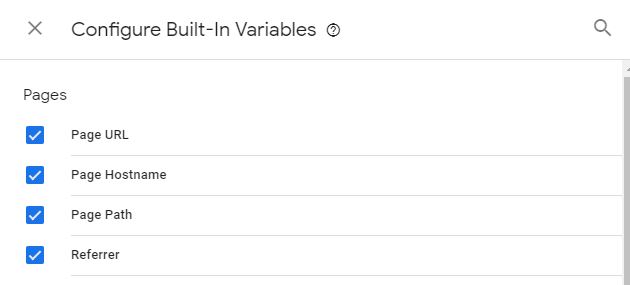
Figure: Page Variables
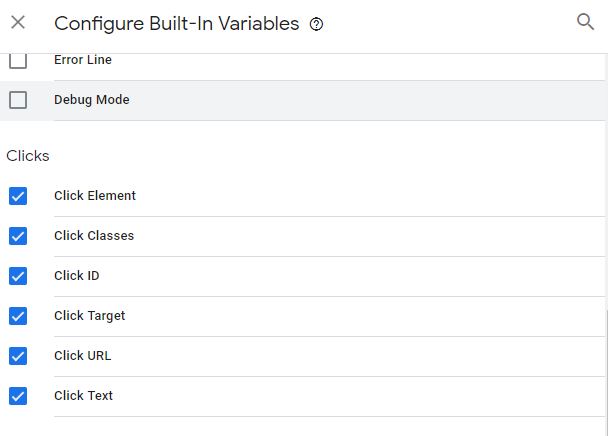
Figure: Click Variables
Once done, click on X next “Configure Built-In Variables” to close the window.
Configuring the Tag
Click on “Tag” menu option and click on “New”.
Pick Google Analytics Universal Analytics as Tag type.
In the next screen, select “Event” from the track type field as we will tracking clicks as Events. (Note: If you are not familiar with Events in Google Analytics, then you should take an introductory course or lecture in Google Analytics events). For this book, you can follow along.
When you select the “Event” type, you will notice that Google Tag manager opens a place for you to enter a few parameters.
![]()
Figure: Event Tracking
You need to set some parameters for tracking events in Google Analytics. These parameters will help get you more information about the events that you are tracking.
Those parameters are Category, Action, Label and Value.
In all these parameters, you can provide whatever you can, but you should think strategically. These are the classification that will help you drive meaningful insights so choose the values that will make sense not only to you but also to others who will be using the data.
For category, you can provide a name such as “External Link”. This way, all your external link clicks can have the same category.
Type in “External Link” (without double quotes) in the Category box.
For action, we are going to capture the name of the page where the links were clicked from. This comes in handy when you have external links all over the site. By capturing this information, you will know which pages on your site are driving the external link clicks.
Google Tag Manager already captures this information for you, and all you must do is pick the variable where this information is available in Google Tag Manager. To do that, click on the icon with a + sign next to the Action input field. It opens the Variable selection window. We are going to be using the Built-in variables that were enabled earlier.
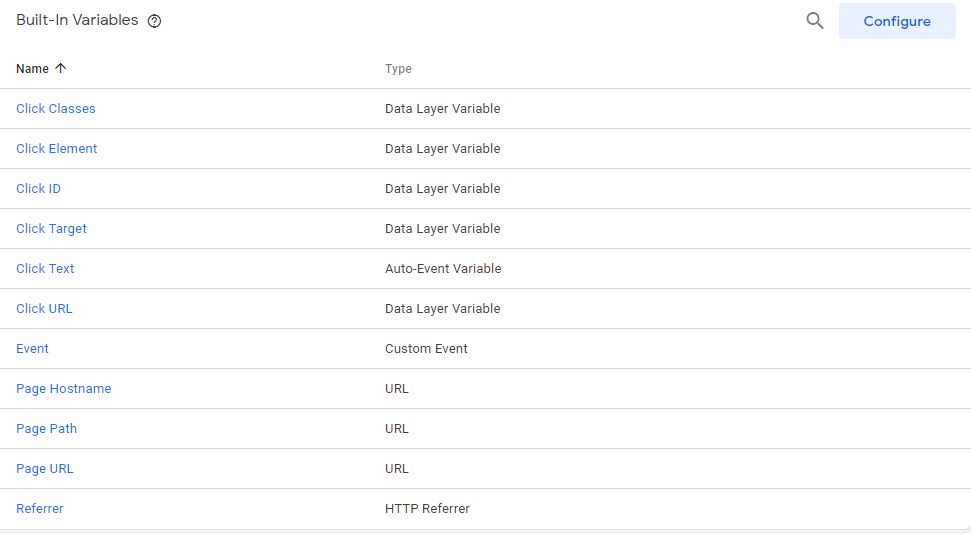
Figure: Built-in variable window
This window will show all the Built-in variables that you have enabled. Your window might show a list that is different from what you see in the figure below. This is because I have enabled a lot more variable than you might have.
Select Page Path from this list, that’s the one that contains the name of the page the user took the “click” action. Select that variable.
For labels, we will provide the name of the URL that was clicked; this way, you will know exactly which linked was clicked. Click on the + sign next to the input field label and then select the “Click URL” variable from the built-in variables.
Note: The names of the built-in variables are very intuitive, so you should not have a problem figuring out the name of the variable to use.)
Leave the value empty if it is not required.
The next option is to choose whether this event tracking should be counted as an interaction or not. If you count as interaction, then it will impact the bounce rate of your site. To understand this better, let’s take an example
- A user comes to a page that has external links
- The user clicks on one of the external links and leaves your site.
In this case, the user only had one page on your site, so should be counted as a bounce? Right?
If you count “external link” click as interaction, then that interaction will be counted on your site, and hence, that session won’t be counted as a bounce and thus giving you an inaccurate bounce rate. So, in this case, you should mark the click event as non-interaction, and hence, the value for “Non-Interaction” should be set to True.
Next, you have to set the GA Tracking ID, as we did when we set the page view tracking. It is already in a variable, so go ahead and select that variable.
Leave everything else as it is. The rest of the settings are advanced and not applicable at this time. This is all you must do for event tracking tag.
![]()
Figure: External Link Tracking with Values
Adding A Tag
When saving the trigger, Google Tag Manager will prompt you to add a Trigger. Add the trigger, GA External Link Clicks Trigger, that we created earlier in this chapter. Give a name for your tag and you are done.
Next, preview your tag before publishing it.
- Click on Preview
- Open the page that has external links, and it will show you the preview window.
- Click on the External link. Make sure to press Control key on windows or equivalent on other operating systems before clicking; this way, the link will be opened in another tab/window and you will not lose your preview mode.
You will see the External Click Tag in Summary view of the preview window
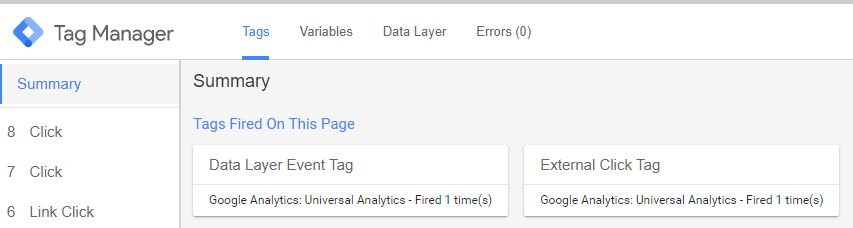
Figure: External Click Tag - Preview
Click on the Tag to see the tag details and the values that are getting passed.
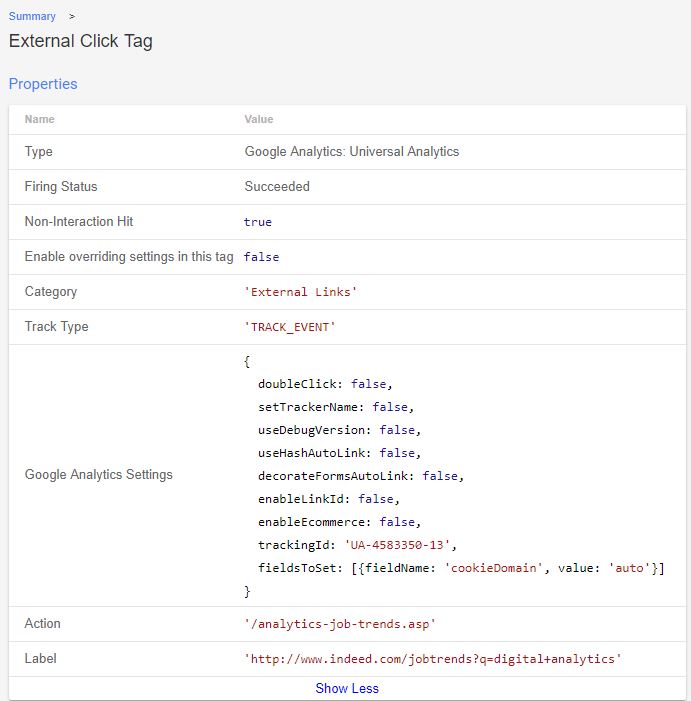
Figure: External Click Tag Details
Go back to your workspace.
If all looks good, then go back to Google Tag Manager and Publish it. Make you get off the Preview mode before proceeding.
Signup for complete course at https://training.optizent.com/
Contact us for onsite workshops.
Excellent and helpful guide, thanks!