
Every website has lots of JavaScript that are used to provide interactive experiences to users, track their behavior, show them personalized content, etc. However, like any other code, JavaScript can fail. When they fail, they can cause bad customer experience. They might also prevent users from doing what they intend to do, such as clicking on a button, filling a form, clicking a link, etc.. However, a lot of these JavaScripts are undetectable because they don't show any visible error to users.
Google Tag Manager has a functionality that allows you to capture these JavaScript errors and send them to any tag that you would like to track them in. The best way is to send them to Google Analytics as events, and that's exactly what we will look at.
Enabling Variable to Track JavaScript Errors
Google Tag Manager has built-in variables that track these JavaScript errors. Before you can use them in your tags and triggers, you have to enable these variables just like we did with Click variables.
To enable these variables
- 1. Click on Variables options on the links on the left-hand side.
- 2. Click on "Configure Button" in the Built-In Variables section.
- 3. Check the three variables under the "Error" section - see figure below.
- a. Error Message variables hold the message of the error
- b. Error URL is the URL of the page where the error was detected
- c. Error Line tells you the line number where the error occurred.
- d. Debug Mode tells you if you were running the Google Tag Manager in Debug mode. We are not going to be using that variable.
Once done, go ahead and click x to close the window. The variables are not ready to be used.

Figure: JavaScript Error Variables
Configuring the Trigger
The next step is to create a trigger to capture all this information.
- 1. Create a New Trigger
- 2. Pick the "JavaScript Error" from the Trigger Type Window

- 3. In the next window, select the "All JavaScript Errors" option, give the trigger a name and clicks save. Next, we will create a Tag.
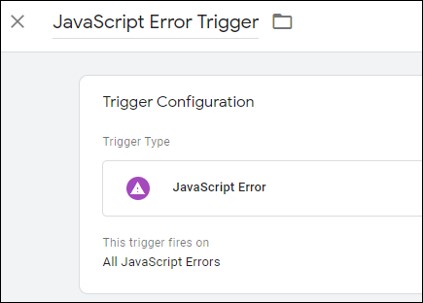
Figure: JavaScript Error Trigger
Configuring the Tag
We will be sending the Tag as Event in Google Analytics.
- 1. Create a new Tag
- 2. Pick Universal Analytics from the Tag Type
- 3. Select Event from Track Type.
- 4. Now we must set the values that we will send to Google Analytics.
- a. Category: I give it a name such as JavaScriptError
- b. Action: I used two values from Error variables, Error Message and Error Line, and configured it as {{Error Message}} Line No: {{Error Line}}
- c. Label: {{Error URL}} - this will show me where the error occurred.
- d. Non-Interaction Hit: True
- 5. Set the GA Tracking ID
The configuration will look as shown in the next figure.

Figure: JavaScript Error Tag
Once done, save the tag and attach it to the trigger that we created earlier.
To test this tag and trigger in a preview mode, you will have to create a page that has JavaScript error. If you don't have such a page, then ask your developers to create one for you to test.
Once you are satisfied with everything, publish this tag and trigger.
Now, you'll start tracking JavaScript errors in Google Analytics.

Figure: JavaScript Error Tracking in Google Analytics
Want to Learn Google Tag Manager. Here are few options: