
Google Tag Manager allows you to preview a tag and debug it before you publish it to the live environment. This is a great feature that I highly recommend.
Note: This feature only works in Google Chrome browser, so make sure to install Google Chrome and open Google Tag Manager account in Google Chrome before proceeding.
To debug your tags, click on the "Preview" button in the top right corner in the Workspace.

Figure: Preview button.
This puts your Google Tag Manager in Preview mode.
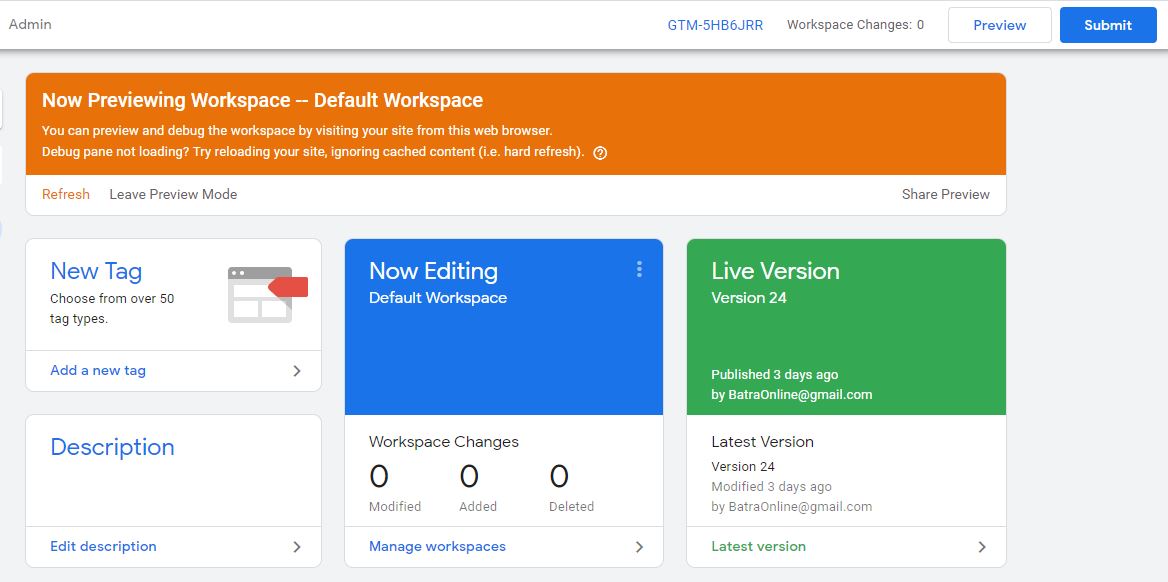
Figure: Google Tag Manager in preview mode.
Now, go to another tab and load your site. When the site loads, it will show you a preview panel.
The panels have several links on the left-hand side, and they are numbered. These links show the data during different stages of the browser.
The only link that you need to look at is Summary for now.
Finally, when everything is loaded, you will see that the Summary link is already selected with the Tags tab opened underneath it. Each link shows you four tabs: Tags, Variables, Data Layer and Error.
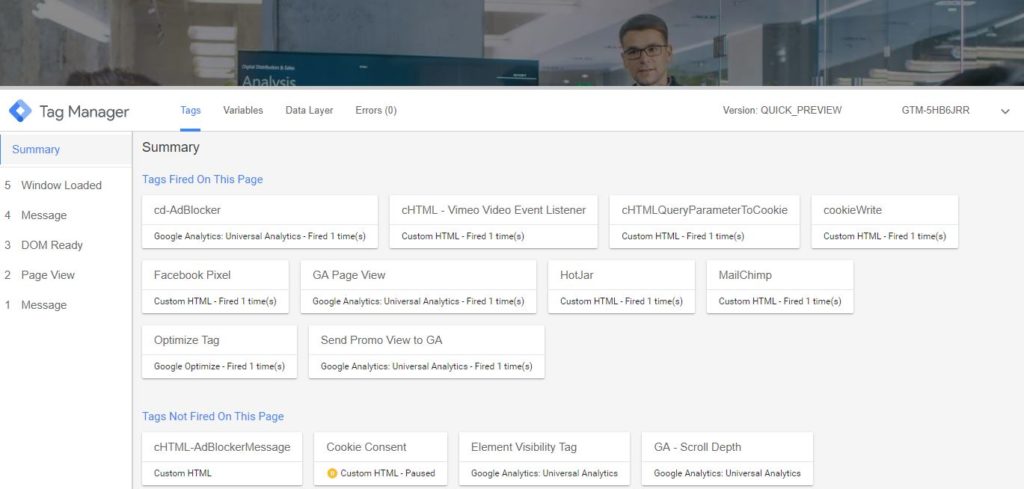
Tags Tab: Shows you the tags that are firing on that page as well as other tags that you have implemented but are not firing on that page.
We implemented Google Analytics basic page view tags that get fired when the page is viewed. In many advanced cases, you will fire a tag after some event happens. In that case, the tags are not automatically fired when the page loads. Those tags are fired when those actions happen. We will look at those actions as needed.
Clicking on a Tag in this Preview window will give you details of that tag so that you can see what's getting passed.
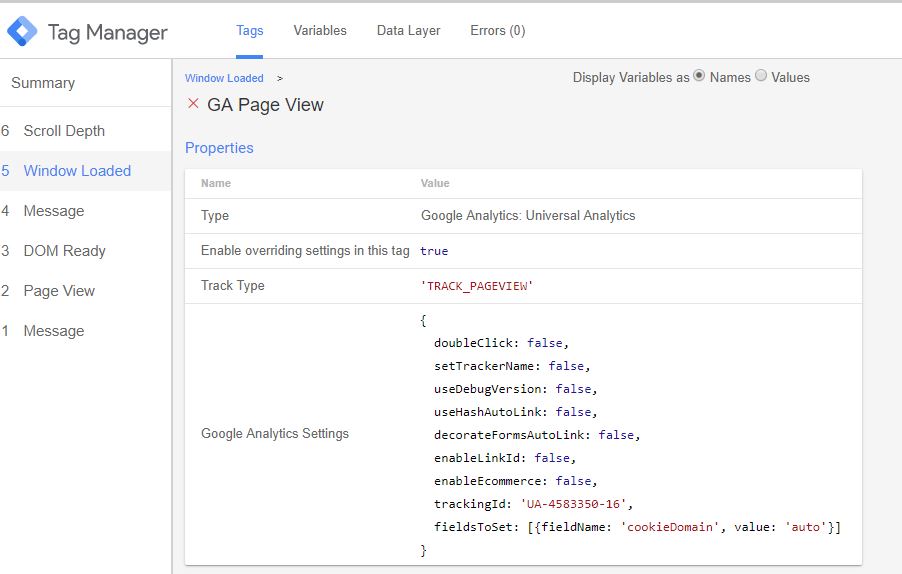
Figure: Tag Details
Variable Tab: When you click on the Variables tab, you can see all the variables and their current values. This gives a chance to make sure that everything is getting set up correctly. This won't apply much at this point, but as you create your variables and pass values to various tags, it will start to make sense.
Data Layer Tab: Data Layers hows you the available data layers and their values. We will discuss Data Layers later in the book.
Error: Error tab shows you any errors encountered on the page.
Once you review all the tabs, if there are any issues, such as correct data is not getting setup, etc., then go back to Google Tag Manager and fix the issues.
If everything links good, then you are ready to move the tags to the live site.
Note: Click on "Leave Preview Mode" to remove the preview mode. Leaving it in preview mode is not going to hurt anything, but keep in mind, every time you make a change to anything in Google Tag Manager, you have to hit the "Refresh" link in preview mode for those changes to show up in the preview mode.
To move your tags to the live site, click on the "Submit" button (on the top right corner, next to the "Preview" button).
On the next screen, make sure to give a proper name and description to make it easy for anybody managing Google Tag Manager to know which tags, triggers, etc. were made live in that version of changes.
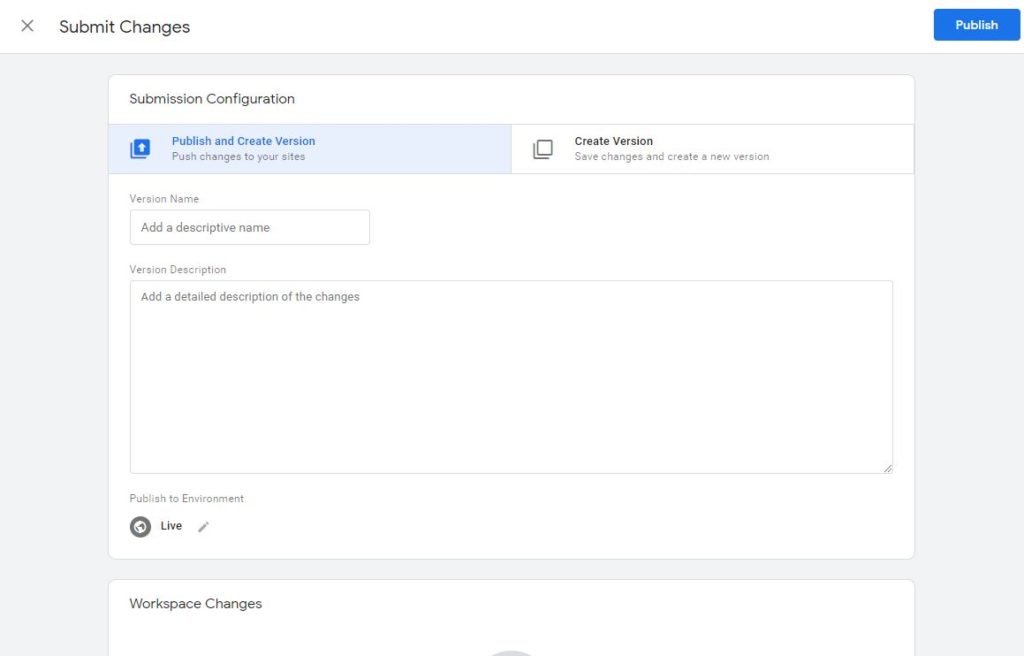
Once you are done, click on the publish button. And your tags will now be published to your live site.
Any time you need to make changes to any tag, trigger or variables you can find them by clicking on the menu option on the left-hand side
Figure: Menu options
Now, you should have a good understanding of creating Tags, Triggers and Variables in Google Tag Manager. In the next few chapters, we will create some other tags that will help you understand other available options in Google Tag Manager.

Want to learn Google Tag Manager? Enroll in our course or buy Kindle book
- Google Tag Manager (GTM) Online Training Course - From Zero to Hero
- Google Tag Manager Advanced Applications
- Get Google Tag Manager Kindle Book