
Let’s look at the Admin Panel of Google Tag Manager.
Click on “Admin” menu option of the top menu of Google Tag Manager. This will take you to the Admin Panel.

Figure: Google Tag Manager Admin Panel
Admin panel is divided into two sections. One the left is a panel to manage Google Tag Manager Account and on the right is the panel to manage for the Google Tag Manager Container.
Let's look at the Account Manager section.
To create a new account, click on the + signs and you will see an option to create a new account. Under the account name there are few options
Account Settings: Clicking on account settings allows you to change the information about the current account you are in.
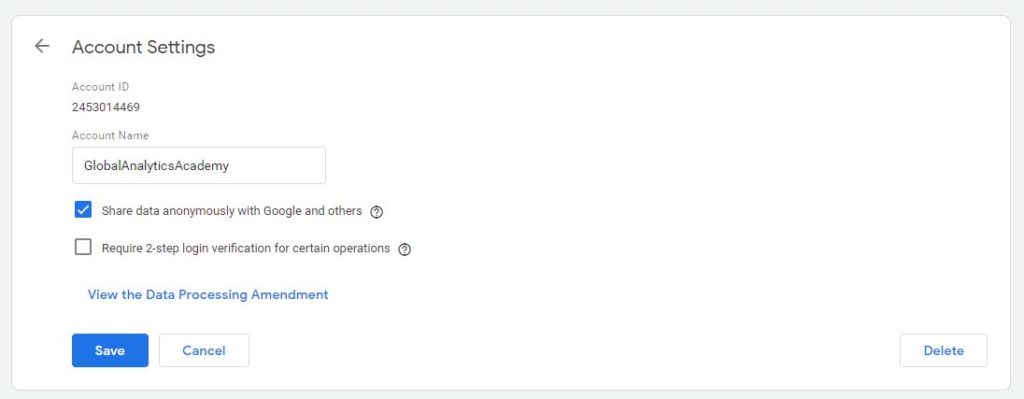
Figure: Account settings
In this panel, you can see the account ID, see or modify the account name, you have option to share the data with Google and option to setup 2-step log in verification. You can even delete an account. If you delete an account.
Account Activity: This is where you can see all the activity within that account. This section won’t give you details of specific activity within a container but provide you high level activity of the containers within the account. Account activity is a great way to monitor and make sure that there is no unauthorized activity within your account.
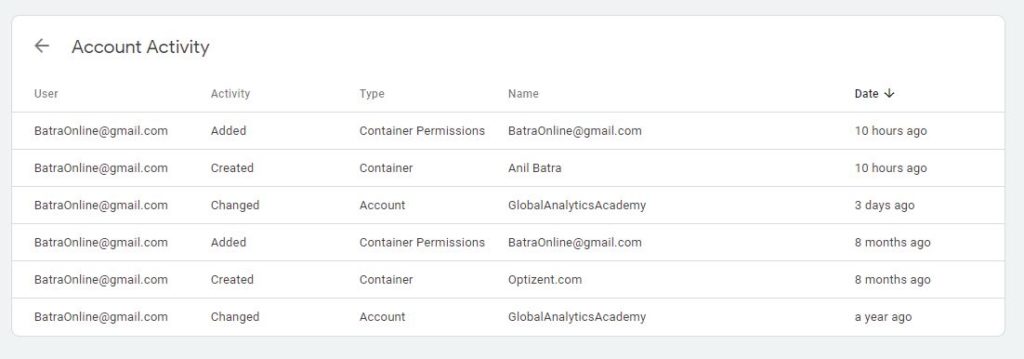
Figure: Account Activity.
User Management : In this screen you can add new users, delete the users or manage user permissions.

Figure: User Management
To add a new user, click on the + sign.
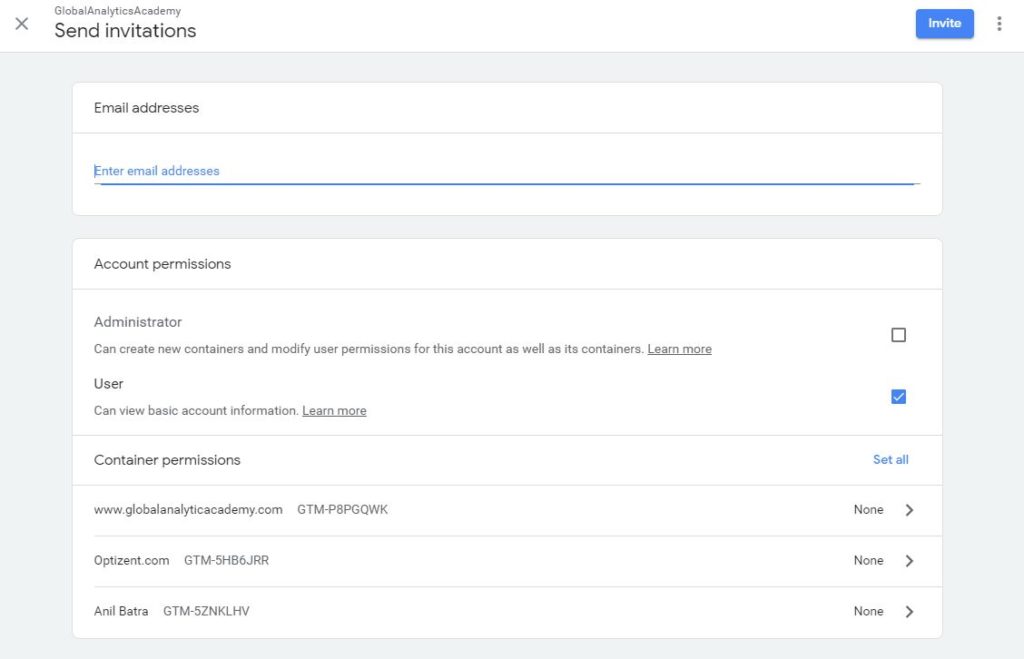
Figure: Add a User to an Account
To add a user
- Enter an e-mail address of the person
- Determine if the user will get Administrator account, if you select that option then that user will the ability to add users, delete users, to the account as well as the container with it.
- Select if the user will have only access to basic information. Most of the time this is the only option you will choose and keep the Administrator access to yourself.
- Pick the containers, within that account, to which you want the user to have access to. Clicking on the container will open up the permissions window, where you can decide the level of access you want this new user to have.
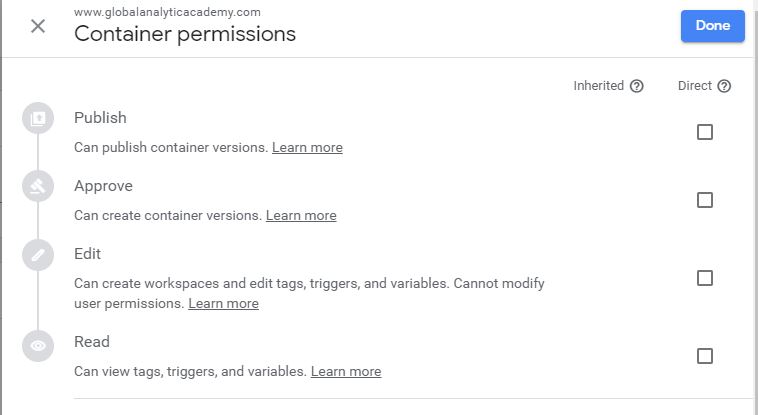
Figure: User Container Permissions
You have four levels of permissions. By selecting top level permission user will automatically have access to permissions listed underneath that option.
Read permission is the lowest level of permission. A user with Read access can view tags, triggers and variable but can’t change them.
Edit permission allows a user to add a new workspace, edit tags, triggers and variables but can’t make them live.
Approve permission allows the user to approve changes by other users, create container versions but not make them live.
Publish is the one with most authority and can do everything listed above and publish the tags to live environment.
Once you set permissions, then click on Done. On the user add screen, you will click on Invite button.
Now, let’s look at Container Administration.
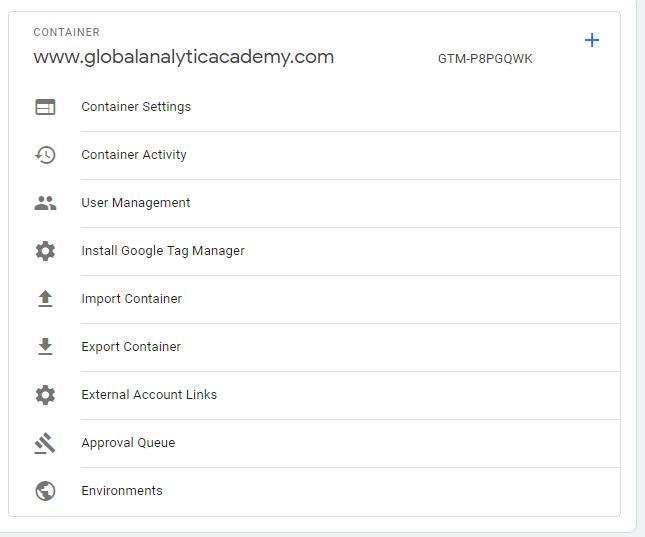
Figure: Container Administration
You can create a new container in this interface by clicking on the + sign in top right corner. The screen is like what you saw when you created the first container.
Let’s look at various other options on this screen
Container Settings option lets you change the name of the container or delete the container that you are in.
Container Activity shows you every single change that has been made to this container. Just like Account Activity this option is a great way to make sure there is no unauthorized changes to your account.
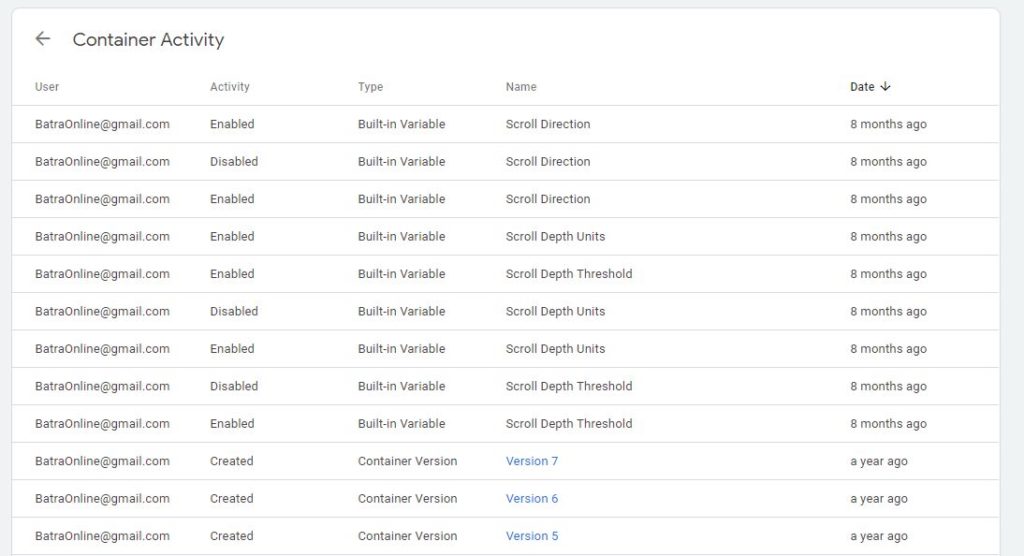
Figure: Container Activity
User management allows you to add a new user to the container. It is very similar to adding a user to account with a small difference. In this case, instead of picking the container the users should have permissions to, you are giving the user permission to the specific container.
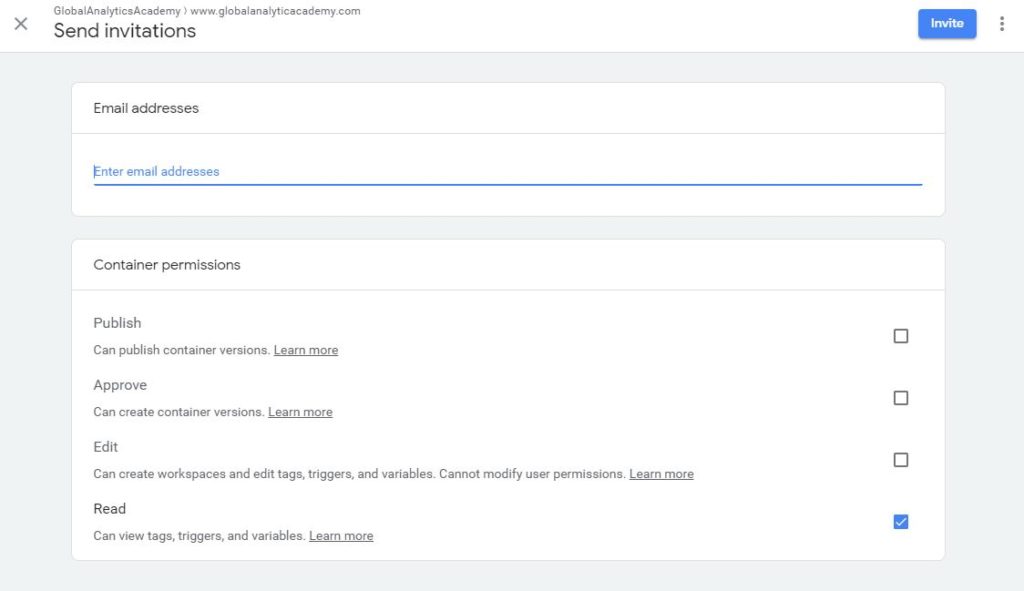
Figure: Container User Add
Install Google Tag Manager gives you the JavaScript code that you need to put on your web pages.
Import container options allows you to import container information from a file that contains the tags, triggers etc. This, along with next option Export Container allows you to move tags, triggers, variables etc. from one container to another. We are not going to cover this functionality at this point.
External Account Links options allows you to approve link requests and activities from an external account. This eliminates the need to implement these external account tag in Google Tag Manager. Examples of such an account is DoubleClick Campaign Manager. Once the requests are sent to Google Tag Manager, you will be able to see them in the Approval Queue option. This is where you can approve or delete the requests.
Environments Option allows you to specify various environments where you can test or publish live tags.
Organizations that want to preview their container changes in a test environment before those changes are published can use this feature to specify those environments here and then publish the tags to a specified environment such as development, test, staging, production etc.
Once you are ready to publish a container you will see a list of environments that you specify here. At that time, you can select the environment you want to publish your container to.
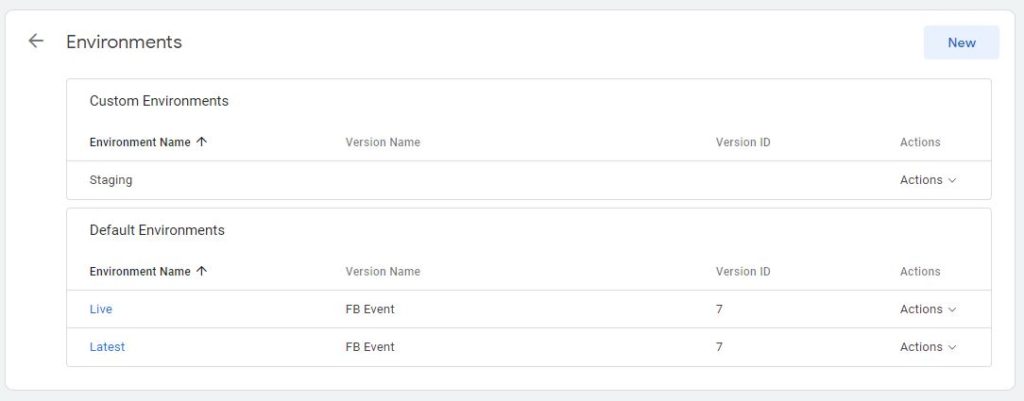
Figure: Container Environment
Previous Chapter: Overview of Google Tag Manager Interface
Enroll in our Google Tag Manages courses
- Google Tag Manager (GTM) Online Training Course - From Zero to Hero
- Google Tag Manager Advanced Applications
Want to Learn Web & Digital Analytics? Enroll in a Web & Digital Analytics Course