
A few months ago a client reached out in a mild panic. Someone on their team had used the same password across multiple tools. One of those tools had a data breach. By the time they noticed unusual activity in their Mixpanel project, a contractor account that should have been deactivated months earlier had been sitting exposed with full analyst access.
Nothing catastrophic happened. But it was close enough that they immediately asked me: what’s the fastest way to make sure this can’t happen again?
Two-factor authentication was the first answer. Not because it solves every security problem, but because it means a stolen or reused password alone is no longer enough to get into your Mixpanel organization. An attacker also needs the second factor — and that’s sitting on someone’s phone.
This post walks through how to enable 2FA for your Mixpanel organization, how individual users set it up, and what to do when someone loses access to their authentication app.
How Mixpanel 2FA Works
When you enable two-factor authentication at the organization level, every user in that organization gets prompted for a 2FA code on login — regardless of whether they use a traditional username and password or Google social login (OAuth). Both login methods are covered.
There’s one exception: users who authenticate via SSO (SAML-based Single Sign-On) are exempt from the 2FA prompt. SSO handles identity verification at the identity provider level, so Mixpanel’s built-in 2FA doesn’t apply to those accounts. If your organization has SSO enabled, you won’t see the 2FA option at all — the two features are mutually exclusive.
For everyone else, the flow is straightforward. Once an org admin turns on 2FA, any user who hasn’t set it up yet will be prompted to configure it on their next login. They don’t get into Mixpanel until that setup is complete.
Part One: Enabling 2FA for Your Organization
This is the admin side of the setup. Only organization admins can do this step.
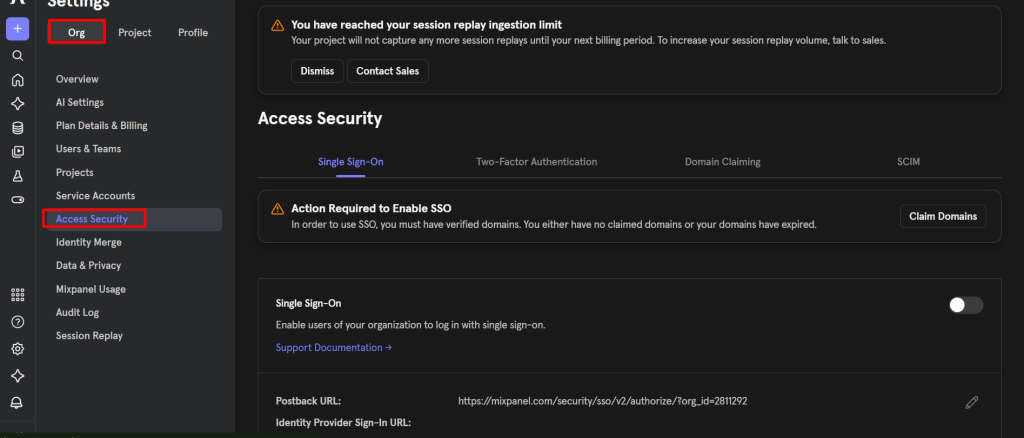
Step 1: Go to Organization Settings and open Access Security.
Click the settings gear icon and navigate to Organization Settings. Select Access Security from the left-hand menu.
Step 2: Toggle on Two-Factor Authentication.
In the Two-Factor Authentication section, you’ll see a toggle. If it’s gray, 2FA is off — click it to enable. If it’s purple, it’s already on. The same toggle disables it if you ever need to turn it off.
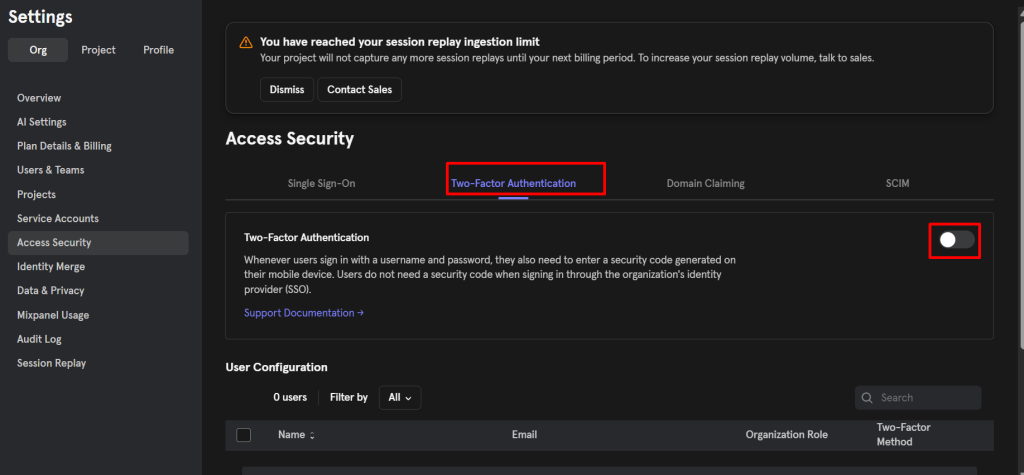
Step 3: Verify your password to confirm the change.
A “Verify Mixpanel password” prompt will appear. Enter your password and click Confirm.
One thing to know here: if you log in using Magic Link or Google Sign In and have never set a Mixpanel password, you won’t have a password to enter at this step. You’ll need to go to your personal settings first and create a password before you can enable 2FA for the organization.
Once you confirm, 2FA is active for the entire organization immediately. Any user who logs in next and hasn’t set up their second factor will be prompted to do so before they can access anything.
Part Two: Setting Up 2FA as an Individual User
After an org admin enables 2FA, individual users complete their own setup. There are two paths to do this.
Option A: Setup Through the Login Flow
The most common path. On a user’s second login after 2FA has been enabled, Mixpanel will prompt them to set up an authentication method before they can continue.
Step 1: Choose the authentication app option and download an app if you don’t have one.
Mixpanel supports OTP-based authenticator apps. The ones that work well in practice are Google Authenticator, Authy, and Microsoft Authenticator. If you don’t have one already, download any of those before proceeding. Authy is worth recommending to your team specifically because it supports encrypted cloud backups of your 2FA tokens — which matters a lot when we get to the “lost phone” scenario later.
Step 2: Scan the QR code with your authentication app.
Mixpanel will display a QR code on screen. Open your authenticator app, add a new account, and scan the code. The app will generate a 6-digit TOTP code that refreshes every 30 seconds.
If you can’t scan the QR code — maybe you’re setting this up on the same device where your authenticator app is installed and can’t scan the screen with itself — click “Can’t scan QR code?” Mixpanel will show you a manual secret key that you can type directly into your authenticator app to complete the setup.
Step 3: Save your recovery codes before finishing.
This is the step most people skip and later regret. Before completing setup, Mixpanel shows you a set of recovery codes. These are one-time-use codes that let you log in if you ever lose access to your phone and can’t generate a TOTP code.
Download them or copy them somewhere secure — a password manager is the right place. Do not screenshot them and leave the screenshot in your camera roll. Do not email them to yourself.
The recovery codes screen is the only time Mixpanel will show you those codes. If you close the screen without saving them and later lose your phone, your only option is to contact either your org admin or Mixpanel support to reset your 2FA. Save them now.
Option B: Setup Through Personal Settings
If a user wants to set up 2FA proactively before they’re prompted on login, or if they missed the setup flow and want to trigger it manually, they can do it through their personal settings.
Go to the settings gear icon → Personal Settings → Your Profile and click “Set Up Method.”
Mixpanel will ask the user to log out and log back in to complete the setup process. Once they log back in, they’ll go through the same QR code and recovery code flow described above.
Part Three: Changing Your Authentication App
People switch authentication apps. Someone moves from Google Authenticator to Authy for the backup features, or their company standardizes on Microsoft Authenticator. Mixpanel supports changing your 2FA method, but there’s an important thing to know before you do it.
Changing your 2FA method resets it entirely.
This means your existing authentication app setup is wiped. You’ll set up from scratch with the new app. Your previous recovery codes will no longer work — you’ll get a new set during the new setup flow.
To change your method:
- Go to settings gear → Personal Settings → Your Profile and click “Change Method.”
- Mixpanel will prompt you to log out. Log out, then log back in.
- On login, you’ll go through the full 2FA setup process again — scan the new QR code, save new recovery codes, done.
Don’t initiate a method change unless you’re ready to complete the new setup immediately in the same session. If you trigger it and then get interrupted, you’ll be in a state where your old app no longer works and your new one isn’t configured yet.
Part Four: What to Do When You’re Locked Out
This is the section most teams don’t read until they need it urgently. Read it now.
If you have your recovery codes
On the 2FA login prompt, click “Need help? Use a recovery code to sign in.” Enter one of your saved recovery codes and click Login.
Each recovery code is single-use. Once you use one, it’s gone. If you work through all your recovery codes without re-establishing access to an authenticator app, Mixpanel will prompt you to reset your 2FA method on your next login.
If you don’t have your recovery codes
This is the harder situation. You have two options:
Contact your organization admin. Admins can reset 2FA for any user in the organization. Once they reset it, you’ll be able to set up a fresh 2FA method on your next login. The steps for admins are covered in the next section.
Contact Mixpanel support. If you’re the org admin and you’re the one locked out, or if there’s no active admin who can reset your 2FA, reach out to Mixpanel support directly. They have processes for verifying identity and restoring access.
The practical lesson here is simple: the recovery code moment during setup is not a formality. Treat those codes like a spare house key. Store them in your password manager, not your memory.
Part Five: Resetting 2FA for a User (Admin Guide)
As an organization admin, you can reset 2FA for any user in your organization. This is the action you’ll take when someone loses their phone, gets a new device, or is otherwise locked out.
- Go to Organization Settings → Access Security
- Click on the 2FA tab
- Select the user or users whose 2FA needs to be reset
- Click Reset Two-Factor Authorization
That’s it. The user’s existing 2FA setup is cleared. The next time they log in, they’ll be prompted to set up 2FA again from scratch — new QR code, new recovery codes, fresh start.
If you’re managing a team of any size, it’s worth knowing this workflow exists before someone comes to you in a panic because they broke their phone over a weekend and can’t get into Mixpanel Monday morning. You can resolve it in under two minutes.
Practical Notes for Teams Rolling Out 2FA
Communicate before you enable it. When you flip the 2FA toggle, the next person to log in immediately hits a setup prompt they weren’t expecting. That’s disorienting. Send a short message to your team a day or two before you enable it — “we’re turning on 2FA for Mixpanel this Thursday, you’ll be prompted to set it up on your next login, here’s what you’ll need” — and the support questions drop dramatically.
Recommend Authy specifically if your team is prone to phone changes. Unlike Google Authenticator (which historically didn’t support backups, though this has improved), Authy stores encrypted backups of your tokens. When someone gets a new phone, they restore Authy and their Mixpanel 2FA is already there. This significantly reduces the “I got a new phone and now I’m locked out” admin reset requests.
Make recovery code storage part of your onboarding instructions. If you document how new team members set up access to your analytics tools, add a line about saving recovery codes to the company password manager. One line in an onboarding doc prevents multiple lockout incidents over time.
SSO users don’t need to do any of this. If part of your team authenticates through your identity provider via SAML SSO, they’re completely outside the Mixpanel 2FA flow. Their authentication security is handled at the IdP level. Don’t send them instructions about setting up an authenticator app — it’ll just create confusion.
If you use Magic Link or Google Sign In as your own login method, set a Mixpanel password first. You need one to confirm the org-level 2FA change. It’s a one-time setup in your personal settings, but if you skip it you’ll hit a wall when you try to enable 2FA for the org.
The Bottom Line
2FA in Mixpanel is a ten-minute setup with a meaningful security payoff. A compromised password stops being a full account compromise the moment a second factor is required. For an analytics platform that holds behavioral data on your users and gives access to your conversion metrics, that’s worth the minor friction of opening an authenticator app at login.
Enable it at the organization level, communicate the change to your team, make sure everyone saves their recovery codes, and document the admin reset process somewhere you can find it quickly when someone inevitably loses their phone.
It’s the kind of thing that feels unnecessary until the one time it isn’t.