
One of the best practices of any analytics implementation is testing and verifying that the analytics set up is actually working.
You cannot just finish setting up your Google Analytics property, leave it and hope that it works. You have to establish for sure that data is flowing from your website to your google analytics account.
This is the essence of trouble shooting your google analytics set up – to establish for sure that GA4 is collecting the data and information that you want to track from your website. You are mainly trying to find out whether visits or any other events that you have tagged such as downloads, scrolls, video plays, shares, link clicks; any events at all, are being collected and reported in your Google Analytics account.
There are a number of ways you can test and ascertain that your analytics implementation is working. Today, we will discuss the following three:
- Using the real-time report in GA4.
- Using Google Tag Manager and Tag Assistant.
- Using the DebugView in GA4.
- Using the Realtime report in GA4
This report shows activity of users on your website as it happens, in real-time.
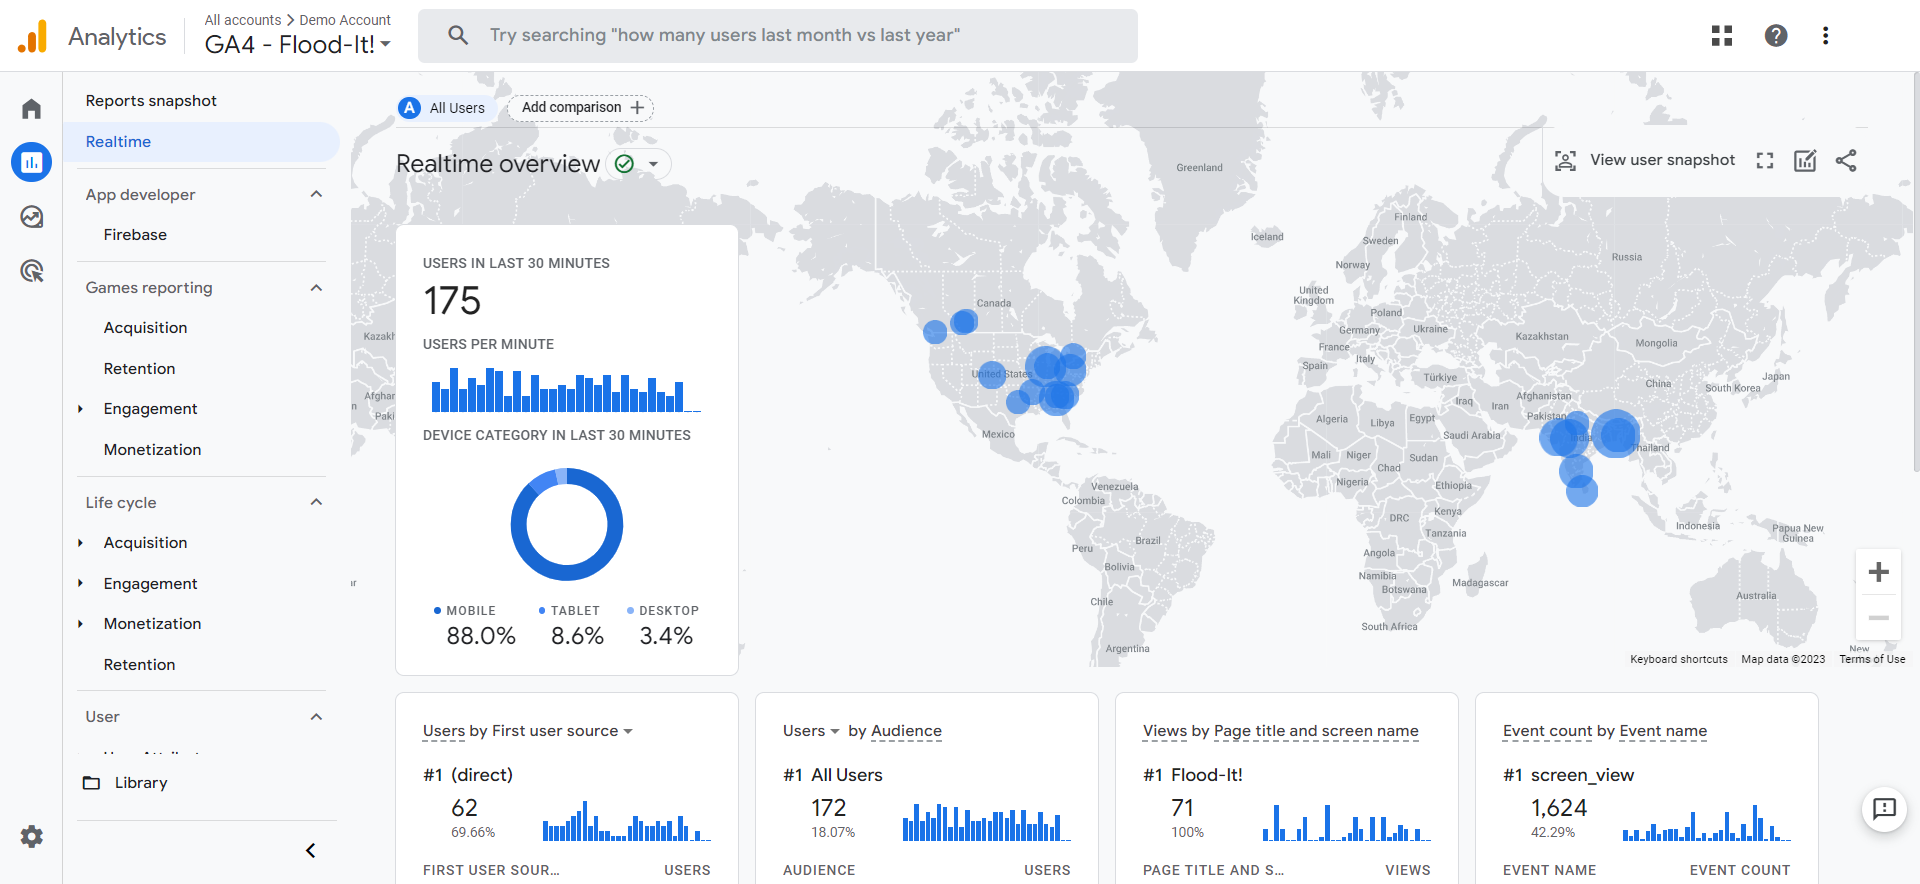
It shows the interactions that users are going through on your website – the pages they are on; the links they are clicking and more.
Where are users visiting your website from – is it Google or Facebook? What is the actual location in terms of place and region? You can see all this the in the Realtime report.
It shows this information during the last 30 minutes, minute by minute.
You can try it – just visit your website, click around and generate some activity, visit a few pages and then go to Reports > Realtime in your analytics account. You should be able to see your own activity.
The Realtime report is undoubtedly one of the quick and easy ways you can monitor activity on your website and verify that your analytics set up is working and that information is flowing from your website to your Google Analytics.
But that’s not all.
2. Using Google Tag Manager and Tag Assistant
Google Tag Manager is Google’s tool for installing, storing and managing tags on a website. A tag is a piece of code that tracks and collects information about users and their behaviors on a website. This information is mostly used for marketing purposes and as such, the tags are also known as marketing tags.
Some examples of tags include Google Analytics tag; Google AdWords tag and Facebook pixel tag.
With these tags installed, Google Tag Manager allows you to track interactions and user behavior on your website. You can track:
- Link clicks
- Button clicks
- Newsletter signups
- Form registrations
- Adding items to cart
- Removing items from cart
- File downloads
- Scrolling
- Video plays
- And much more
In order to track an interaction on your website, it has to be set up as a tag. The tag is then fired or executed when a user triggers it by taking an action associated with the tag on your website (e.g., by clicking a link or loading a page). This information is then sent to your Google Analytics property as an event that has taken place on your website.
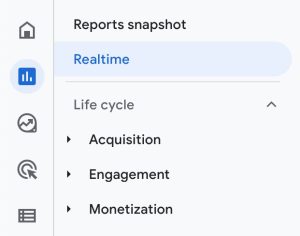
Troubleshooting your google analytics set up using google tag manager is, therefore, verifying that these tags that you have set up to collect information about various user interactions on your website are actually executing; or as put GTM lingo, that they are firing. In Google Tag Manager, you do this through the preview and debug mode.
Using the preview and debug mode in google tag manager to verify tags
The preview and debug mode is Google Tag Manager’s functionality that enables you to verify that tags are firing properly. Once the preview and debug mode is enabled in google tag manager, the following happens:
- A new browser window opens with a preview of your website.
- Another window also opens showing the debug interface with information about your tags.
This is made possible by Google’s Tag Assistant, a Chrome Extension for debugging and testing tags that is also connected to Google Tag Manager.
As you click through your website in the preview browser window, the debug interface window shows information about how your tags are firing.
Below is a demonstration of how this actually works:
Open your GTM account. Ensure that Google Tag Assistant is already installed on your browser. If it’s not, please install it from here.
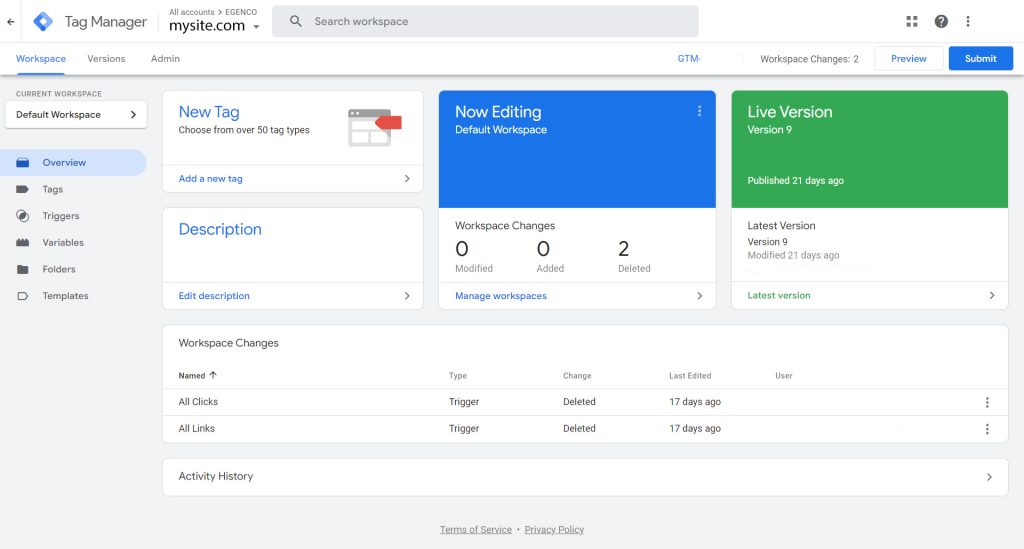
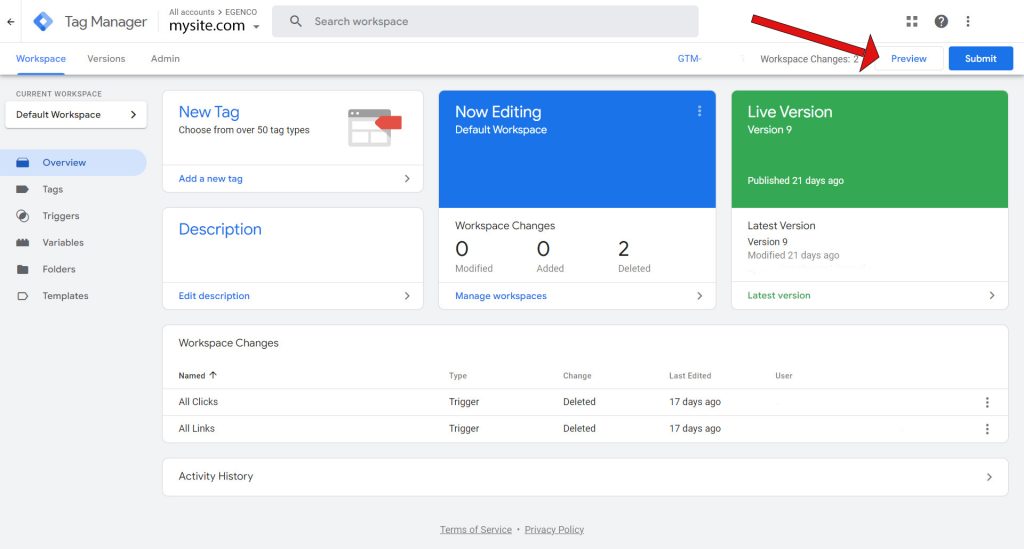
In your GTM account, click the Preview at the top right corner.

Google Tag Manager will prompt you to enter your web address and connect to Tag Assistant
Once you enter your web address and click connect, your website will open in a new preview window.
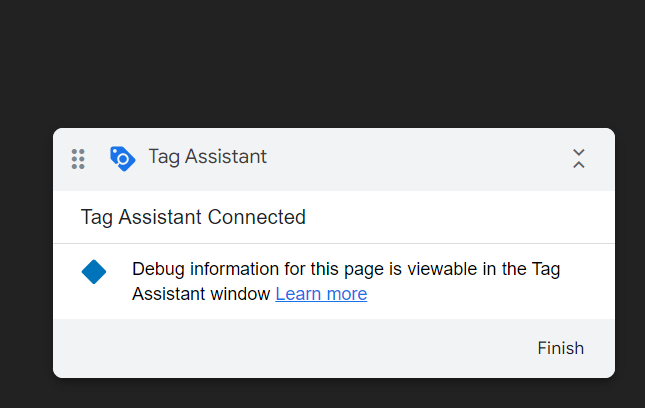
Another window will also open showing the debug interface with information about your tags.
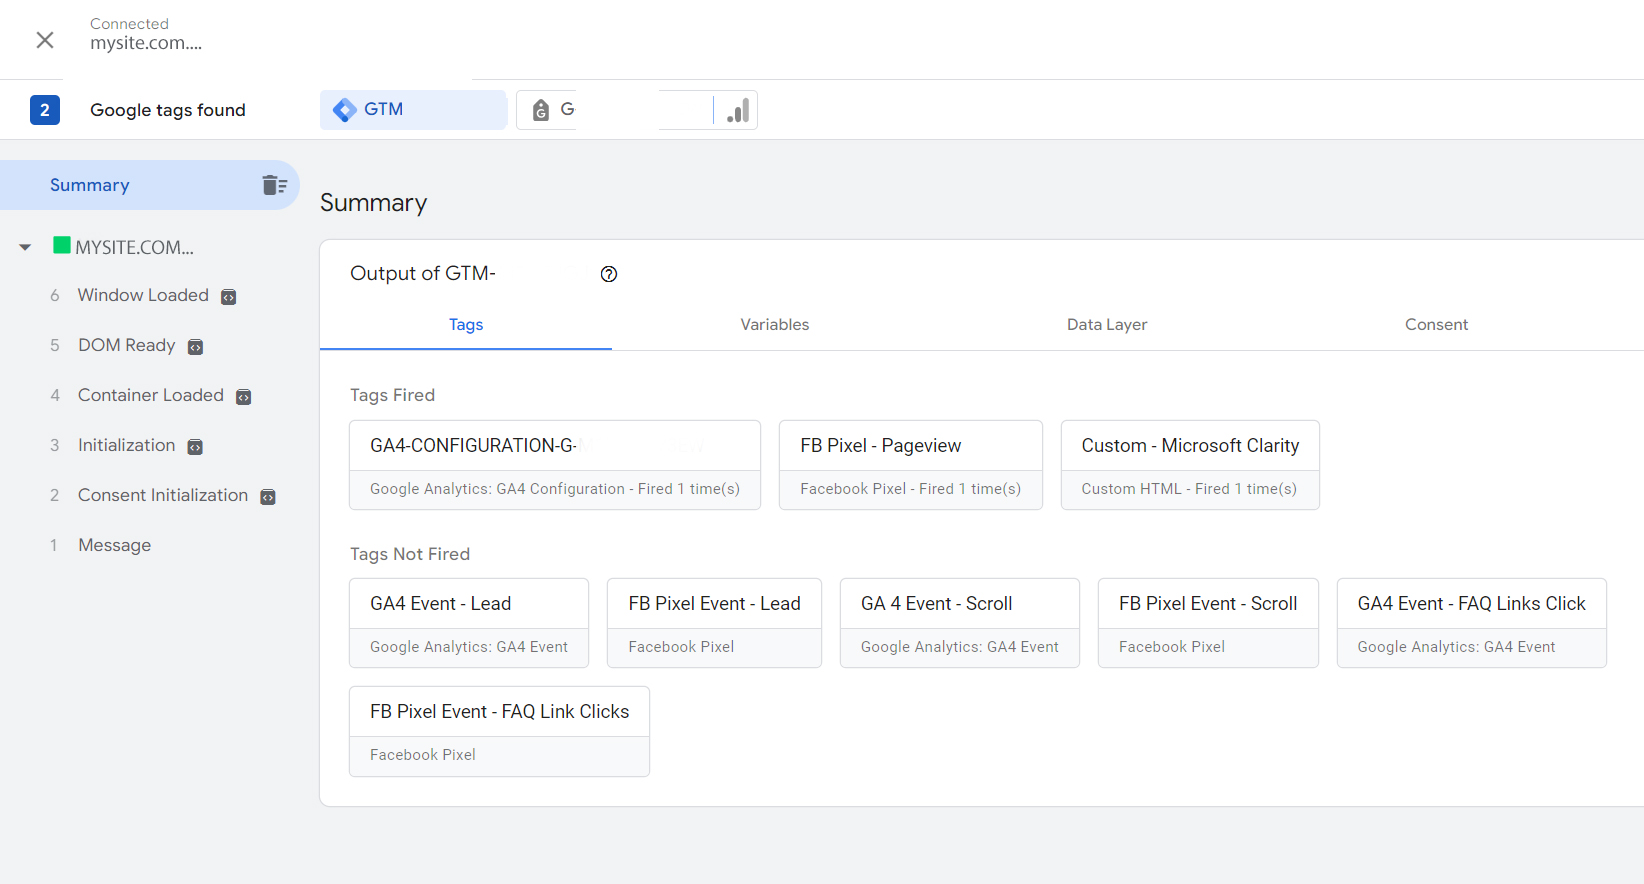
Once you click around and interact with your website in the preview window in tag assistant, the debug interface will update information about the tags that are firing from your website.
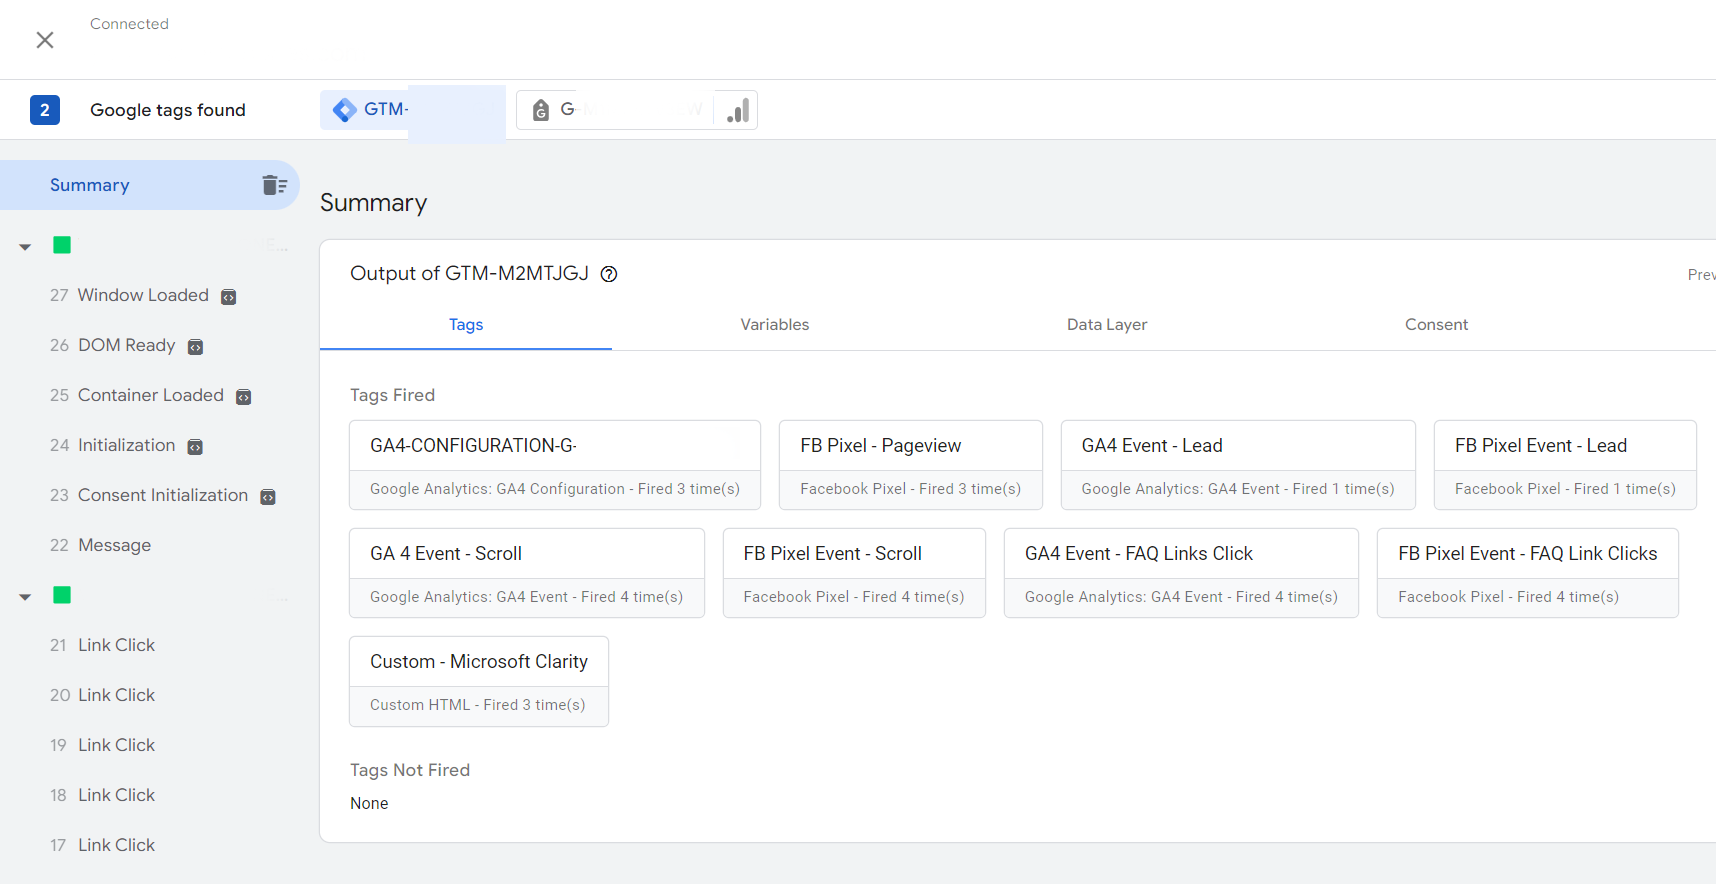
You use this information to verify whether tags that you set up are firing successfully or not, and hence ascertain that information is flowing from your website to your Google Analytics.
One more way of troubleshooting your google analytics set up to go!
3. Using the DebugView in GA4
GA4’s DebugView is another feature that is used for troubleshooting your analytics implementation. Like the Realtime report, it also enables one to monitor events happening on the website in real time – only that data in the DebugView is more granular as it comes with user properties and their parameters.
The DebugView is found in the google analytics account by going to Admin > DebugView (under the account property section).
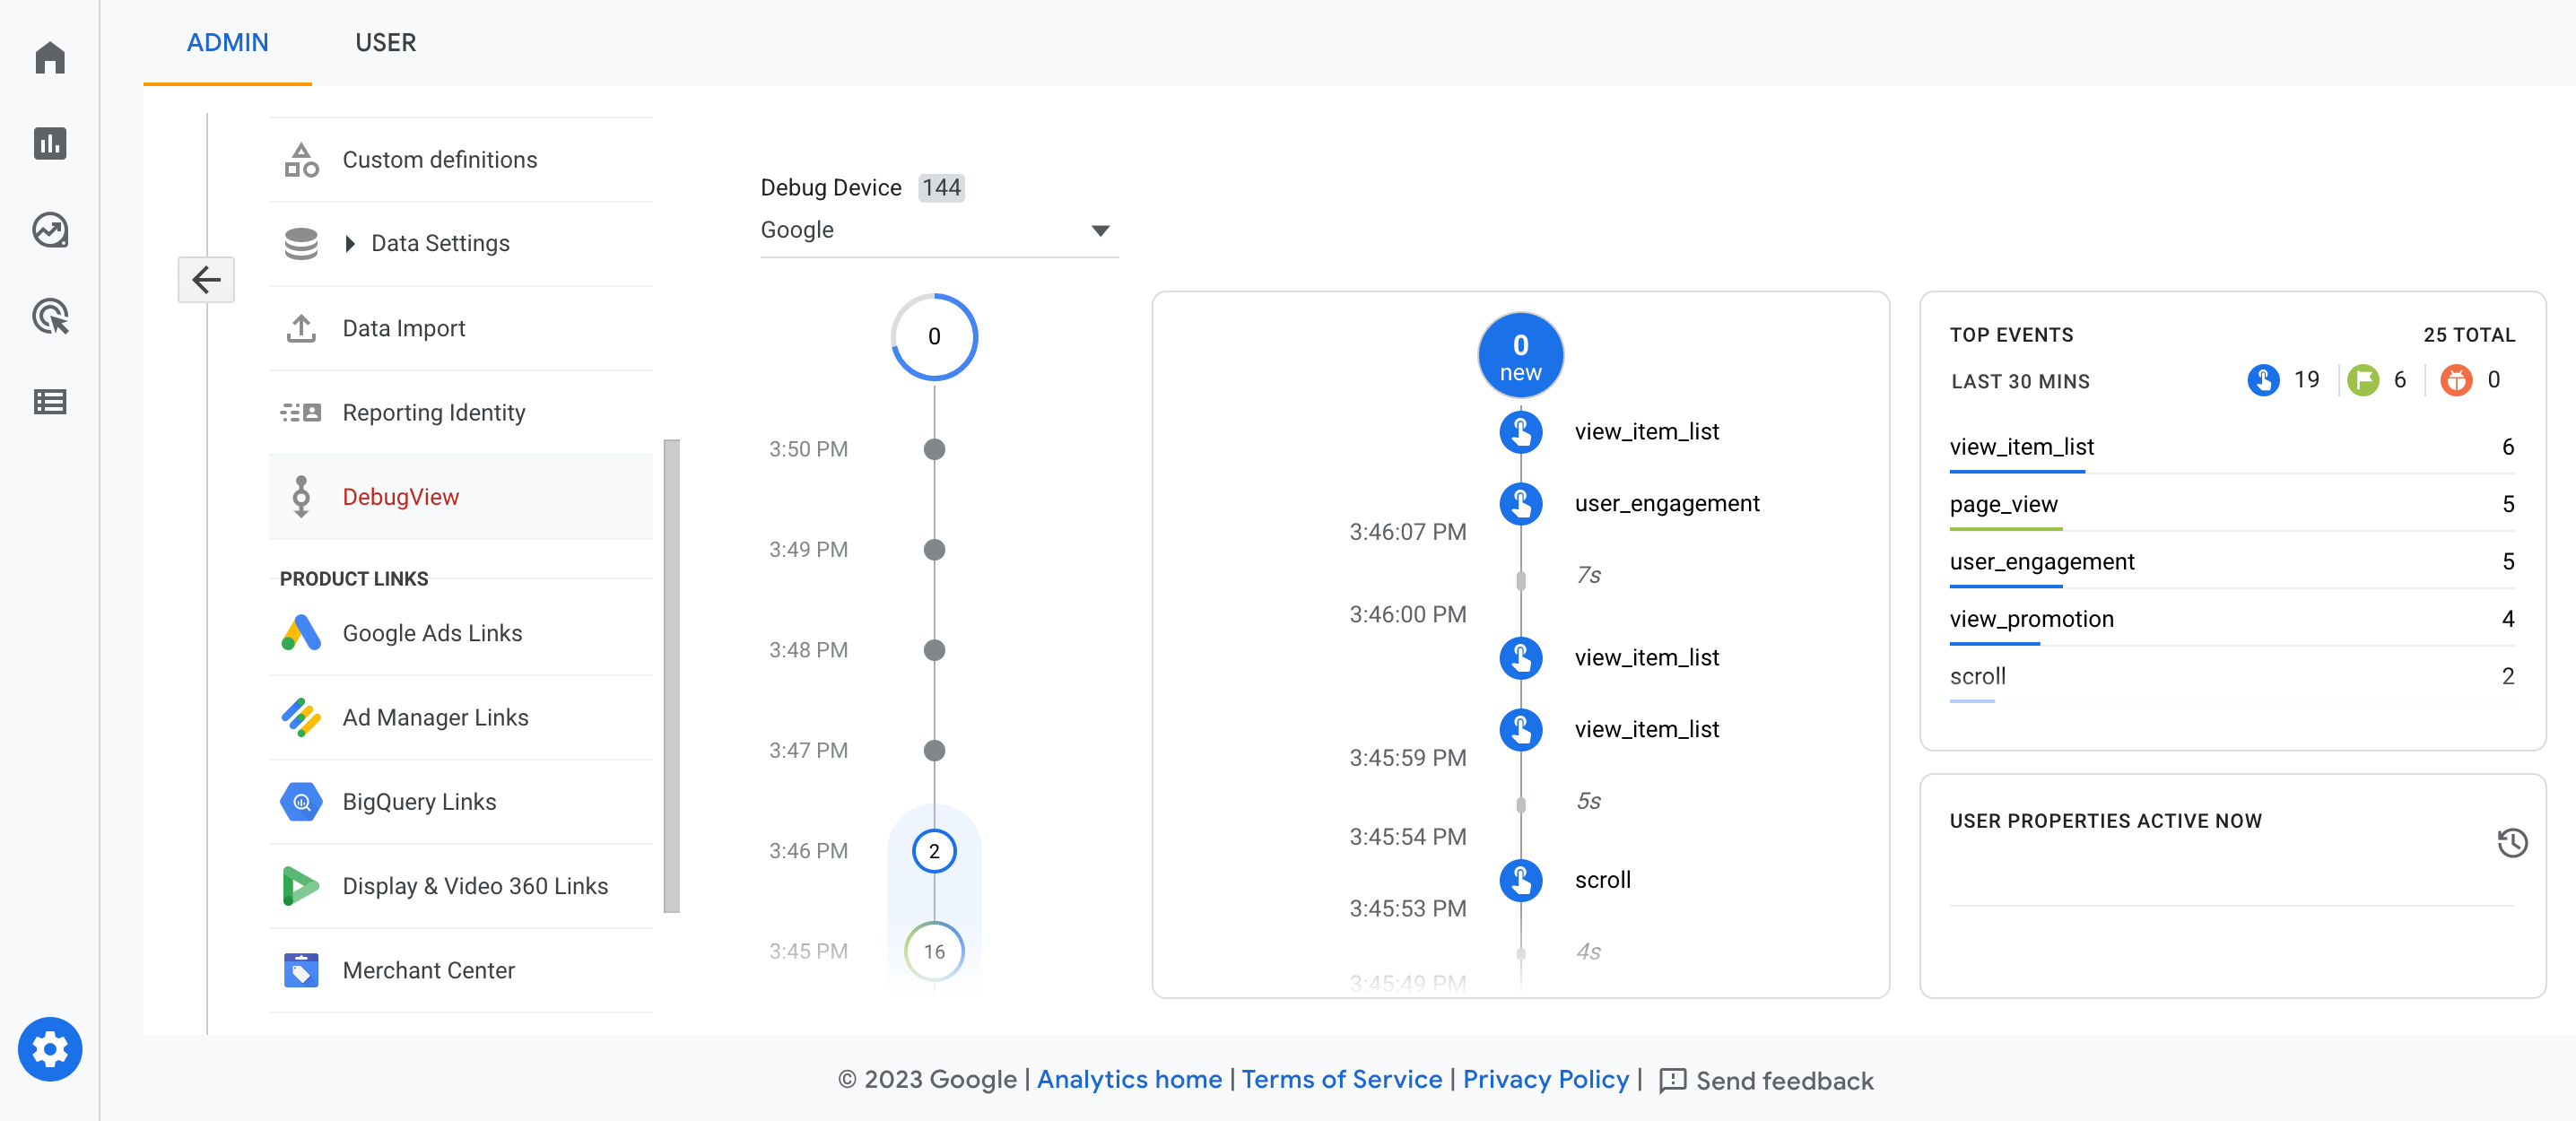
Essentially, when troubleshooting using DebugView, you are trying to establish whether GA4 is receiving the various events that you have set up, alongside their associated parameters and user properties.
In order to use the DebugView, one must enable debug mode. This can be done in a number of ways including using Google Analytics Debugger Chrome extension and the GA4 debug_mode parameter.
The most common way of enabling debug mode, however, is by using Google Tag Manager’s Preview mode. As seen above, this is easily done by clicking Preview at the top right corner in your Google Tag Manager Account.
Once you enable debug mode, go to Admin > DebugView in your GA4 account. Start using your website and see the events as they are triggered.
We have written extensively on How To Enable and Use GA4’s DebugView. Read it here.
Conclusion
That’s it! Now you should be able to troubleshoot your Google Analytics set up and verify that it is working with these three ways:
- Using the real-time report in GA4.
- Using Google Tag Manager and Tag Assistant.
- Using the DebugView in GA4
However, there are times where the above tests fail – there is no information from your website showing in your Real-time report or DebugView – what does this mean and where do you look?
We have written on Why you may not see data from your website in Google Analytics and what you can do to fix it. Read it from here.
Remember. Don’t just trust your analytics set up. Verify that it works!
We offer Google Analytics 4 help and support
We are here to help you with all your Google Analytics needs. We can get you up and running in no time, train you and your team on how to set up and use Google Analytics 4 and other digital analytics tools.
Contact us at support@optizent.com or fill out the form at the Contact Us page