
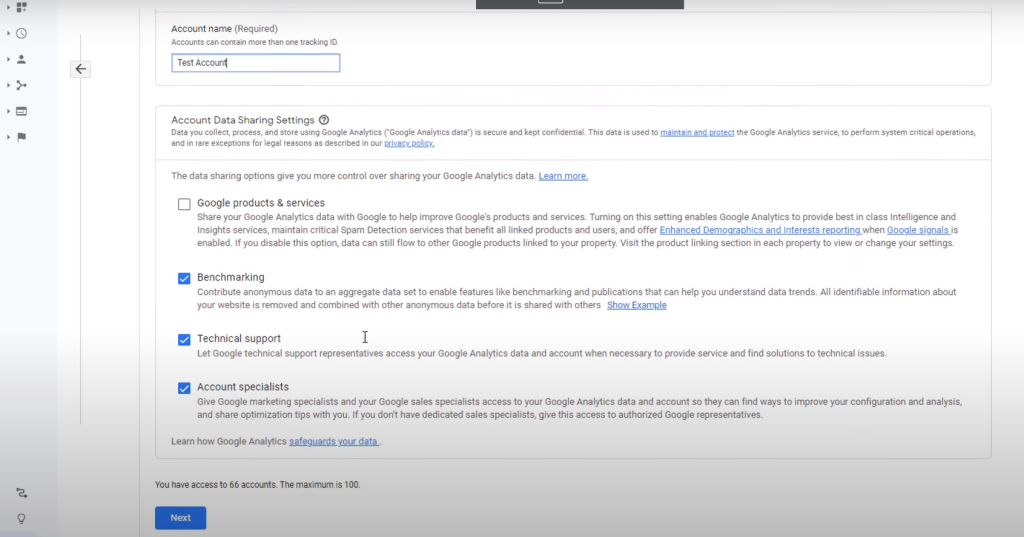
Step by step information on how to install Google Analytics on Blogger. The first step is to make sure to have a Google Analytics account. If you don’t, then go to google.com/analytics. It’ll bring the home page. Click on start for free, which will create an account and set up Google Analytics property. Give the account a name, and then click on next. Then give the property a name. Property is the website where we should add Google Analytics code. It’s just a name to identify the property. Then click on next, pick the options that apply, and click on create. Read the terms and then click on I accept, which creates the Google Analytics property.
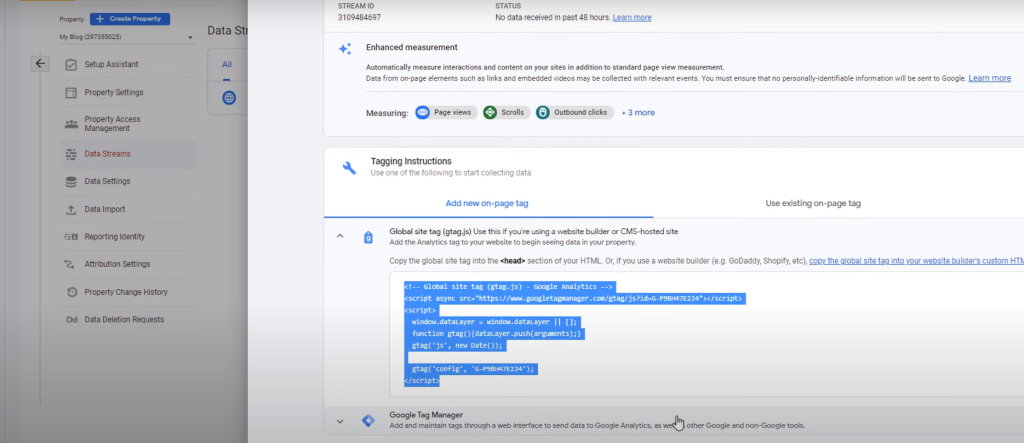
Here pick the option on where it will be implemented in Google Analytics since it is implemented on Blogger, a website, select web. Provide the URL of the blog and then provide a name and click on create a stream. Click on the global site tag option and obtain the code to add for the Blogger website. We can also implement Google Analytics through Google Tag Manager.
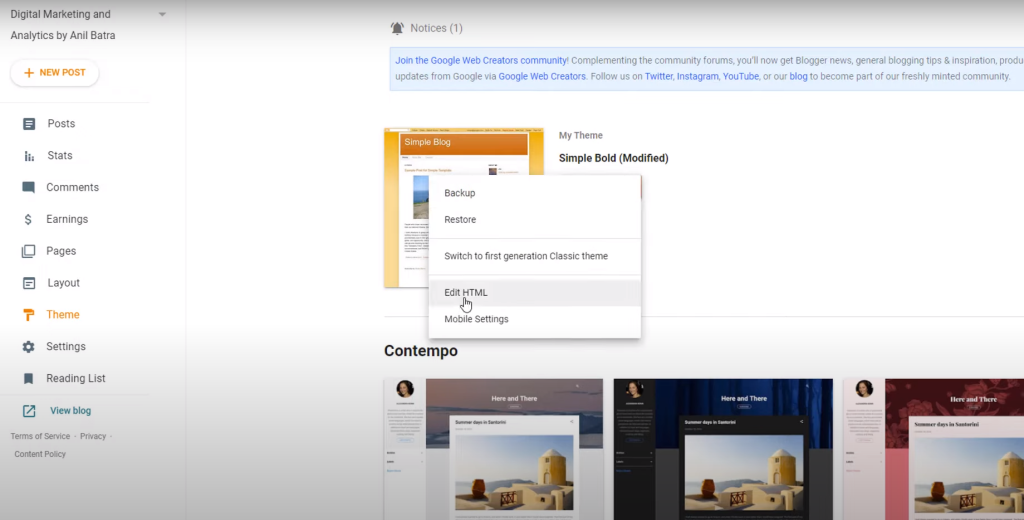
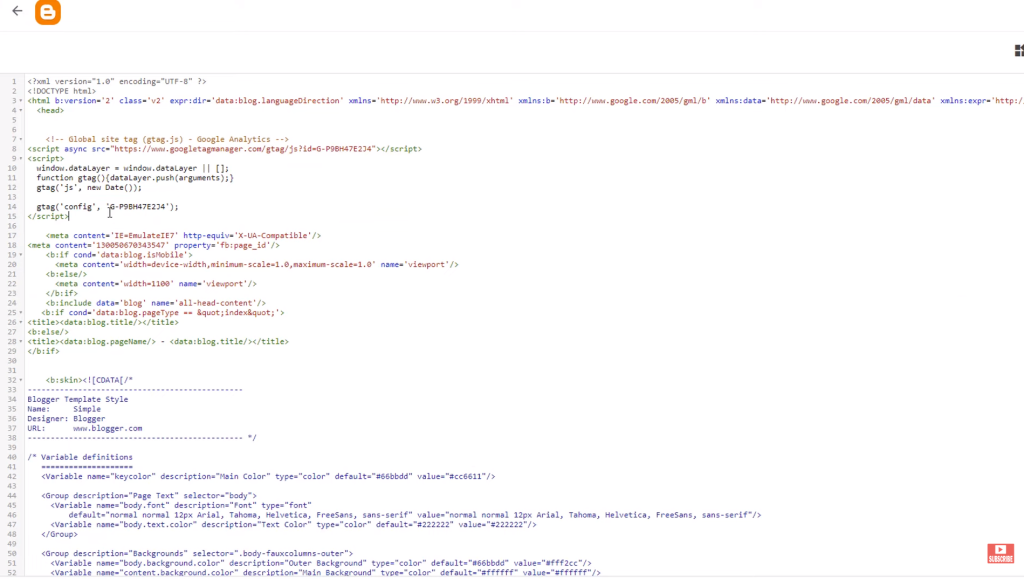
Head over to Blogger. If it has multiple blogs, make sure to select the right blog. Go to the theme you have chosen and click the button named customize. Click on the drop-down and click on edit HTML. It allows editing HTML. Find the head tag and paste Google Analytics code within the head tag. Now the Google Analytics account is ready to collect the data.
Then go to Google Analytics and check the data. Go to reports real-time, browse the Blogger blog, and then go back to Google Analytics. It will show you as a user and the place you are browsing. When users visit the blog page, it’ll collect all that data. It is the setup for the latest version of Google Analytics.
To get the code implemented in Blogger again. Go to the admin panel, go to the data streams, click on the data stream and click on the global site tag. This is where to get that code again. However, if an existing Google Analytics account (Universal Analytics), also known as GA3, is already available. Then follow the same process in Blogger; however, the code will look different and available in another place.
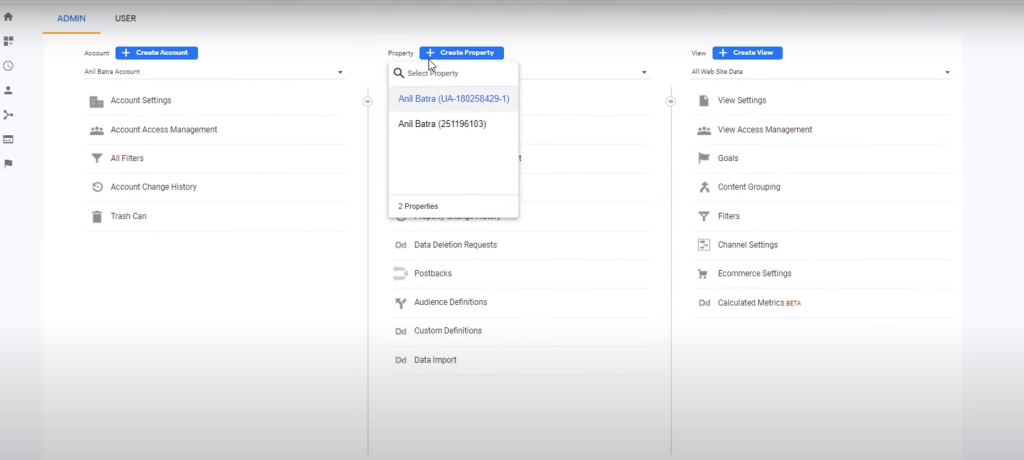
Go back to the admin panel and click on admin. So if the existing account has Universal Analytics installed already, it is identified by UA code. Google Analytics4 account does not have a UA in front of it, and that’s the way to differentiate. Universal Analytics account also has a view panel, while Google Analytics4 does not have a view panel. So that’s a significant difference. Now in Universal Analytics property, click on tracking info and tracking c7de. This is the code that has to be copied and pasted in Blogger at the same place.
So copy and go back to Blogger, go to theme customize, click on edit HTML and add the code. We can even send data to both Universal Analytics and Google Analytics accounts. Just add both the codes on the head tag. This is how to set up Universal Analytics and Google Analytics 4 on the Blogger website.
Need help with Google Analytics 4?
We can get you up and running with Google Analytics 4 as well as train your and your team to use it effectively. Reach out to us for more details.
Master Google Analytics 4
- Get your team ready for GA4 with this online self-paced course – Google Analytics 4 Masterclass
- Optizent Academy Membership – Learn GA, GA4, GTM, BigQuery, etc. and get support from fellow members