
Google analytics four allows you to customize the left-hand navigation bar. All the left navigation bar reports are organized into major buckets called Collections. Examples are Lifecycle Collection and User Collection. Within each Collection, there are specific sets of topics. Here you have acquisition, engagement, monetization, and Retention topics under Lifecycle and Demographic and Tech under User. Each topic has specific reports if this navigation doesn’t suit the business needs. Customize the experience with your Collection of topics and reports.
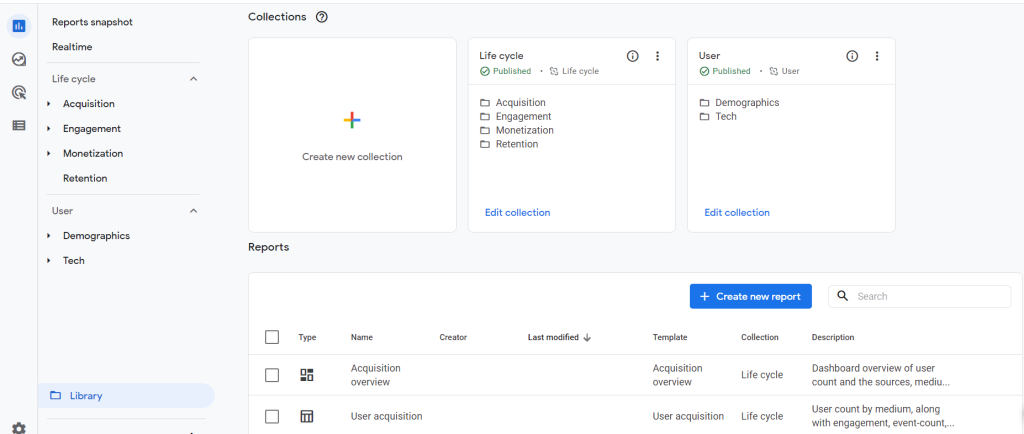
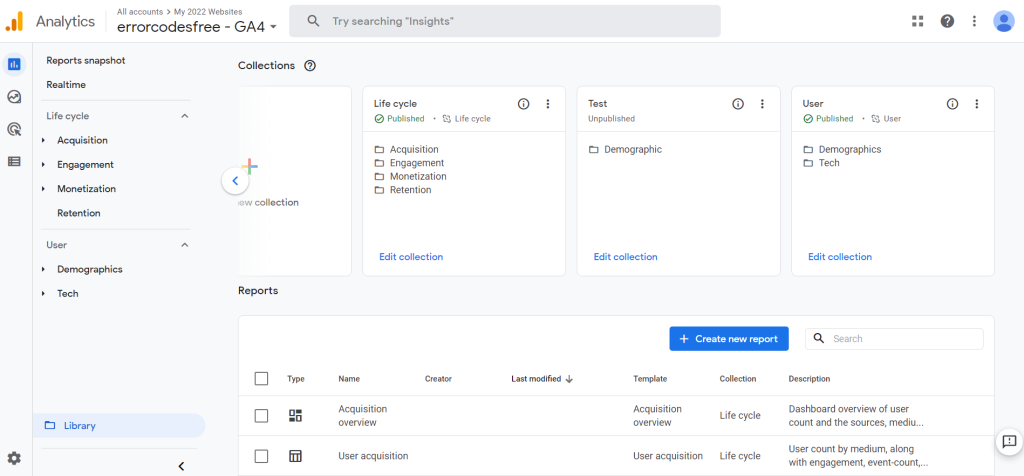
There are certain limitations regarding the number of Collections, topics, and reports you can have. Underneath the navigation, you will see the Library option. Only people with editor or administrator roles will be able to use this functionality. So if you don’t see the Library option, which means you don’t have an editor or administrator access to this property. However, if you have access, then click on Library, and that opens up an interface where you can see the current Collections and options to create new Collections and add topics and reports to them. Here you have a Lifecycle Collection with the following topics underneath it.
That’s how it maps to the Lifecycle navigation menu. You’ll notice it says Published. Then you have a Search Console which is currently unpublished. If published, it will also show up in the navigation menu and a user with topics in it. You can click on Edit Collection on any of these to edit that Collection. To create a new Collection, click on Create New Collection.
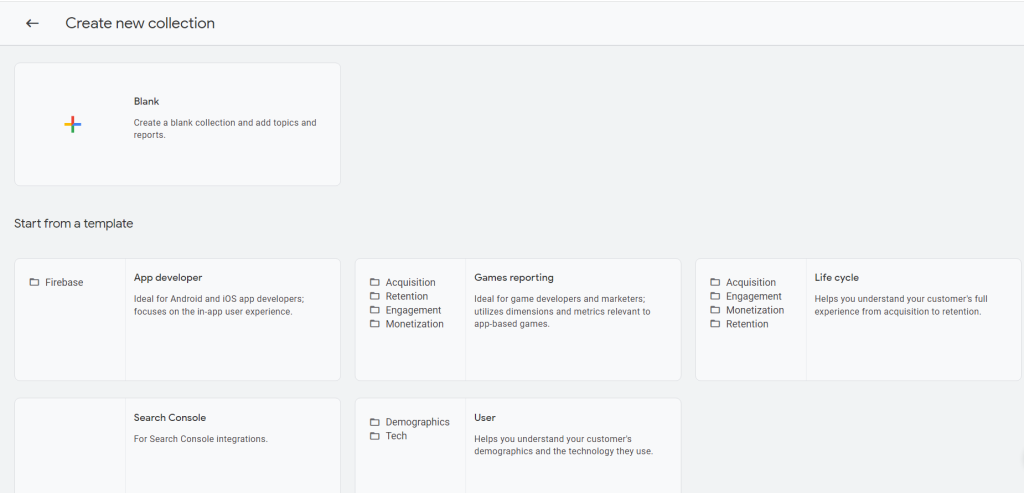
It opens up another window to pick one of the templates to start with. These predefined templates have a set of topics and reports that make sense for that Collection—using a template, pre-fills the information with the relevant topics and reports for that particular Collection. Then customize it.
Start a blank template instead of using any template, so click on the blank. It opens up an interface where you can create your Collection. Here you have a Collection Title so give it a name, and then underneath that is the option to create topics. To create a topic, click on Create New Topic, provide the topic’s name, and apply it to create the topic.
Underneath the topic, add the reports that you want. Click on Create New Topic to add reports to your topic section to create another topic. Pick the reports from this section, on the right-hand side, which has the Detailed Reports and Overview Reports. To add any report to the topic, click on the report, drag it over, and drop it.
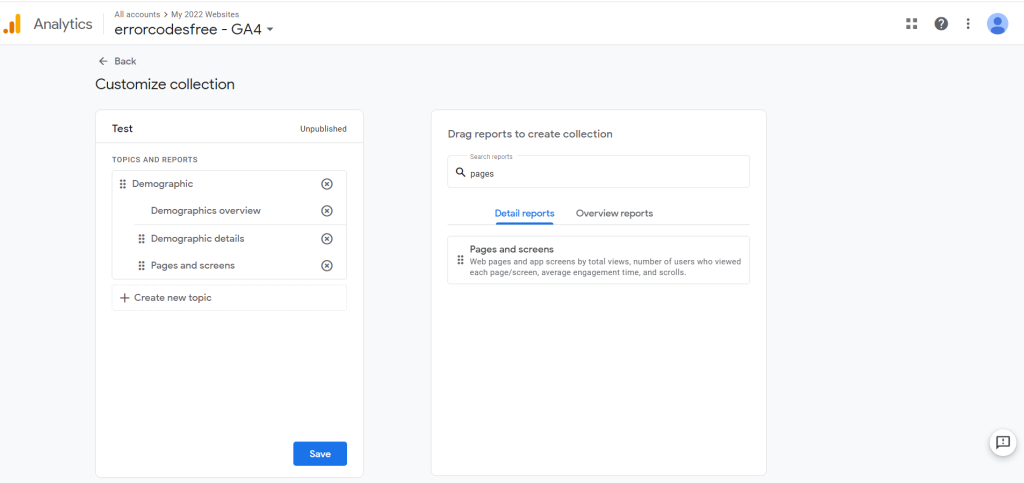
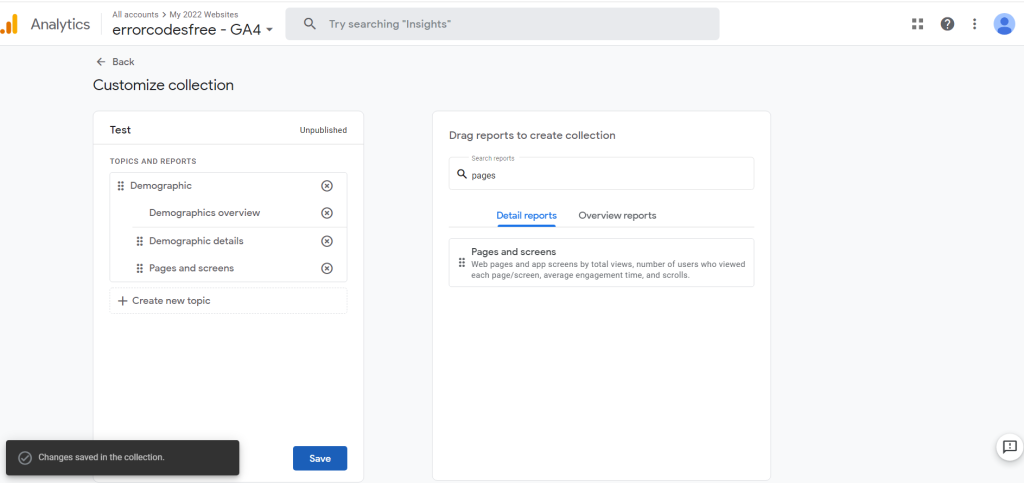
Now that report is added to the topic. You can also use the search functionality on the top for a particular report. When typing the word ‘pages’ on the search bar, it will find the report with the keyword pages. There are no matching results in the Overview Reports, so go to Detail Reports and see that they have the Pages and Screens Report. To use this report in the topic, click on it and drag it.
Now Pages and Screens is also added to the topic. Go ahead and add more reports and more topics as required. Once done, click on Save. A message pops up at the bottom when the Collection is saved. It is an indication that the changes have been saved.
After the Collection is saved, click on back to go back to the previous screen. Here it shows the Collection. However, this Collection is still unpublished. So to include this in the navigation menu, publish it. Click on the three dots and click on Publish.
Once published, the Collection will show up in the navigation bar on the right side. Expand it to see the reports. All the available reports are listed in this section. See the name of the report and the Collection it belongs to. Able to create new reports too.
To make any changes to the Collection, click on the Edit Collection link, and it goes to the screen where the Collection was created earlier. Customize the Collection again by adding or removing the topics and reports. Once done, go ahead and save it. Then click on back to go back to the Library interface. If you don’t wish to show your Collection in the navigation, click on the three dots and click Unpublish it.
It will unpublish the Collection and remove it from the navigation. However, if you don’t want the Collection, go up again to these three dots and click on Delete. It will completely delete the Collection.
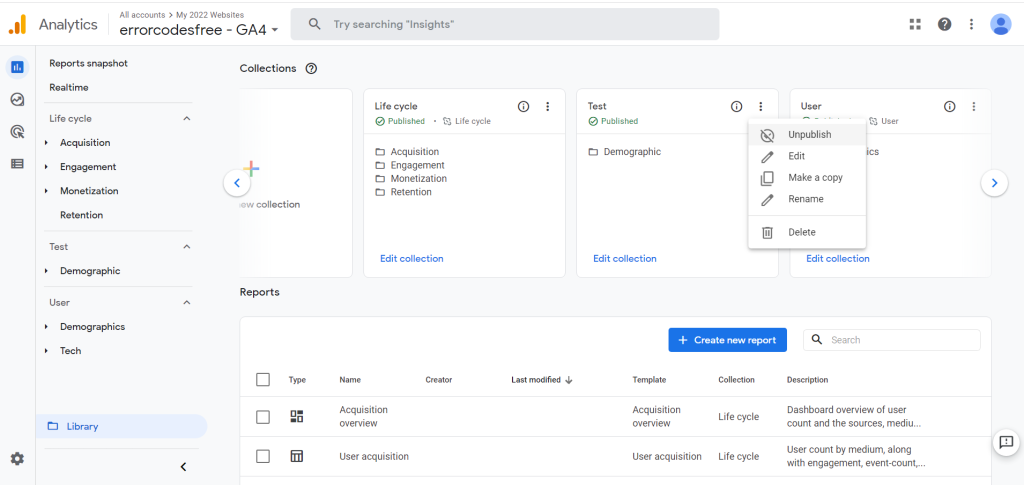
Other options available under these three dots are Make a Copy and Rename. To duplicate and start from that Collection, use Make a Copy and make changes. To rename, use the Rename option. When clicked on Edit this Collection, it shows that it was built using the Lifecycle Collection template.
Whenever a template is used, the name of that template is listed. It is an important aspect of the Library Collection. Next to the name of the template is a link icon. Whenever Google Analytics provides a predefined template, you will see the icon. By default, the status of this icon is linked.
It means that the Collection is linked to the underlying template. As a result, if Google makes any updates to the template, it adds new topics and reports, and those will automatically become available in the Collection.
If clicked on unlink the template, then any new updates from Google Analytics to this template will not be pushed to the Collection, and once unlinked, it cannot be linked back. So be especially careful about this. Do not touch it unless you have a specific business purpose. It will reflect on all users if you make any changes in the navigation. Go ahead and play with it.
Where can you learn about Google Analytics 4 and/or get training for your team?
Optizent has several options to get your team trained on various aspects of Google Analytics 4. Check out Google Analytics 4 training page.
If you are interested in an online course then signup for Google Analytics 4 Waitlist.
Who can I contact to get Google Analytics 4 setup?
Optizent does provide Google Analytics 4 setup, implementation, and upgrade from Google Analytics. Contact us at support@optizent.com for a free assessment.