
This article is about Google Analytics 4 eCommerce view_item event. When a user views an item on the online store, this event should be triggered. Using this event, we can determine which products the users are looking at and how many times, and this information helps determine which products are popular and which ones aren't. This event requires three parameters Items that contain an array containing the item details, currency which is a three-character currency code, and the value, which is the price of the item in the currency. All these three parameters are required for the view_item event to work.

To use these parameters in the event, we need to have a way to get these values on the site. Ideally, these values should be in a dataLayer. If the dataLayer does not exist, ask the developer to create one. If the developers cannot create the dataLayer, then create the dataLayer dynamically using the values on the site. Let's assume that these values exist in the dataLayer.
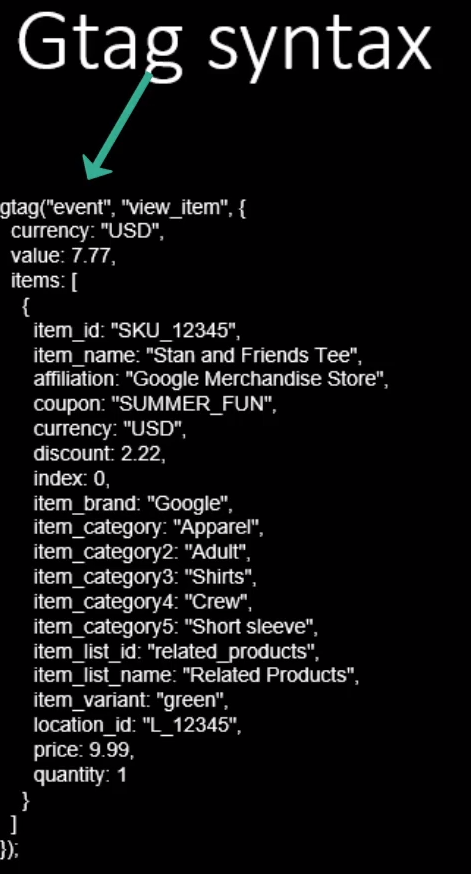
Once they are in the dataLayer, then we can either use Google Tag Manager to pull the values from the dataLayer and pass them to Google Analytics or use the GTAG function to pass these values to Google Analytics. The above image shows the syntax for the GTAG call. This call or function takes three parameters. The first value is an event, the second value is the name of that event which is view_item, and the third is the name-value pair of the parameters for that event. So, in this case, it has currency value and items. Items are an array containing the detail of the item viewed on the page.
The tag requires the developers' help because this code needs to be on the web pages. However, using Google Tag Manager, we can pull the data directly from dataLayer into Google Tag Manager and pass it to Google Analytics.
Go to Google Tag Manager and put the site in preview mode to see the dataLayer and the custom event that gets created. These are done automatically by a WordPress plugin for a WordPress website. It automatically creates this dataLayer and the custom event for other third-party platforms too. If it is a custom website, ask your developers to create this.
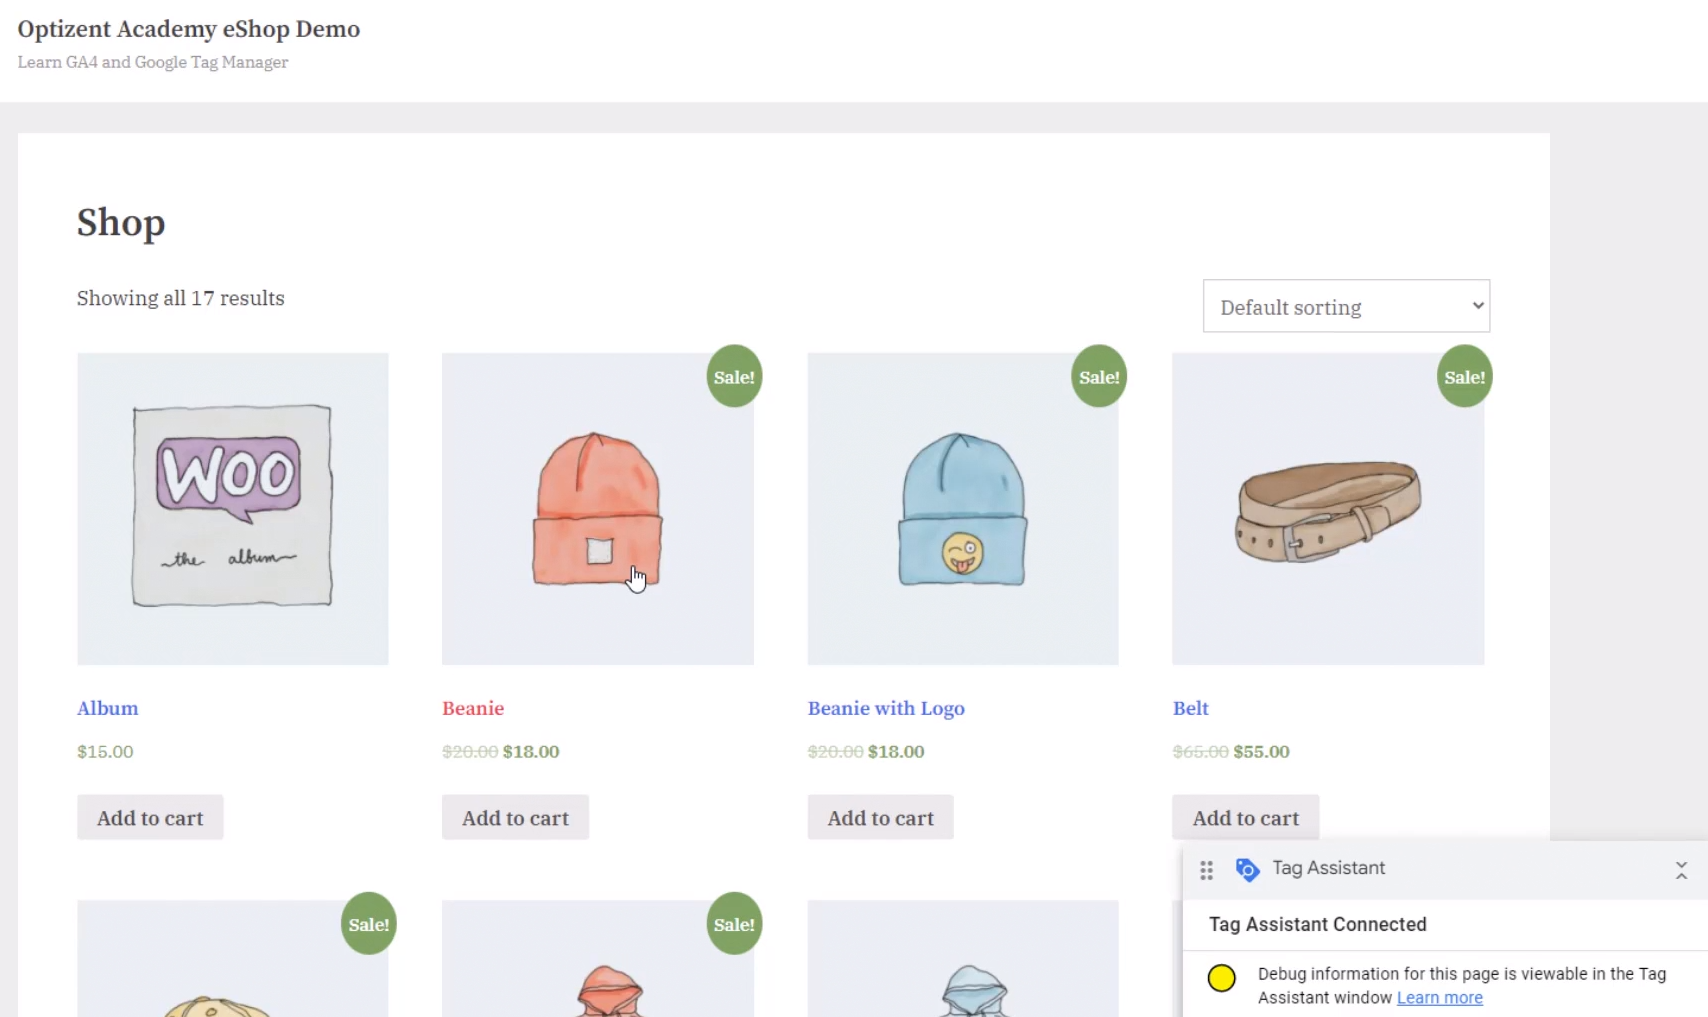
The above image is about the Google Tag Manager account for the Optizent eCommerce demo shop. Put Google Tag Manager in preview mode. Click on Connect, which launches the Tag Assistant and the demo shop. To view an item, click on it in the demo shop, and that loads the product detail page (this is what a view_item is). In order to track this in GA4 eCommerce reporting, trigger the view_item event for GA4.
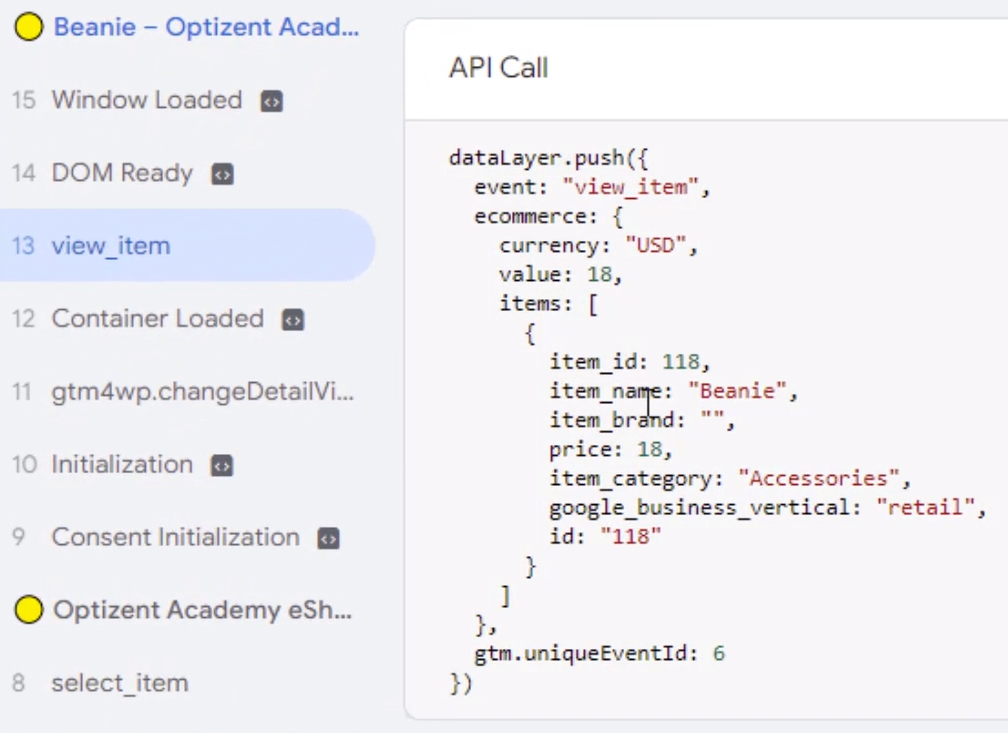
Do that when the page loads that you have all the values that need to pass to the event available on the page load. In this case, the WordPress plugin builds the dataLayer on the fly, and when it's done building the dataLayer, it creates a custom event called view_item that will be used when triggering the GA4 event. Go to the tag assistant window and see the dataLayer as well as the custom event. Click on continue on the tag assistant popup. See the view_item (left side) event that got fired on the GTM. Clicking on view_item will show the dataLayer Keep in mind that this is a custom event. It has the event name and eCommerce values, and currency view_item. Items are an array in Google Tag Manager. Pull all these values in the variables and then use those variables to pass the values to GA4 when this event gets fired because this custom event tells us that the dataLayer is ready with the values we need.
If not familiar with how custom events and dataLayer work, then make sure to check out the Google Tag Manager course. Go to Google Tag Manager and set the GA4 event. In Google Tag Manager first thing we need to do is to create three variables. These variables are going to hold the values for currency value and Items. So click on Variables, and click on the new in the user-defined variables section. Click in the middle to configure the variable and pick the dataLayer variable and pull the values from the DataLayer. First, create a variable to capture the currency value. Give this variable a name and call it dlv-currency. DLV stands for dataLayer value, and we can name it whatever we want. Go ahead and click on the variable configuration and enter the dataLayer variable name that will be used.
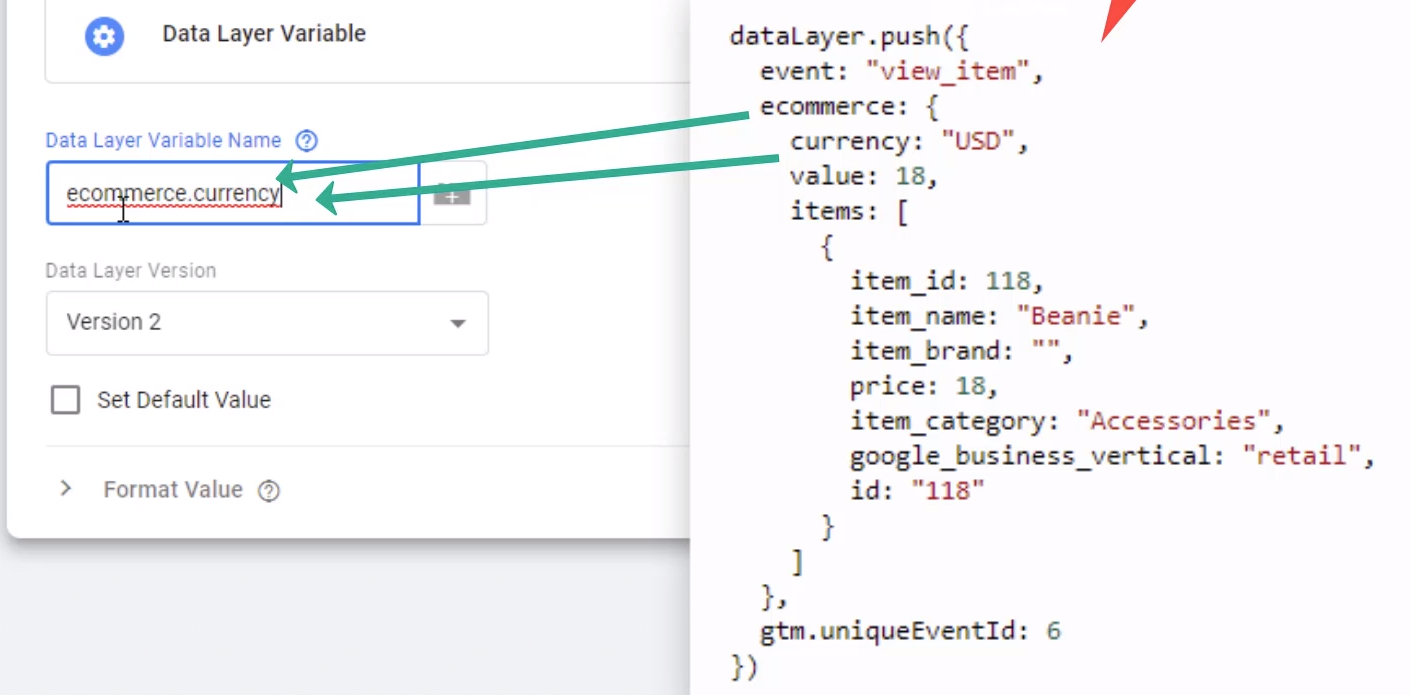
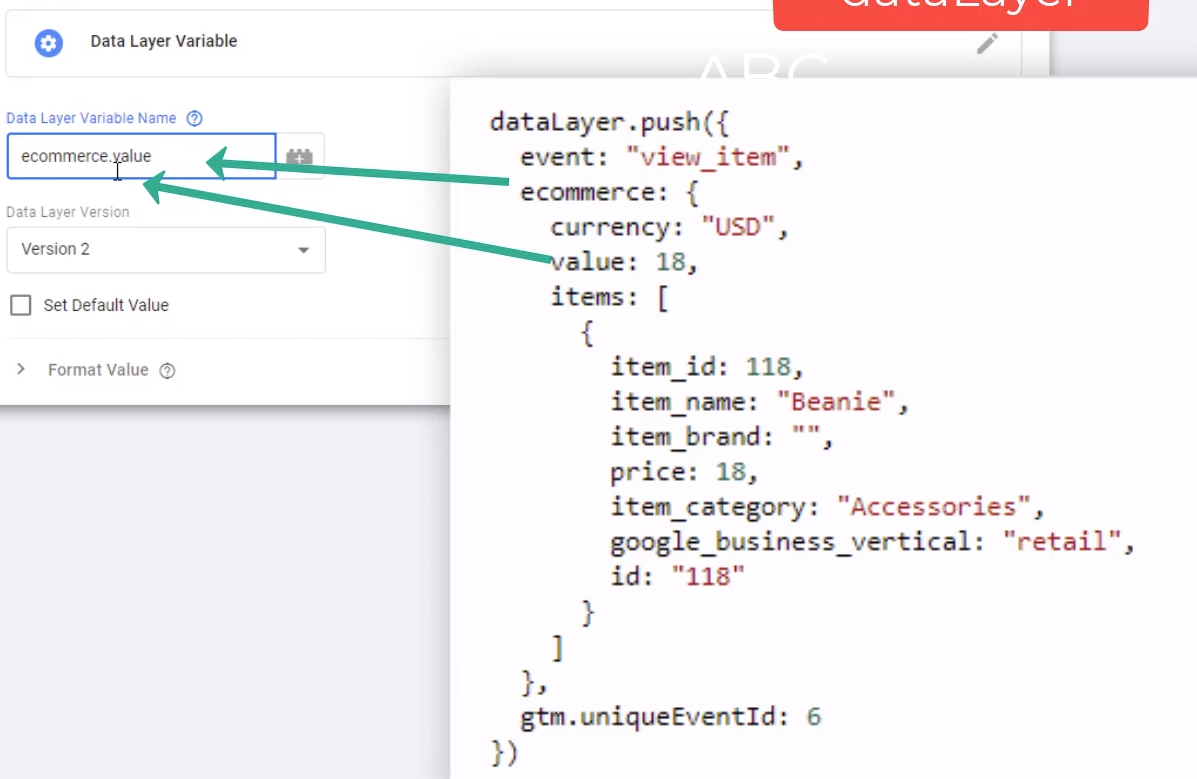
Make sure the case and spelling are the same as in the dataLayer. If not, this is not going to work. Once done, go ahead and save it. Now the variable is ready. This variable will pull the currency value from the dataLayer and store it. Now let's create the other two variables to store the value and the items array. So click on new and give the variable a name. Click in the middle again. It's a dataLayer variable, and this time use eCommerce.value. Go ahead and save it.
Click on new again, and add the dlv_items. Click in the middle and pick the dataLayer variable, and use eCommerce.items. Go ahead and save it. Now the three variables are ready. The next step is to configure the tag to send this data over to GA4. So click on Tags and click on new to create a new tag and name this tag eCommerce View item. Click in the middle and pick GA4 Event since we track an event that is a view_item event. Select the configuration tag, which is the GA4 base tag that contains the GA4 id. Now the event name needs to be view_item. This name needs to match what Google is expecting. It's expecting all lower case view_item with an underscore between view and item.
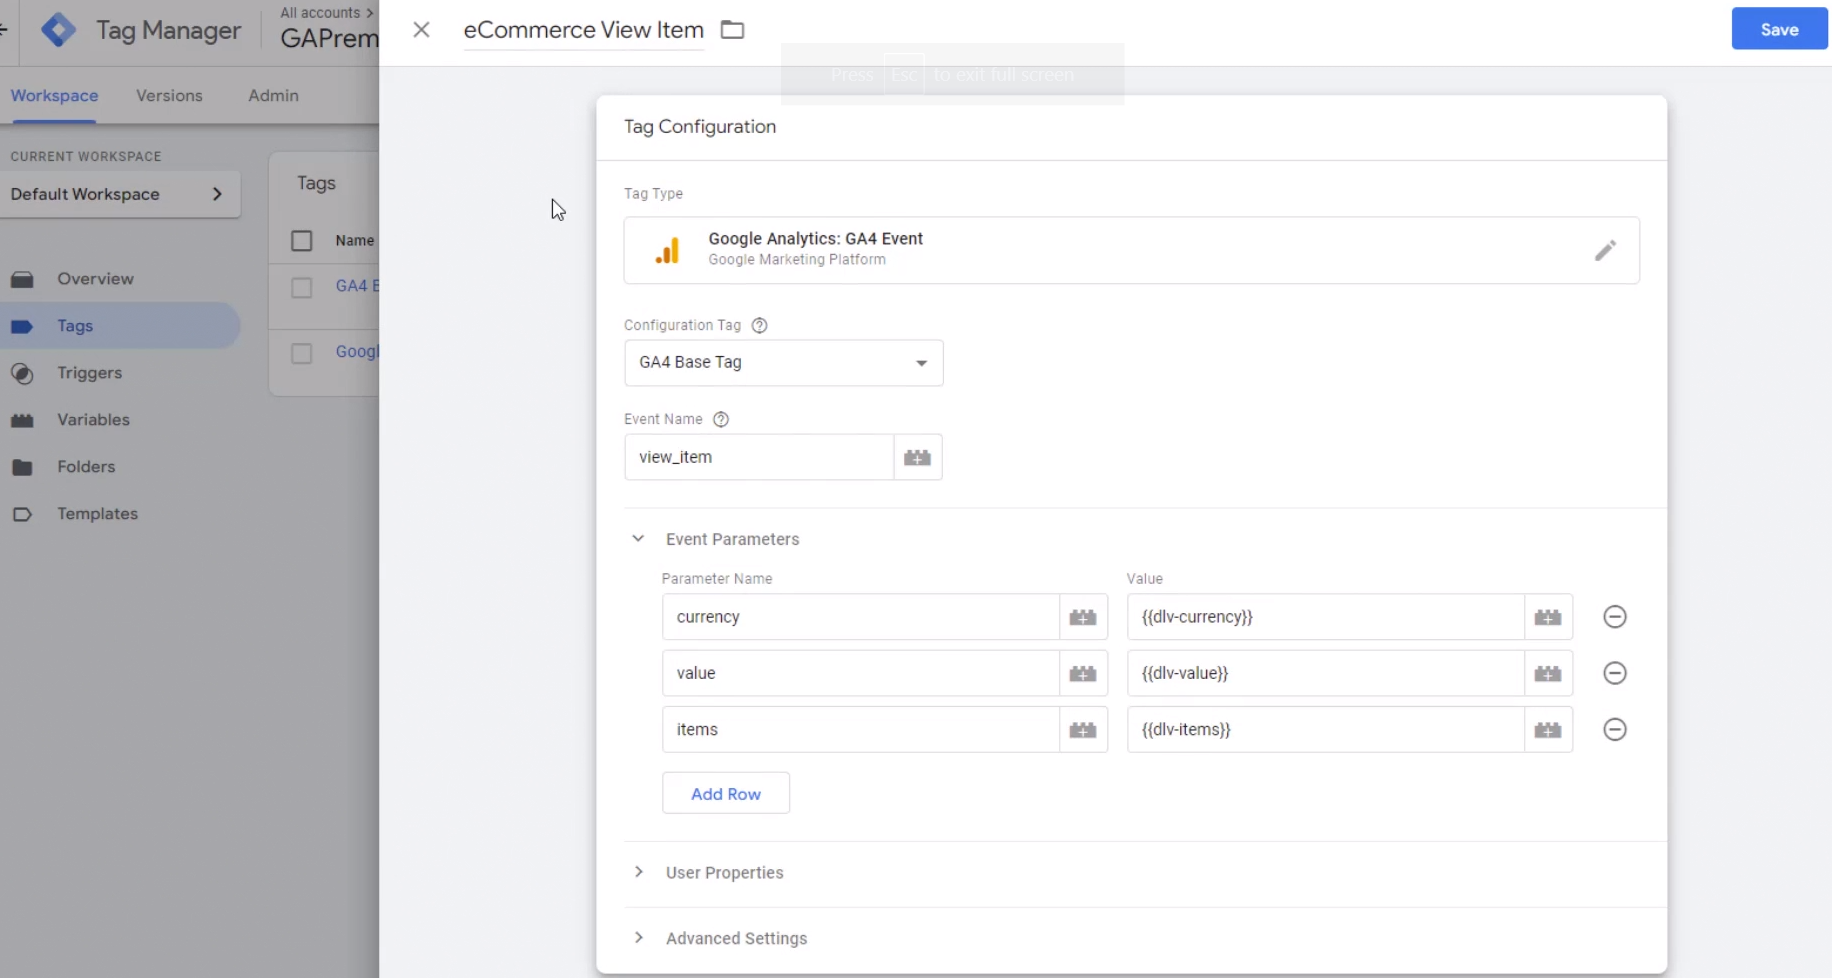
Next, click on event parameters and add three rows. Need to pass currency parameter, value, and items. Go ahead and assign the values for these parameters. Since the variables that contain these values are already created, pick dlv_currency, dlv_value, and dlv_items. Then go ahead and save it. Then go ahead and add the trigger. Click on Add trigger. Click on plus to add a new trigger and call this trigger "CE view item" this is the custom event we will use.
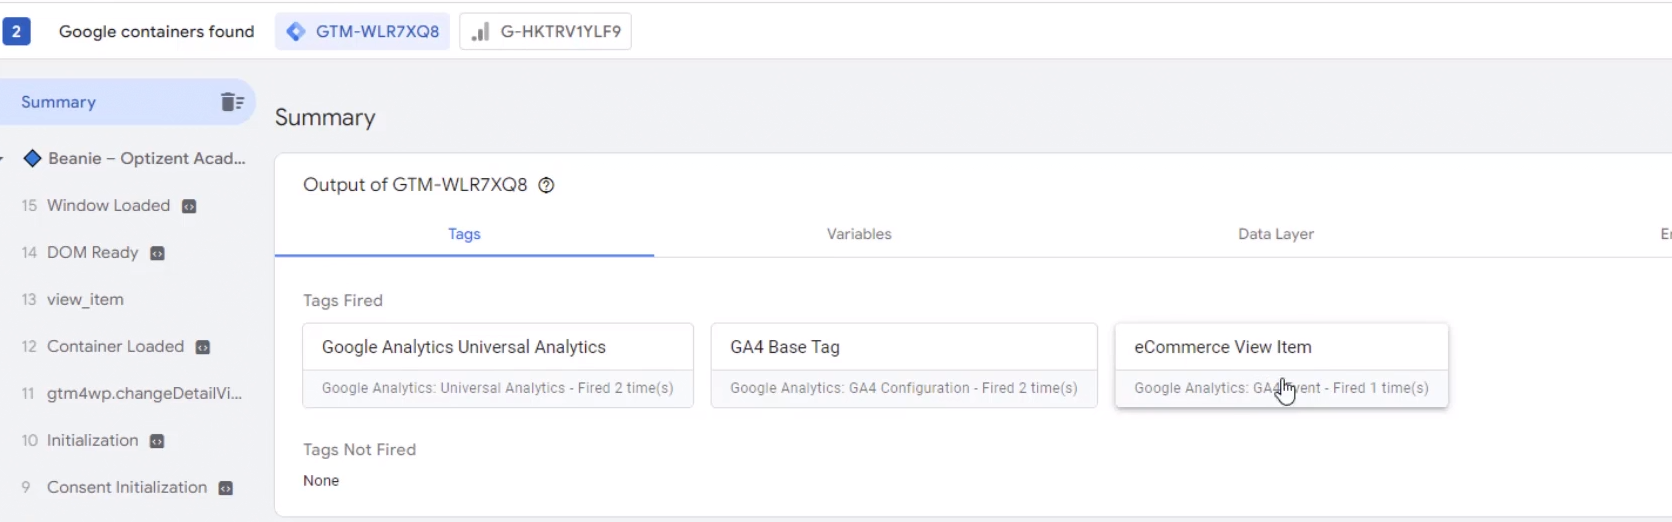
Click in the middle and pick Customer Event and provide the name of that custom event. Remember that it was called view_item. Go ahead and save it. Now the trigger is ready and attached to the tag, and save it. The view_item tag is now ready. Go ahead and put this in preview mode to verify if everything is working as expected. Before making it live on the site, click on connect. The site is now loaded, and Tag Assistant is connected. Go back to tag assistant and click on continue.
Click on an item to view it and go back to tag assistant and see view_item got triggered, and also the tag that was fired is view_item eCommerce tag. Clicking on it shows the parameters it's passing - currency, value, and items. Close that and click on view_item, which is on the left side in the summary section. It is the custom event when a tag gets fired, so click and see the tag got fired here.
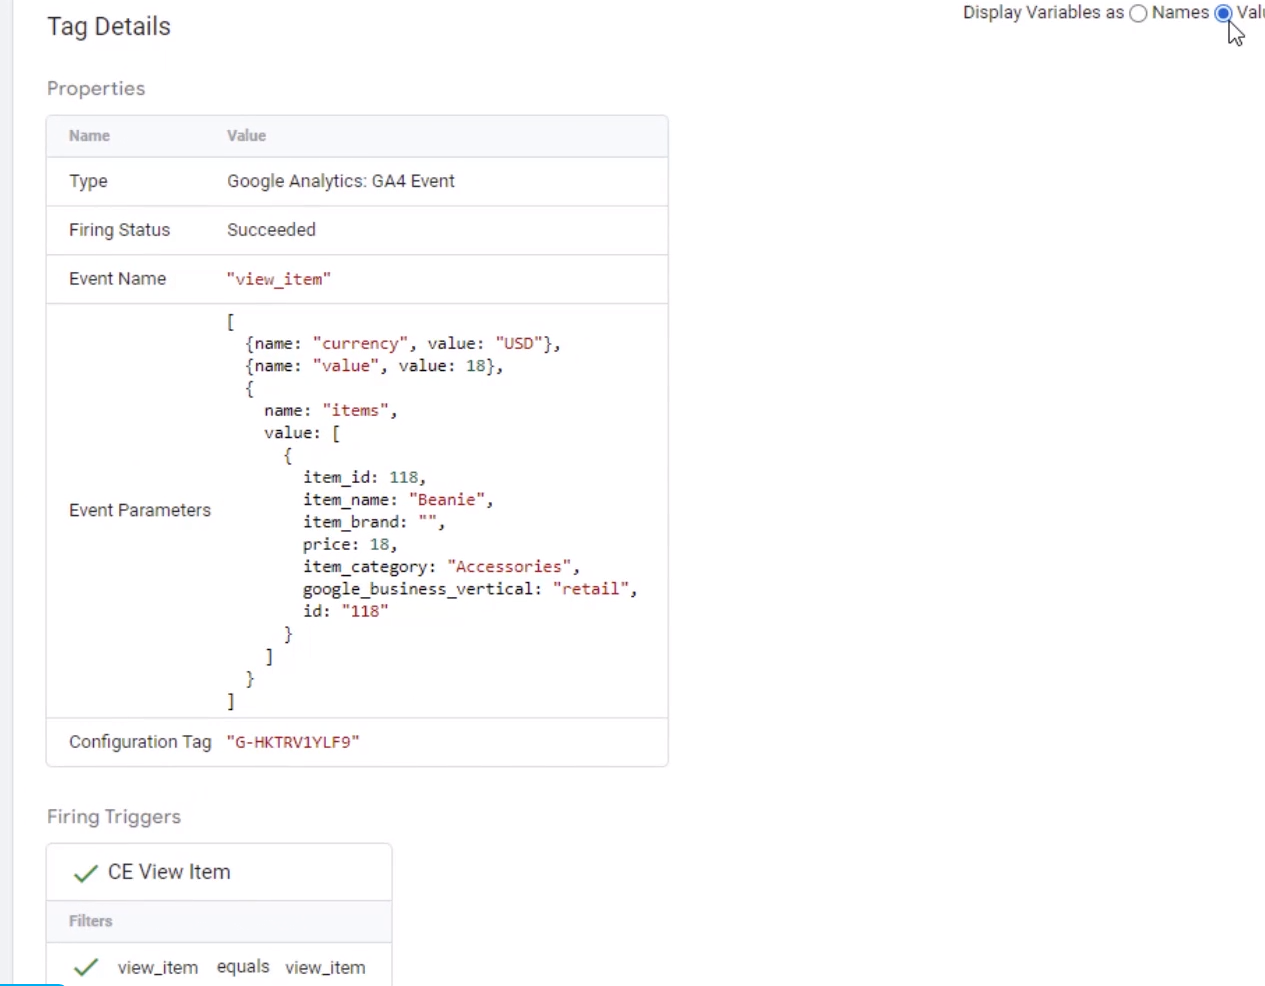
Click on the eCommerce View Item tag, and see the name of the event and the parameters that are being passed. If you do not see the values on the tag, then make sure to check the values option on the top right-hand side, and if the names option is checked, it will show only the names of the variables.
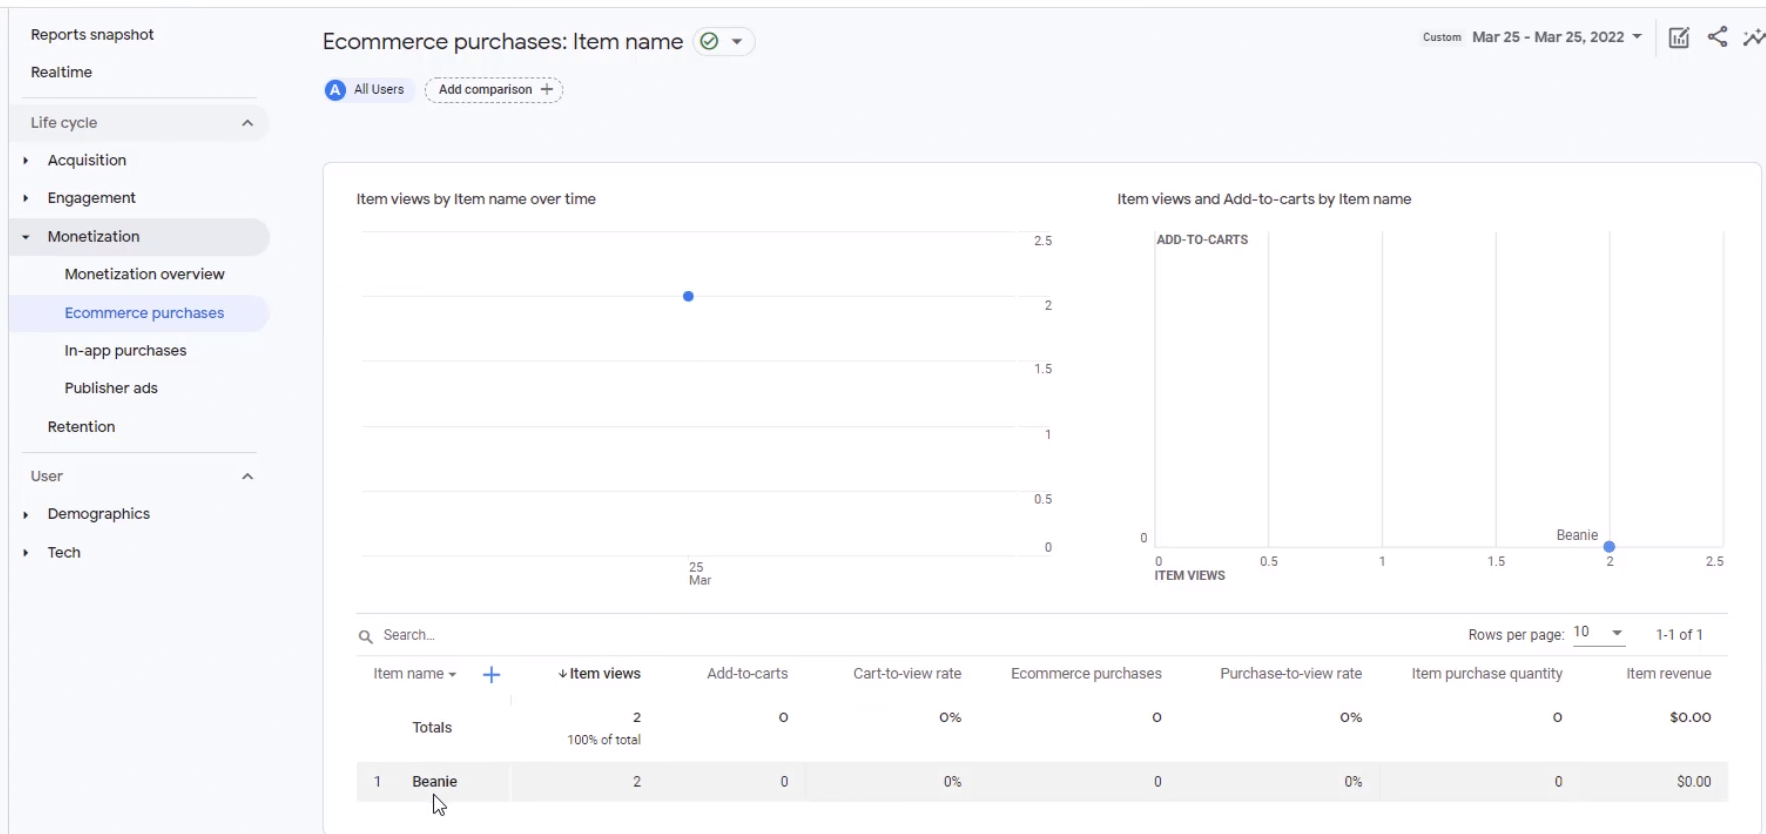
Go ahead and close the tag window and close the debug window. Click on stop debugging and close the tag assistant and submit the tag and publish it. Within a few hours, the data will start to flow in Google analytics 4. Once Google analytics processes the data, the data sent via view_item event will start to show up in the eCommerce purchase report under monetization. The above eCommerce report shows the item name and the item views rest of the column shows zeros because we haven't implemented the other events requirements for eCommerce tracking.
Google Analytics 4 help and support
We are here to help you with all your Google Analytics needs. Our team can get you up and running in no time and also train you and your team to save you a lot of time so that you can focus on driving the business outcomes rather than configuring Google Analytics 4.
Online Course - If you want to learn on your own then check out Google Analytics 4 Masterclass
Workshop - We conduct the onsite customized workshop. Reach out to us for more details.
Consulting - Reach out to us for more details.