If you are a marketer or a business owner looking to leverage Pinterest for your business, you need to ensure that you are using Pinterest tags. These tags allow you to track user behavior on your website after they have clicked on your Pinterest ads. In this article, we will guide you through the process of adding Pinterest tags in Google Tag Manager.

Understanding Pinterest Tags
Pinterest tags are snippets of code that you add to your website to track user behavior. When a user clicks on your Pinterest ad and lands on your website, the tag sends information to Pinterest about the user's behavior on your website. This information helps you understand the effectiveness of your Pinterest ads and how users are interacting with your website.
Setting up a Pinterest Tag
Before you can add a Pinterest tag in Google Tag Manager, you need to create a tag in your Pinterest Ads Manager account. Follow these steps:
Log in to your Pinterest Ads Manager account.
Click on the "Ads" tab and select "Conversion tracking."
Click on "Create a new tag."
Enter a name for your tag and select the website you want to track.
Choose the events you want to track, such as page visits, sign-ups, or purchases.
Click on "Save."
Once you have created a tag, you can add it to your website using Google Tag Manager.

Adding Pinterest Tags in Google Tag Manager
Follow these steps to add a Pinterest tag in Google Tag Manager:
Step 1: Create a new tag
Log in to your Google Tag Manager account.
Click on "Tags" and select "New."
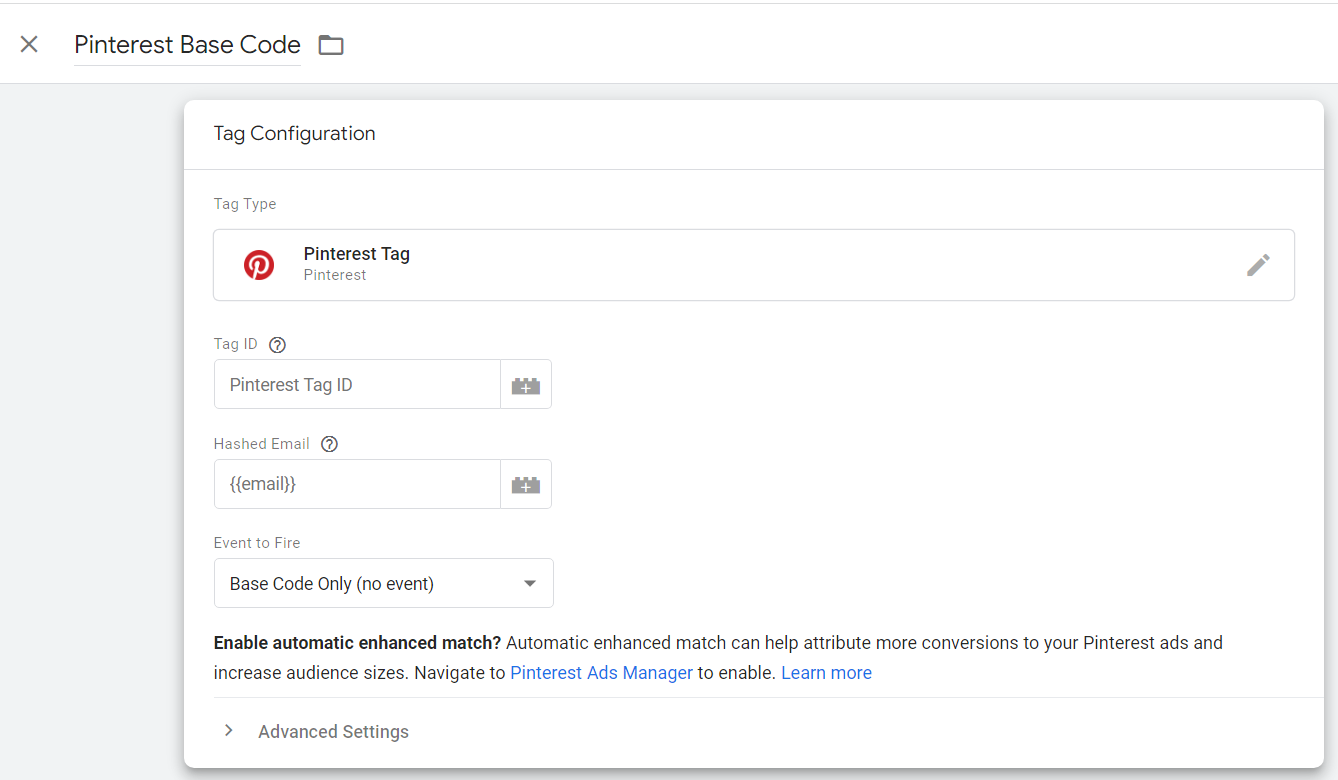
Enter the name “Pinterest Base tag” and click on "Tag Configuration."
Select "Pinterest Tag" from the list of tag types.
Add your Pinterest Tag ID in Tag ID section and add Hashed email if you want to Enhanced match which is user’s email address stripped of whitespace, lower-cased, then hashed with MD5, SHA1, or SHA-256. This step is optional.
Under “Event to fire” select Base Code only (no event)
Click on "Triggering" and select "All Pages" to fire the tag on all pages of your website.
Click on "Save."
In the same way you can change the “Event to fire” for Page Visit, View Category, Add to Cart, Purchase with the required parameters and triggers and save the tags.
Step 2: Publish the tag
Click on "Submit" in the top right corner of the Google Tag Manager interface.
Enter a version name for your changes and click on "Publish."
Once the tag is published, it will start tracking user behavior on your website.
Verifying your Pinterest Tag
Once you have added your Pinterest tag in Google Tag Manager, you need to verify that it is working correctly. Follow these steps:
Log in to your Pinterest Ads Manager account.
Click on the "Ads" tab and select "Conversion tracking."
Click on the name of the tag you just created.
Click on "Test Tag."
Enter the URL of a page on your website and click on "Test."
If the tag is working correctly, you will see a green checkmark.
Google Analytics help and support
We are here to help you with all your Google Analytics and GTM needs. Our team can get you up and running in no time and also train you and your team to save you a lot of time so that you can focus on driving the business outcomes rather than configuring Google Analytics 4.
Consulting - Reach out to us for more details.
