
For Piwik PRO to start collecting the data on the website or app, we must install the tracking code. This article will provide information about the Piwik PRO tracking code and how to install it.
Piwik PRO Login
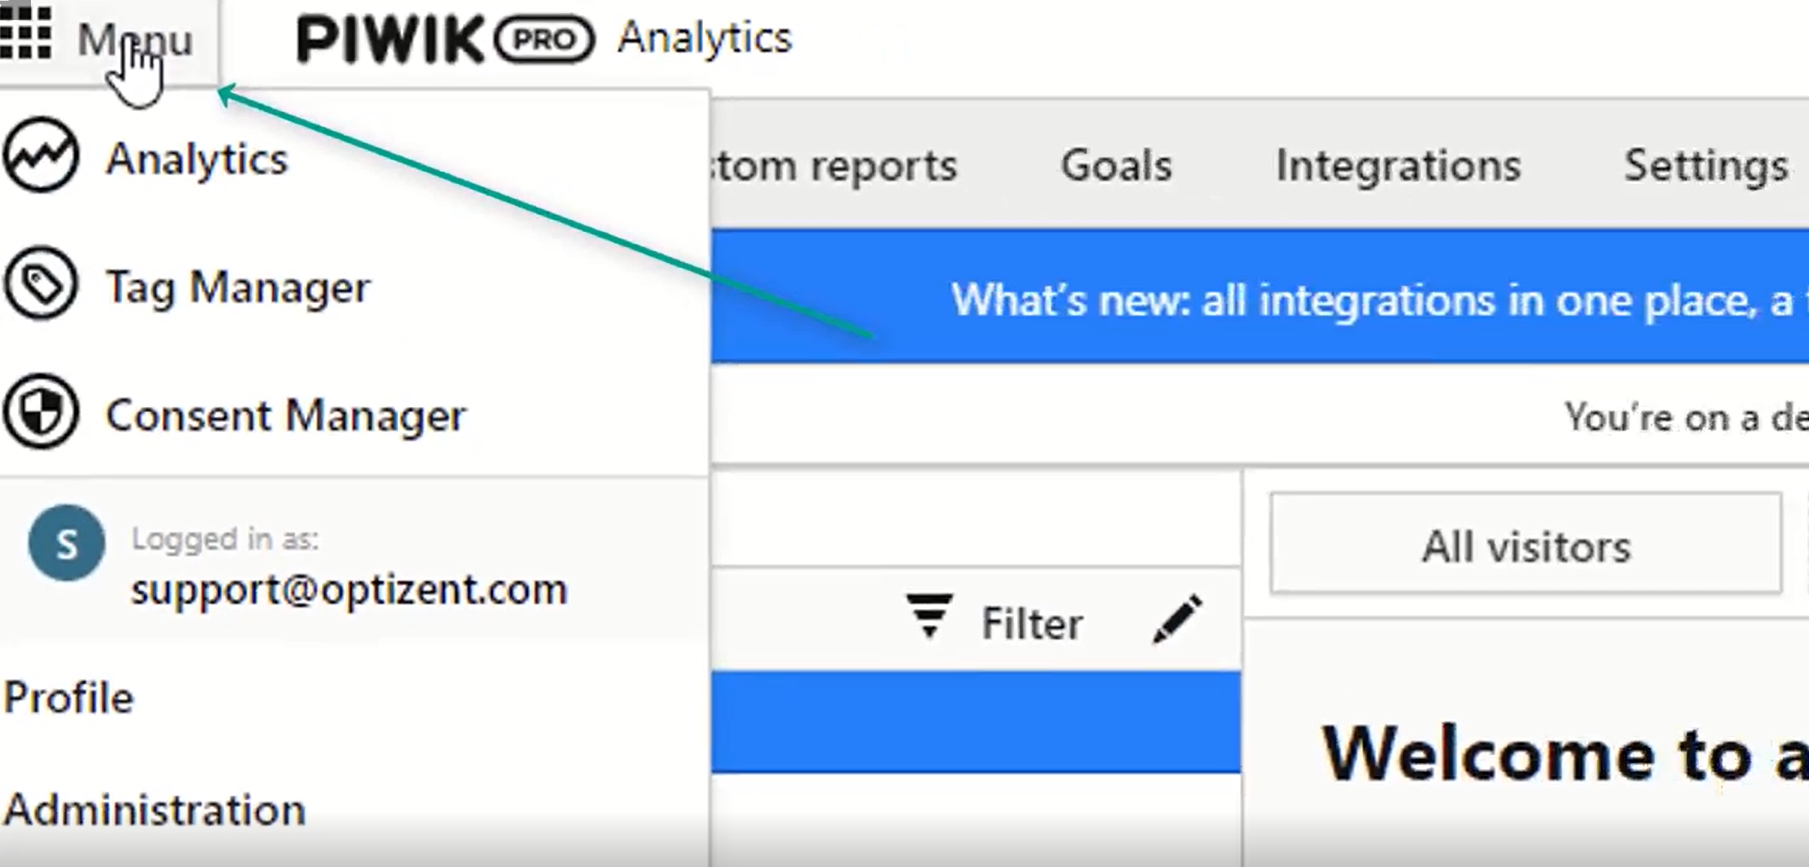
First, log into your Piwik PRO account, click on "Menu" on top, and then go to Administration. It is the section where we will see all the sites we have access to. Click on the site address where we want the Installation code added, which opens up an interface where we can set or configure data collection, privacy reports, etc.
Piwik PRO Installation
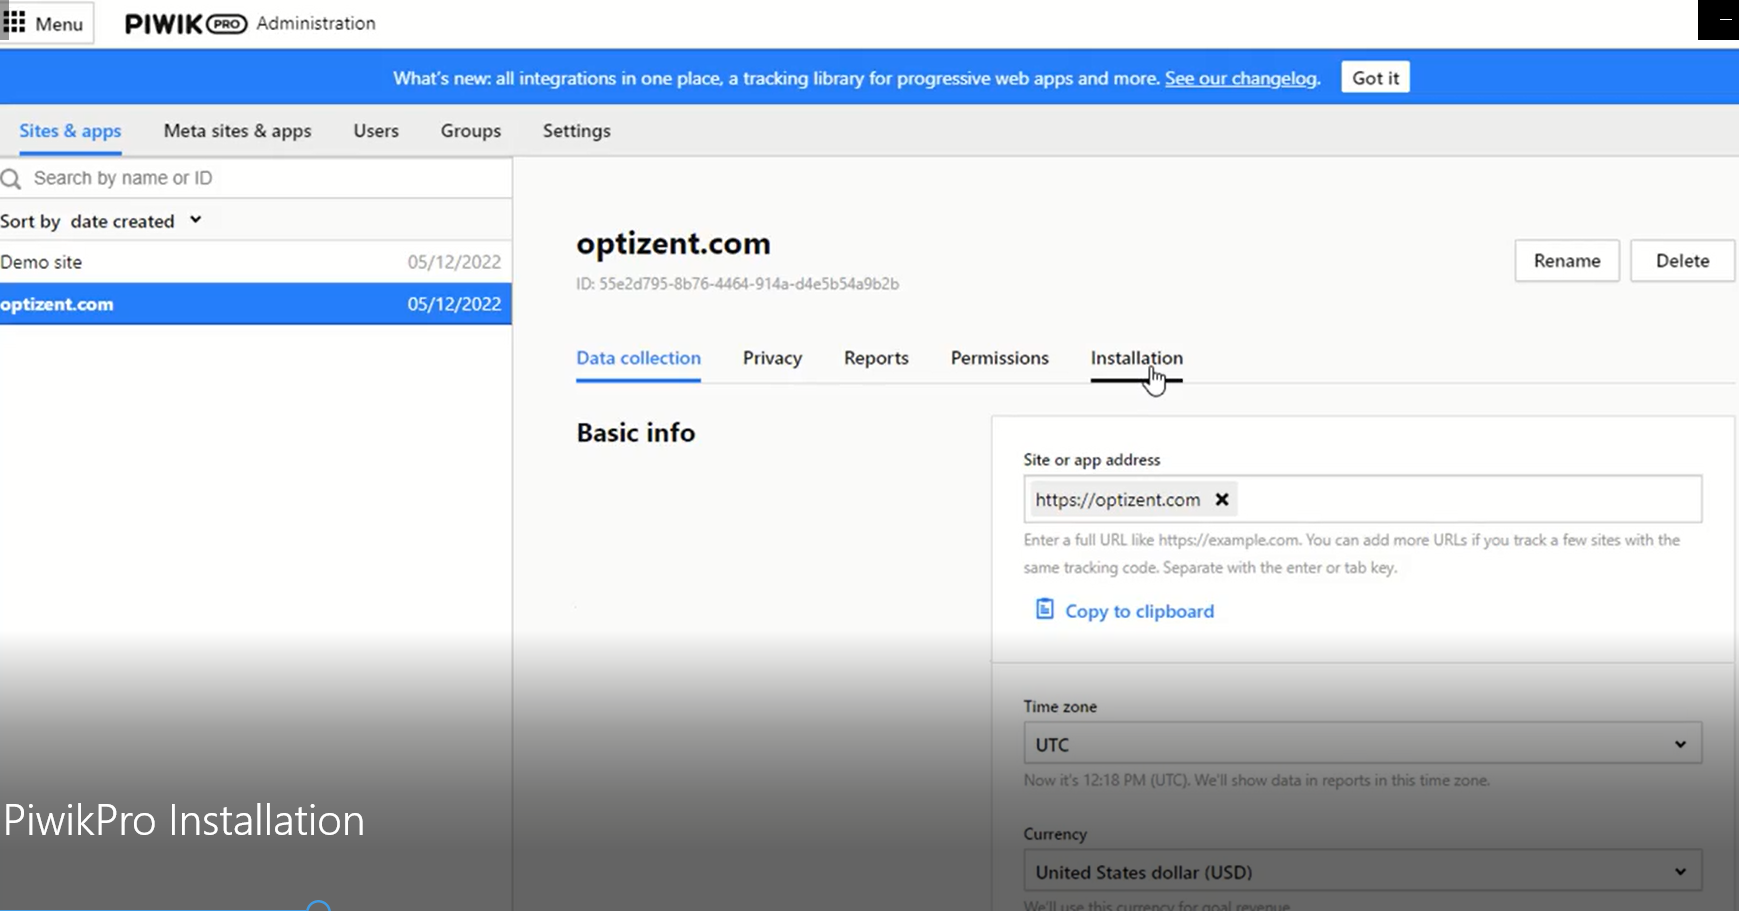
In this interface, we'll also see a tab called "Installation." Under Installation, we can find the tracking code that needs to be added to the website or app. However, we install, make sure that the basic information for the tracking is correct. It includes the site or app address. Make sure to add additional addresses if it is more than one site that we want to track and list them.
Next is the time zone. By default, the time zone is set to UTC. That means all the reports will be based on UTC. However, if the organization and customers are in a different time zone, then we should set this time zone to match our own time zone.
To change the time zone, go to the time zone option and pick the correct time zone. Finally, make sure the currency is set correctly. The currency is used for reporting the revenue numbers. To change the currency, click on the currency option and pick the right currency. All these settings are automatically saved, so we don't have to click on "save" or anything. There are other settings on this page, and they will be covered in the upcoming articles.
Piwik PRO Analytics Code
The next step is either to get the Installation code or to wait for other settings to be completed before adding the Installation code on the website or app. Remember that the other settings on this page will impact how the data and reports appear. It is okay to finish all the settings before installing the code on the website or app.
To get the Piwik PRO Installation code:
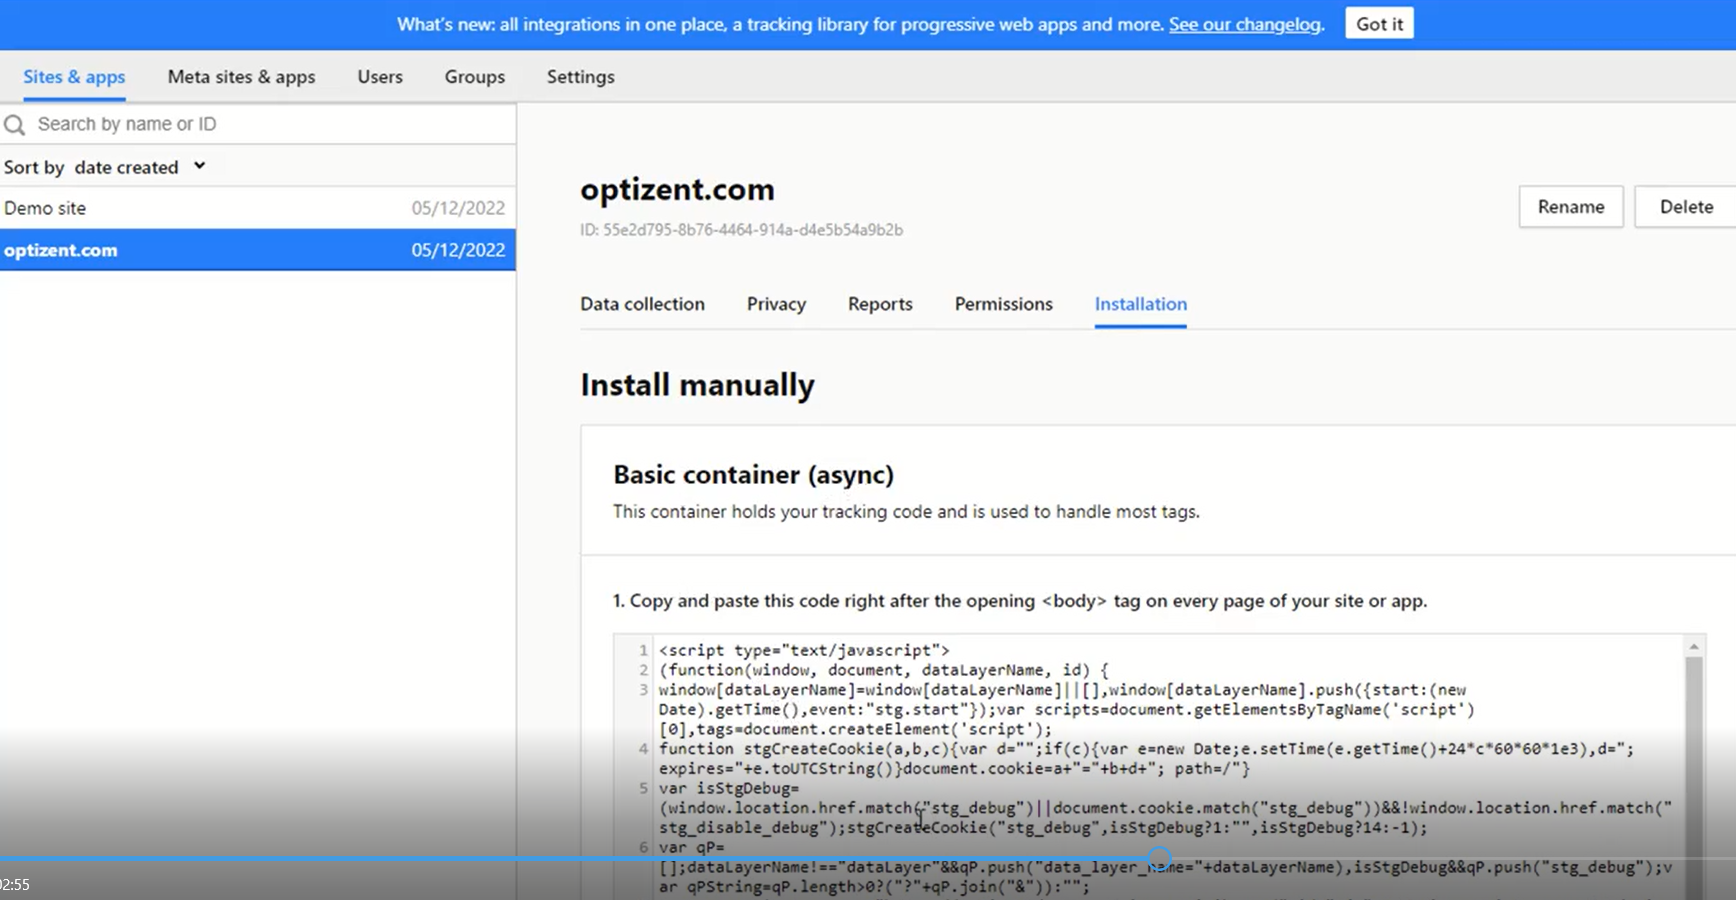
Click on Installation to see two types of code. One is Asynchronous code. Asynchronous means that the code will load in the background while the rest of the page is loading. This code should be added after the opening body tag on every page or screen of the site.
The second option is synchronous code. Synchronous code goes in the head tags of the site or app. Unlike Asynchronous code, synchronous code loads after the previous code have finished executing. It's recommended to use the Asynchronous code.
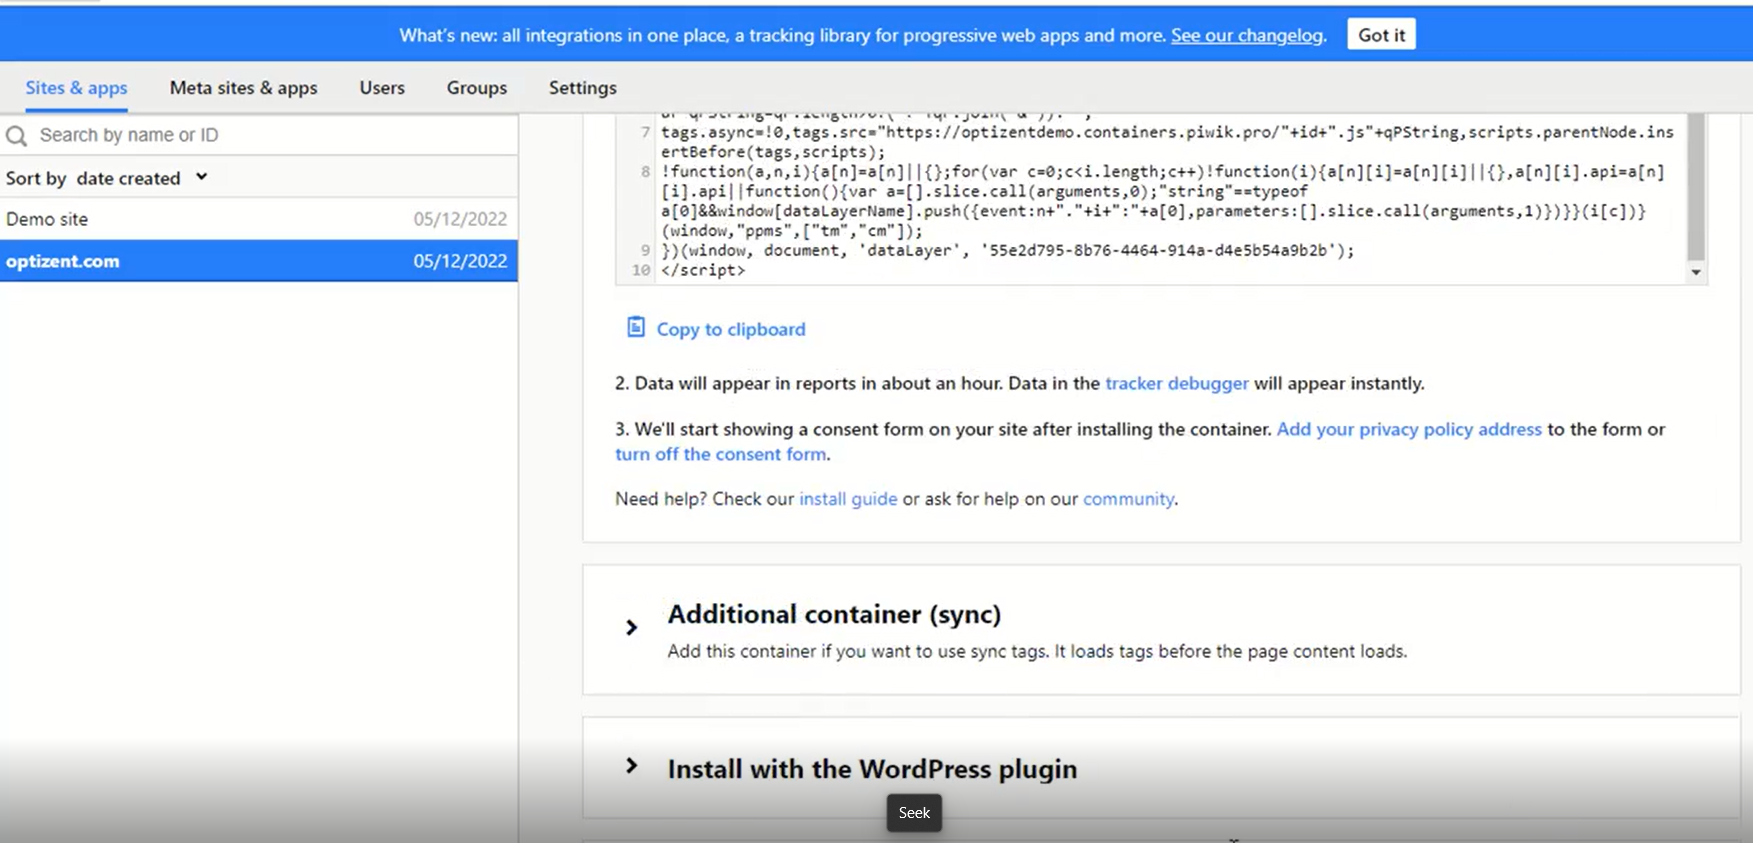
But if we require a synchronous code, it's available below the Asynchronous code. Instructions to add these codes are given below each section. However, adding this code is pretty simple. All we have to do is copy the code and send it to the developers, or if we have access to the site's code, then we can add it in a common file where it gets included in the body tag on every page.
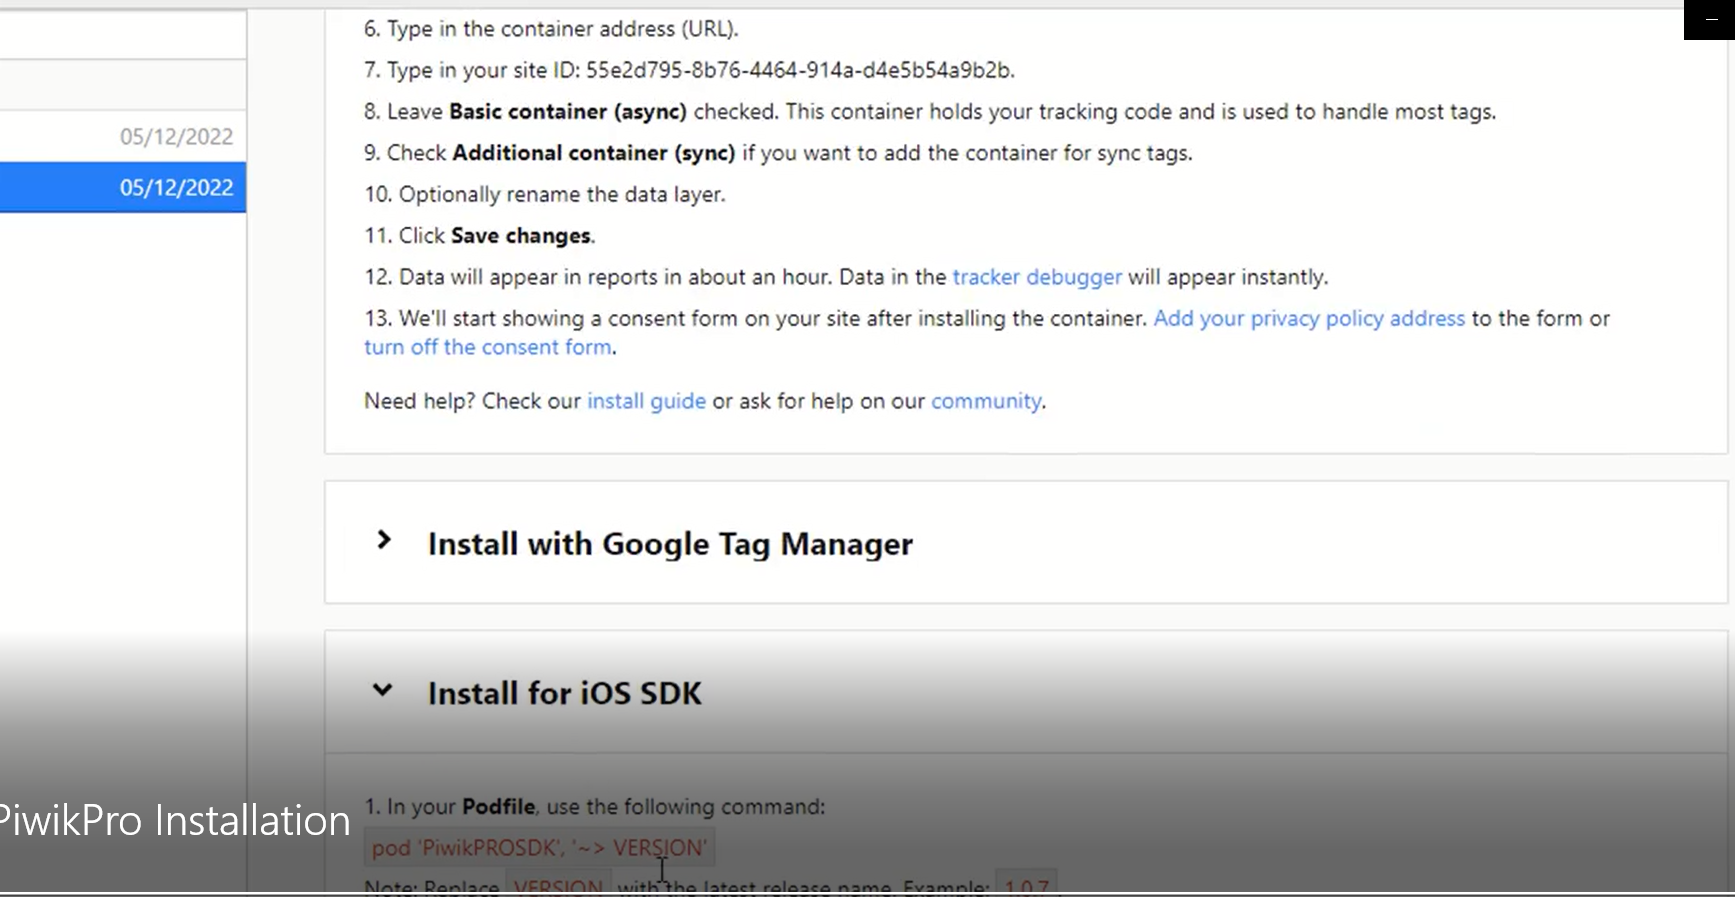
Once the code is live, it will collect the data, and the reports will start to show up. If our site is in WordPress and we do not want to add the code directly on the web pages, then we can use the WordPress plugin available below the synchronous code. We can also install this code with Google Tag Manager - the option is below the WordPress plugin.
In addition, we also have instructions for installing iOS SDK as well as Android SDK. Grab the code, send it to the developers or implement it on your own.
Piwik PRO help and support
We are here to help you with all your Piwik PRO needs. Our team can get you up and running in no time and also train you and your team to save you a lot of time so that you can focus on driving the business outcomes.
Online Courses:
Workshop - We conduct the onsite customized workshop. Reach out to us for more details.
Consulting Services - We can help you up and running with Piwik PRO analytics. Email us at support@optizent.com